
Power Query: Divided Groups
16 December 2020
Welcome to our Power Query blog. This week, I look at how to group into changes of value.
Just for a change, I have some tent data.
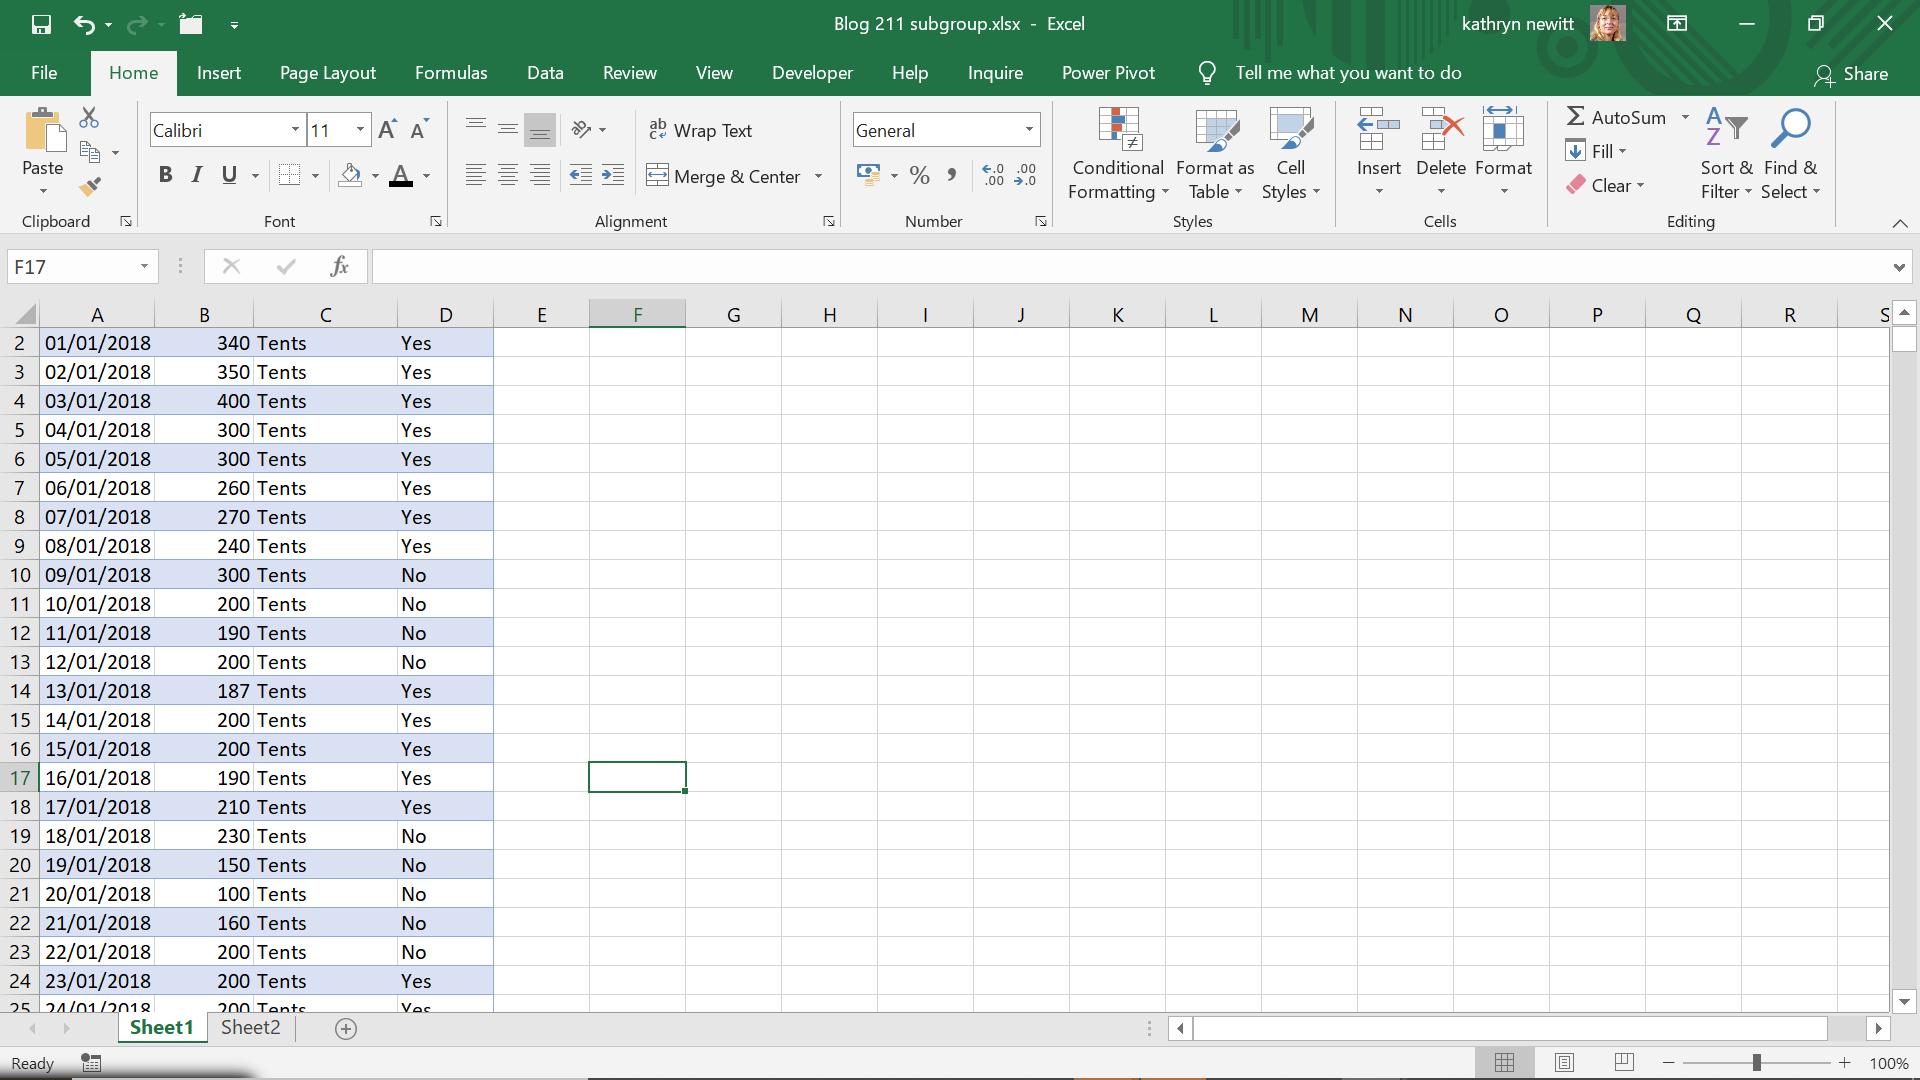
I want to return the start and end dates of each section of data which has not been verified. I start by extracting my data to Power Query using ‘From Data’ on the ‘Get & Transform’ section of the Data tab.
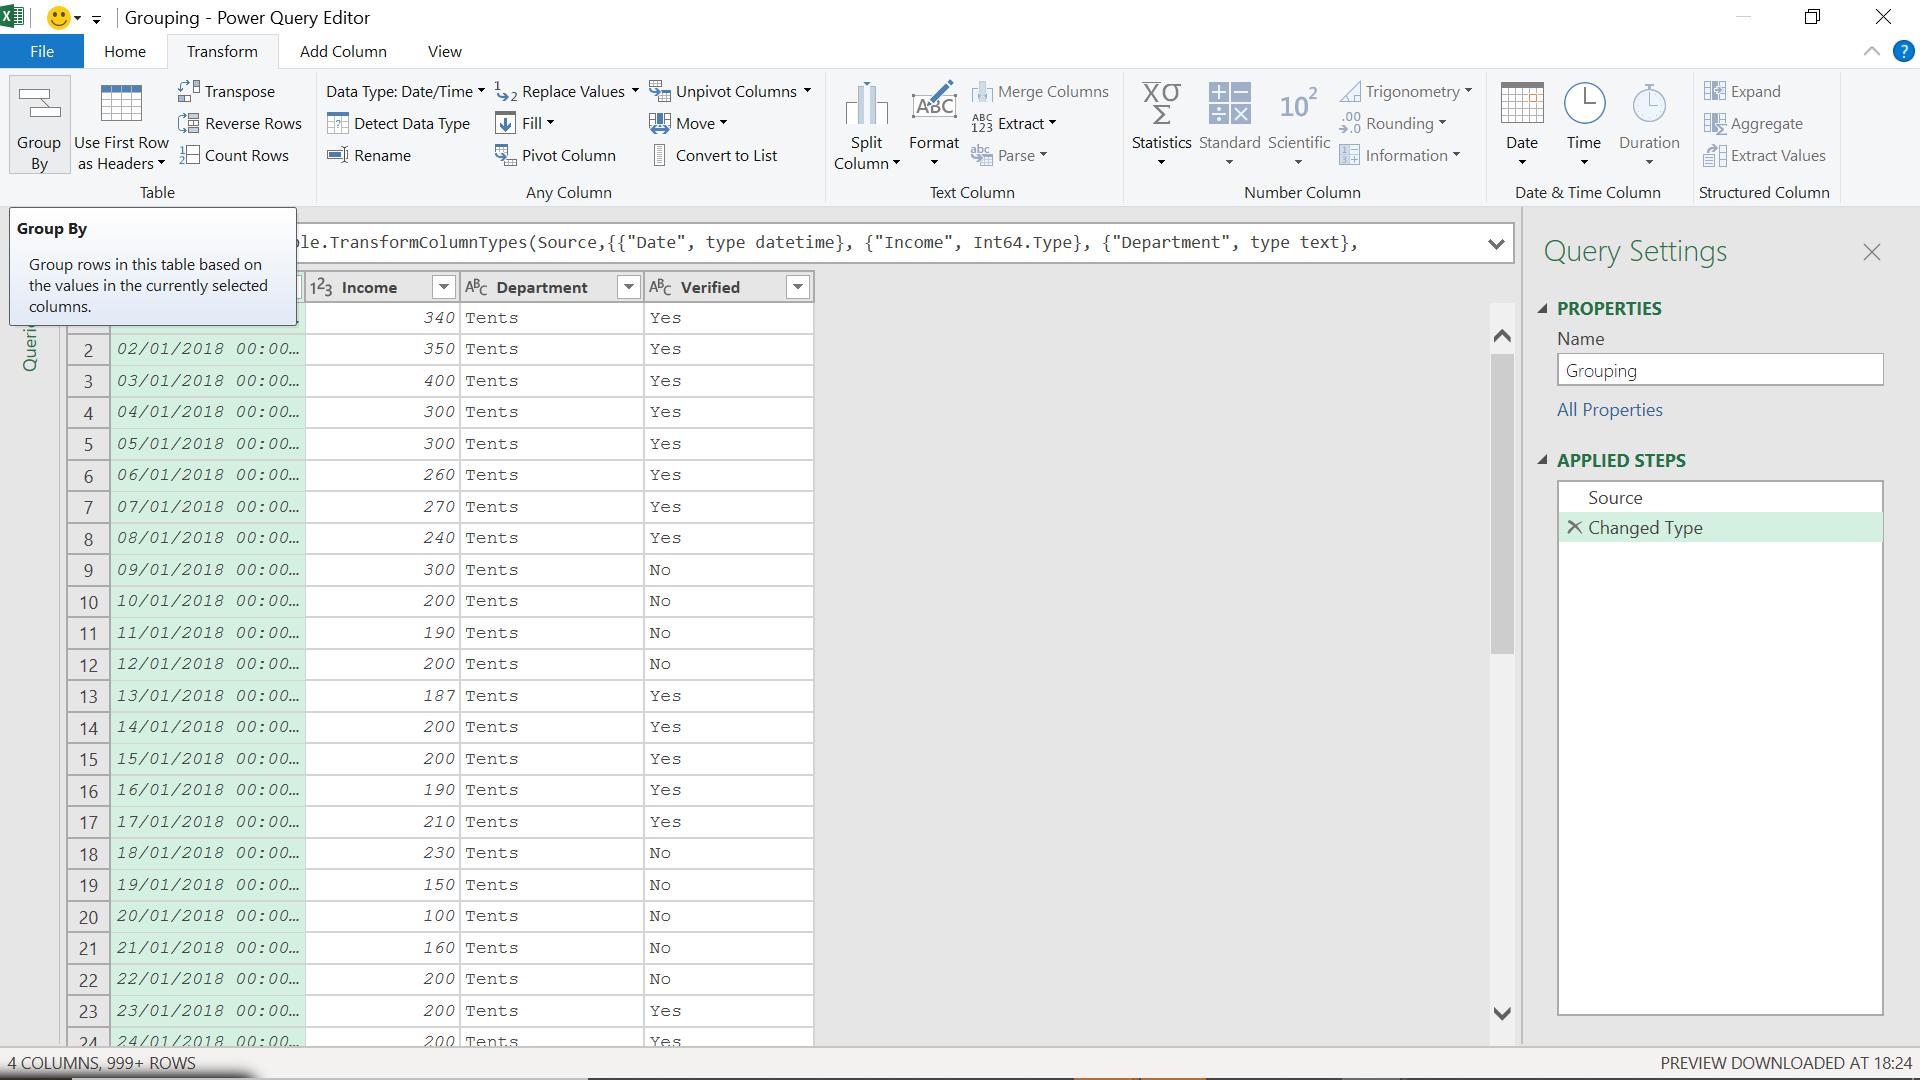
I am going to try and use the ‘Group By’ functionality on the Transform tab.
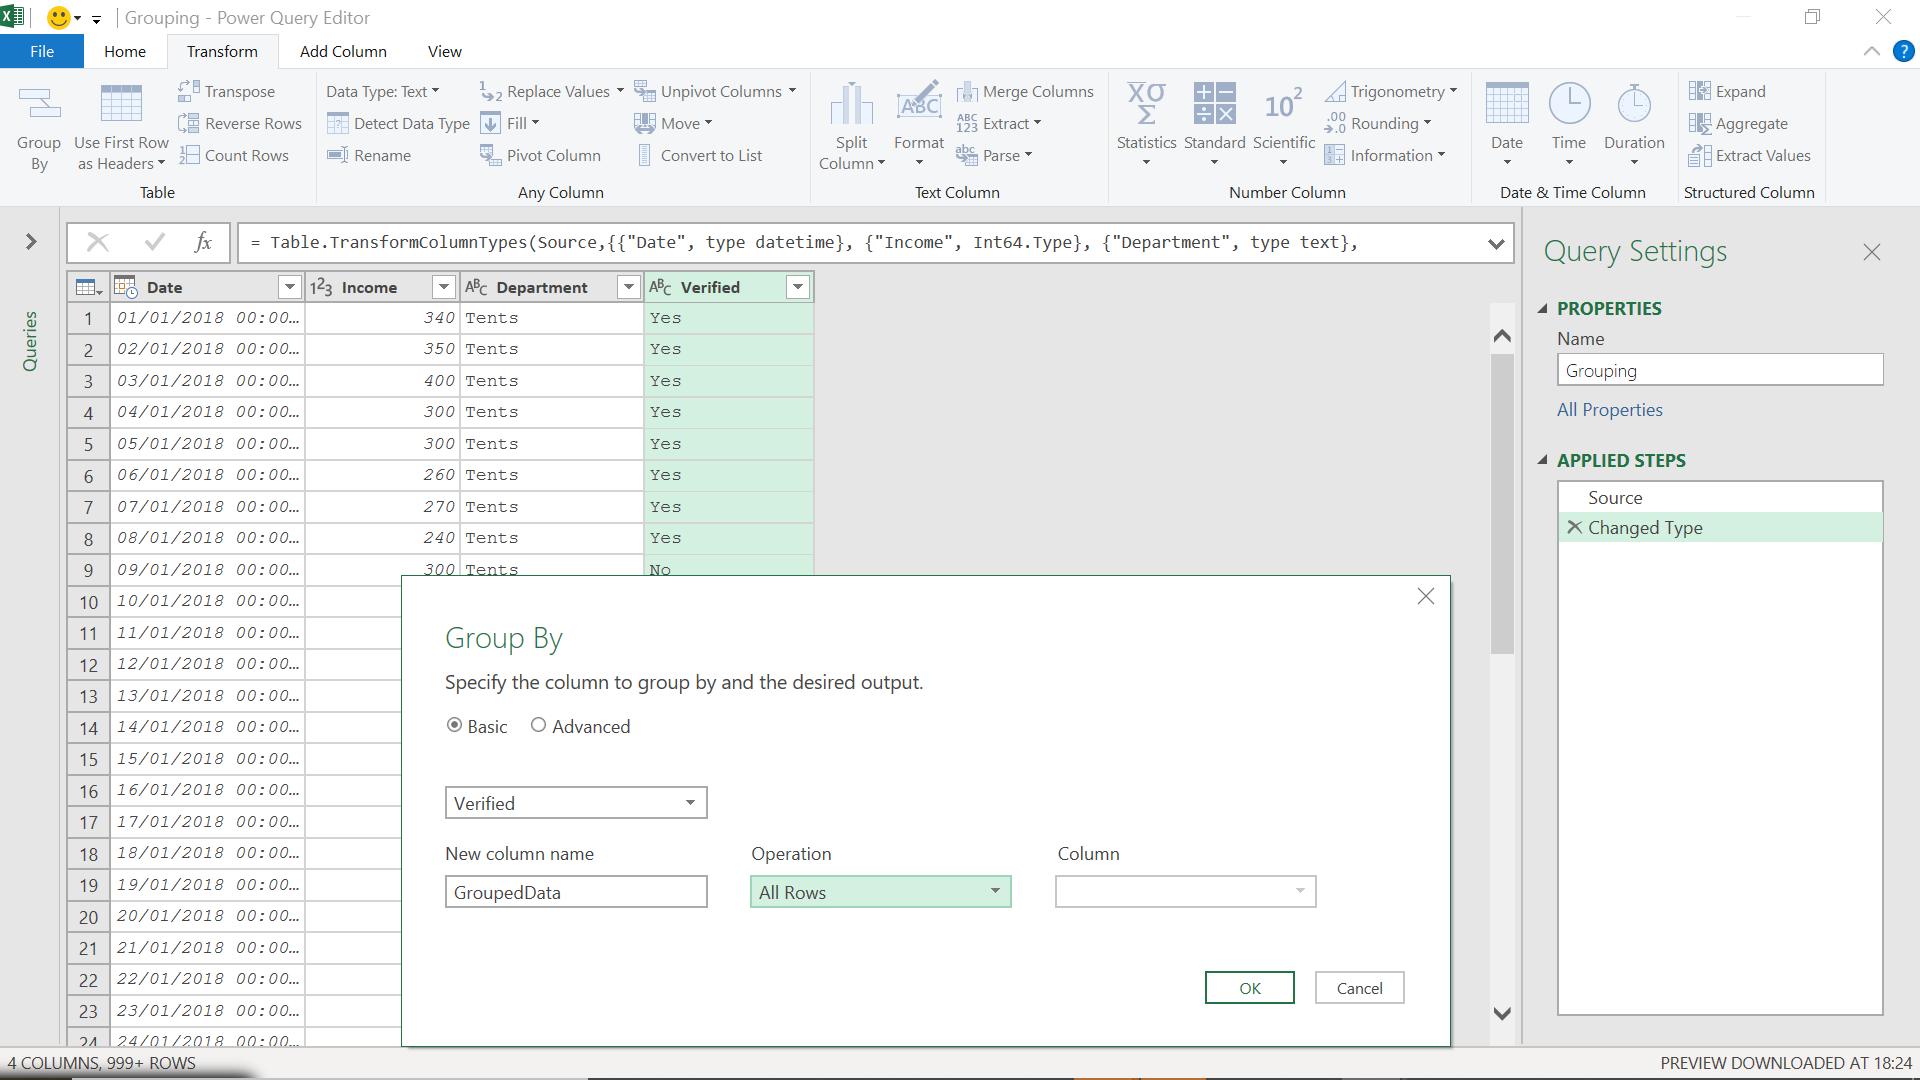
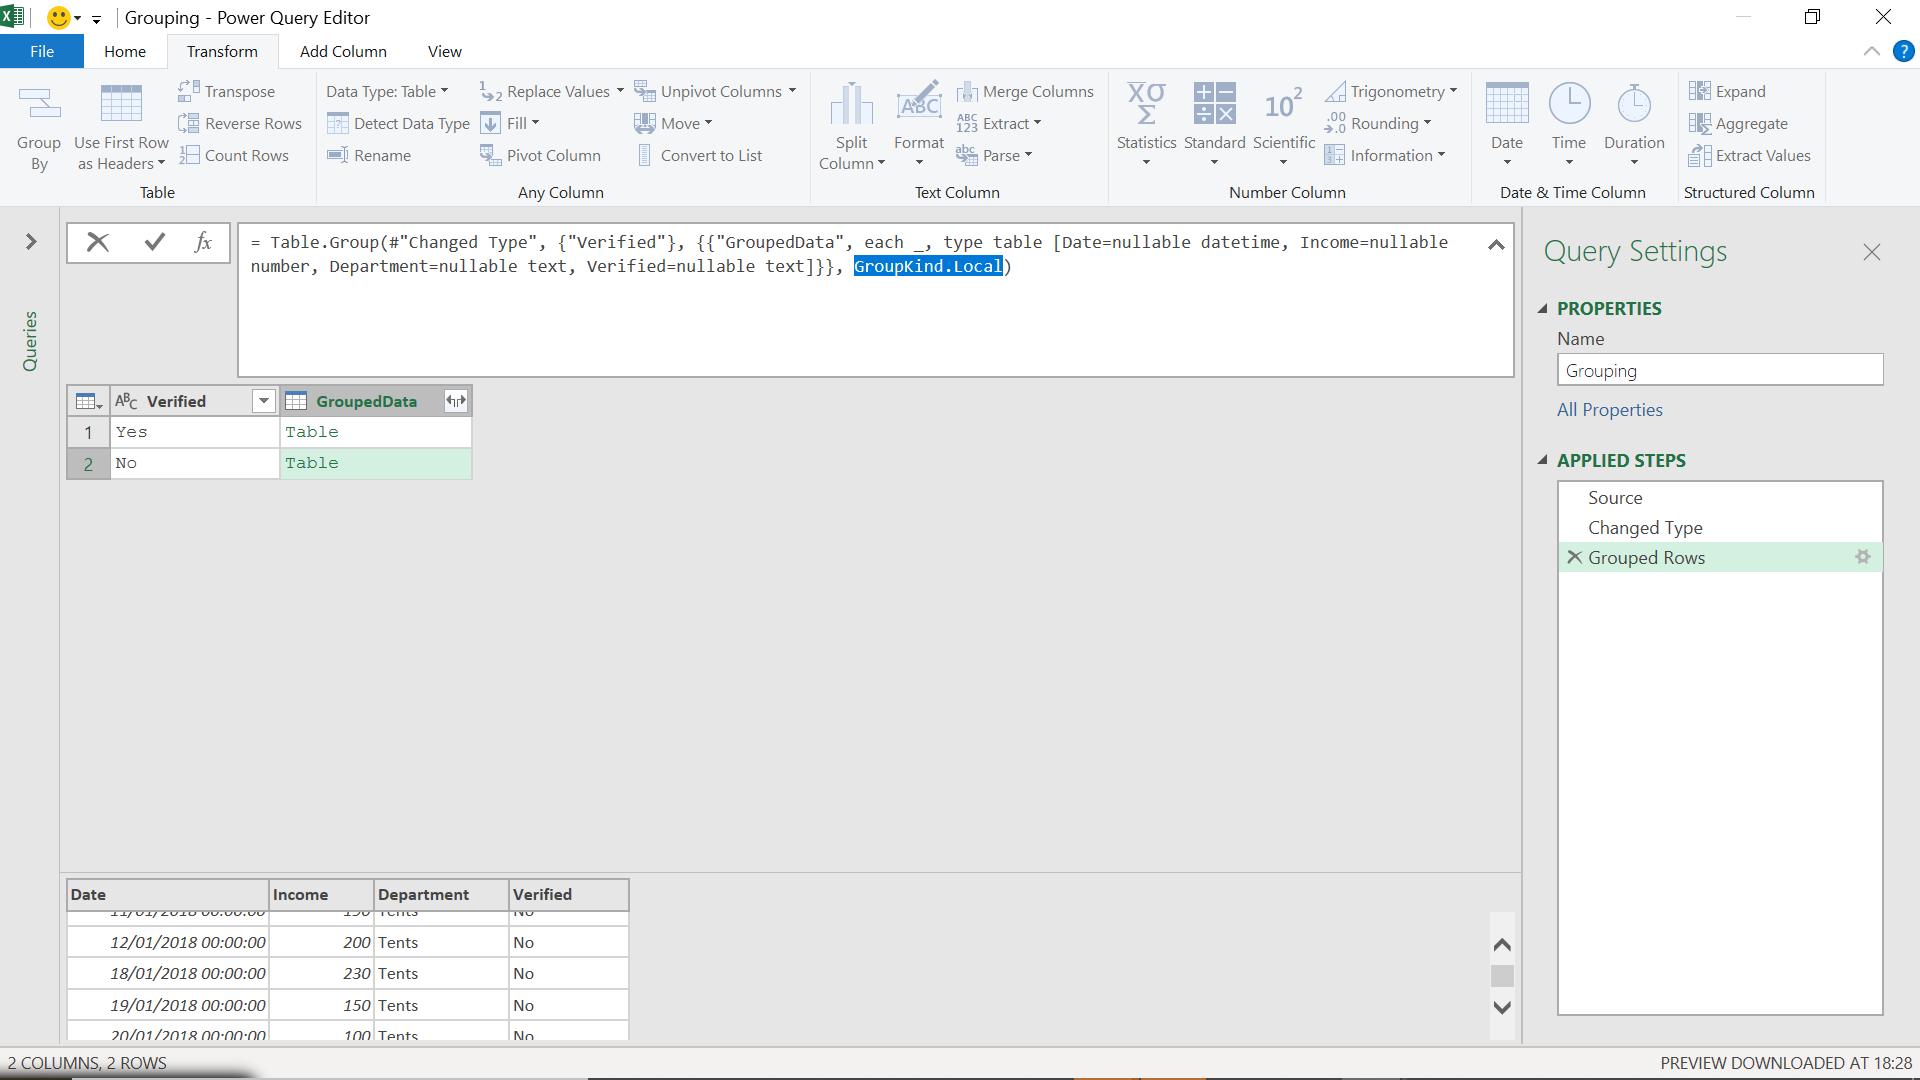
I am grouping on Verified.
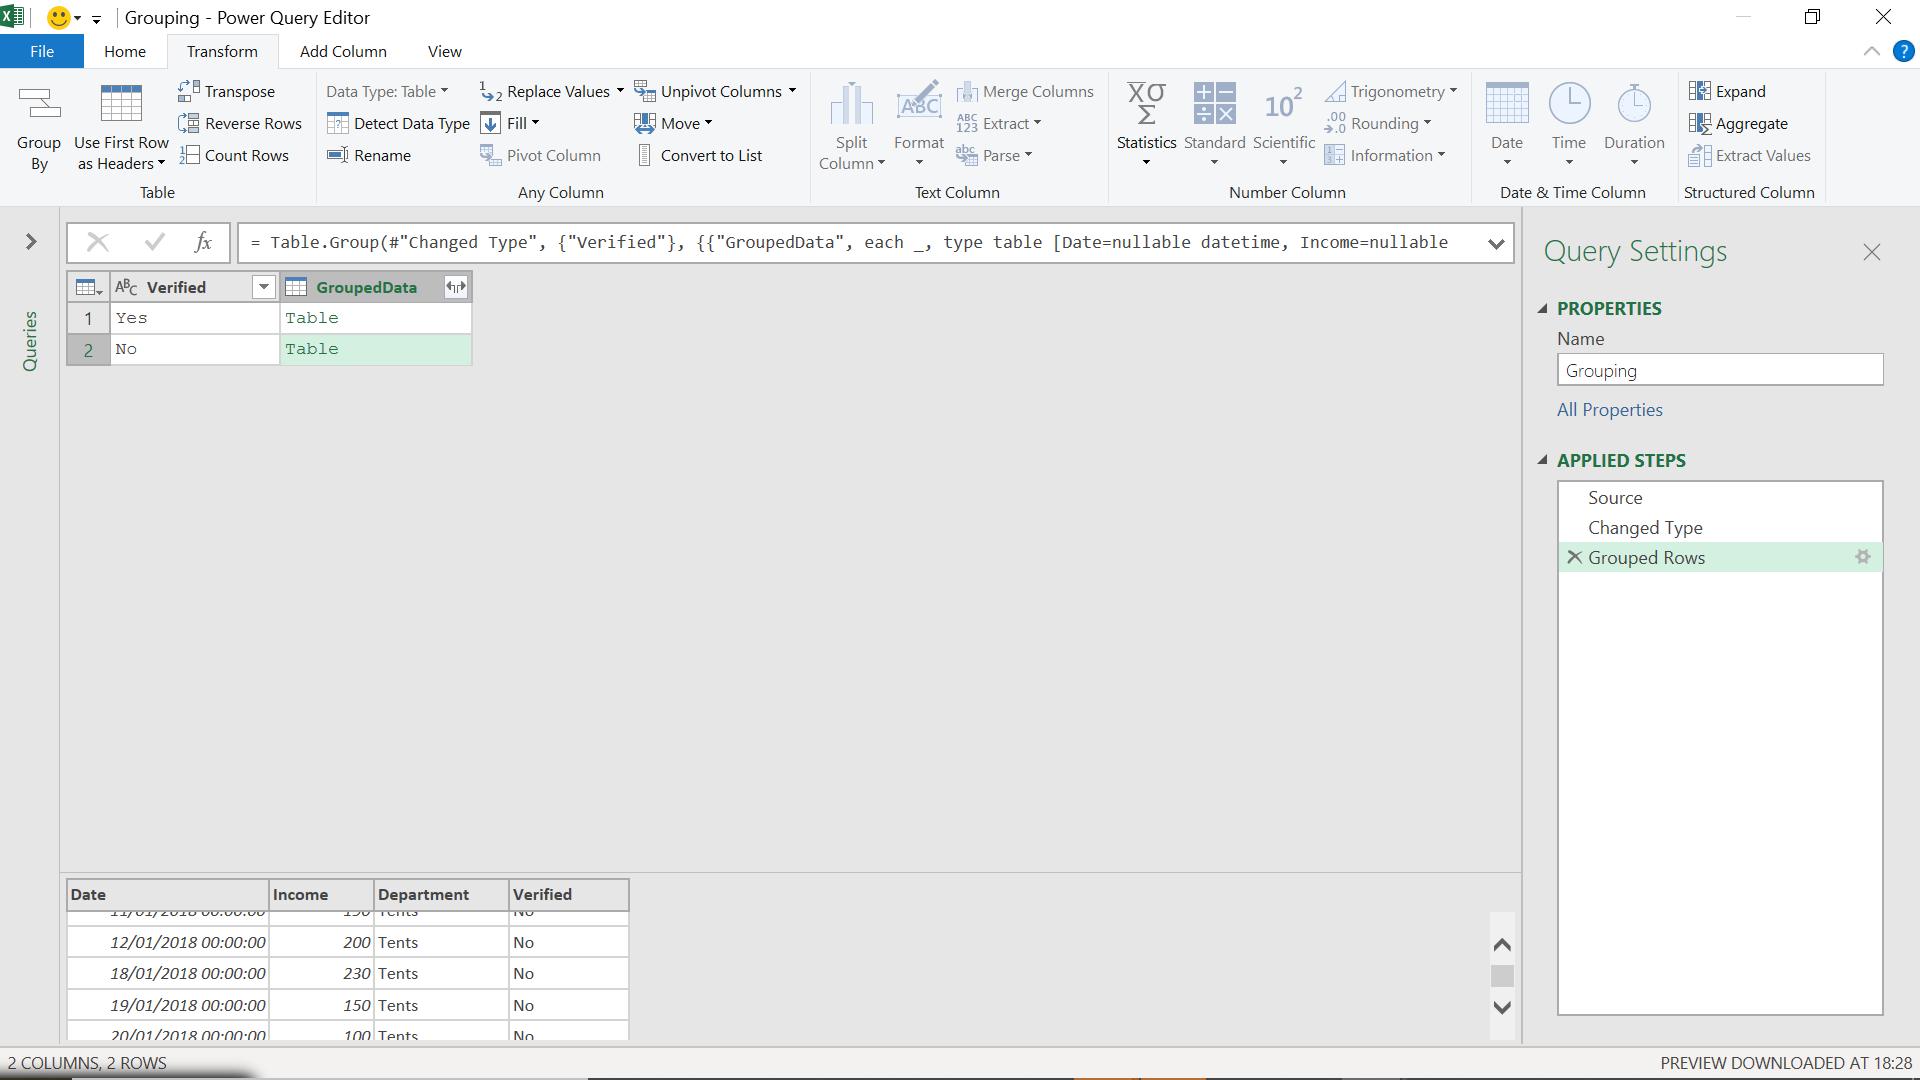
The problem is, this only creates two groups, one for Yes and one for No – I can see the No row contains data from both date ranges. If I look at the M code generated for this step I get:
= Table.Group(#"Changed Type", {"Verified"}, {{"GroupedData", each _, type table [Date=nullable datetime, Income=nullable number, Department=nullable text, Verified=nullable text]}})
This uses the M function Table.Group():
Table.Group(table as table, key as any, aggregatedColumns as list, optional groupKind as nullable number, optional comparer as nullable function) as table.
This groups the rows of table by the values in the specified column, key, for each row. For each group, a record is constructed containing the key columns (and their values) along with any aggregated columns specified by aggregatedColumns. Note that if multiple keys match the comparer, different keys may be returned. This function cannot guarantee to return a fixed order of rows. Optionally, groupKind and comparer may also be specified.
The key to solving my issue, is to use the groupKind parameter (next week I will look at the other optional parameter, comparer). There is nothing to describe the options for the groupKind parameter currently in the Table.Group() section, but according to github.com, there used to be! They helpfully reproduced what used to be there, which has apparently disappeared when documentation was moved.
A group can be local (groupKind.Local) or global (groupKind.Global):
- A local group is formed from a consecutive sequence of rows from an input table with the same key value
- A global group is formed from all rows in an input table with the same key value
- Multiple local groups may be produced with the same key value but only a single global group is produced for a given key value
- The default groupKind value is groupKind.Global.
So, in fact the default groupKind.Global is pulling all the values together into one row, which, in this case, is not what I want.
I am going to amend my data to use groupKind.Local:
The M code is now:
= Table.Group(#"Changed Type", {"Verified"}, {{"GroupedData", each _, type table [Date=nullable datetime, Income=nullable number, Department=nullable text, Verified=nullable text]}}, GroupKind.Local)
[Note in the M code GroupKind.Local also starts with a capital letter.]
I enter my changed step.
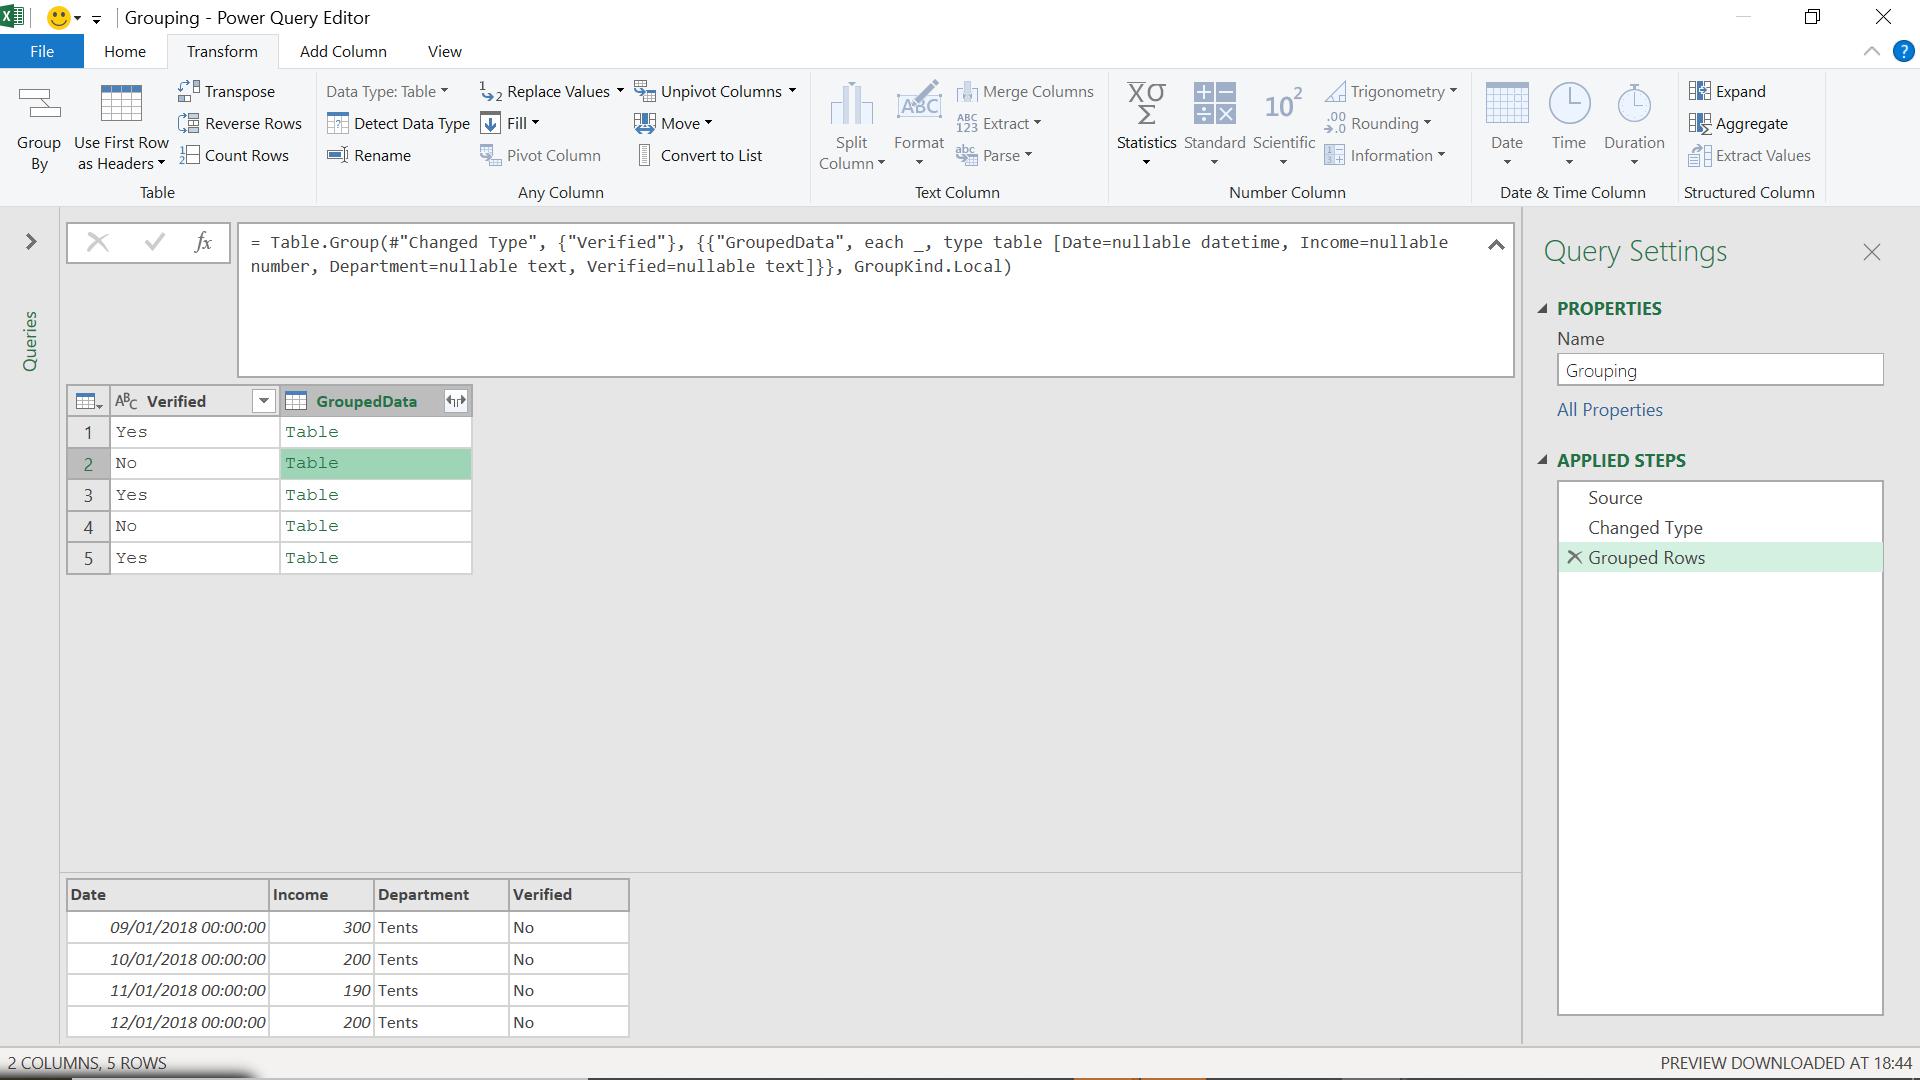
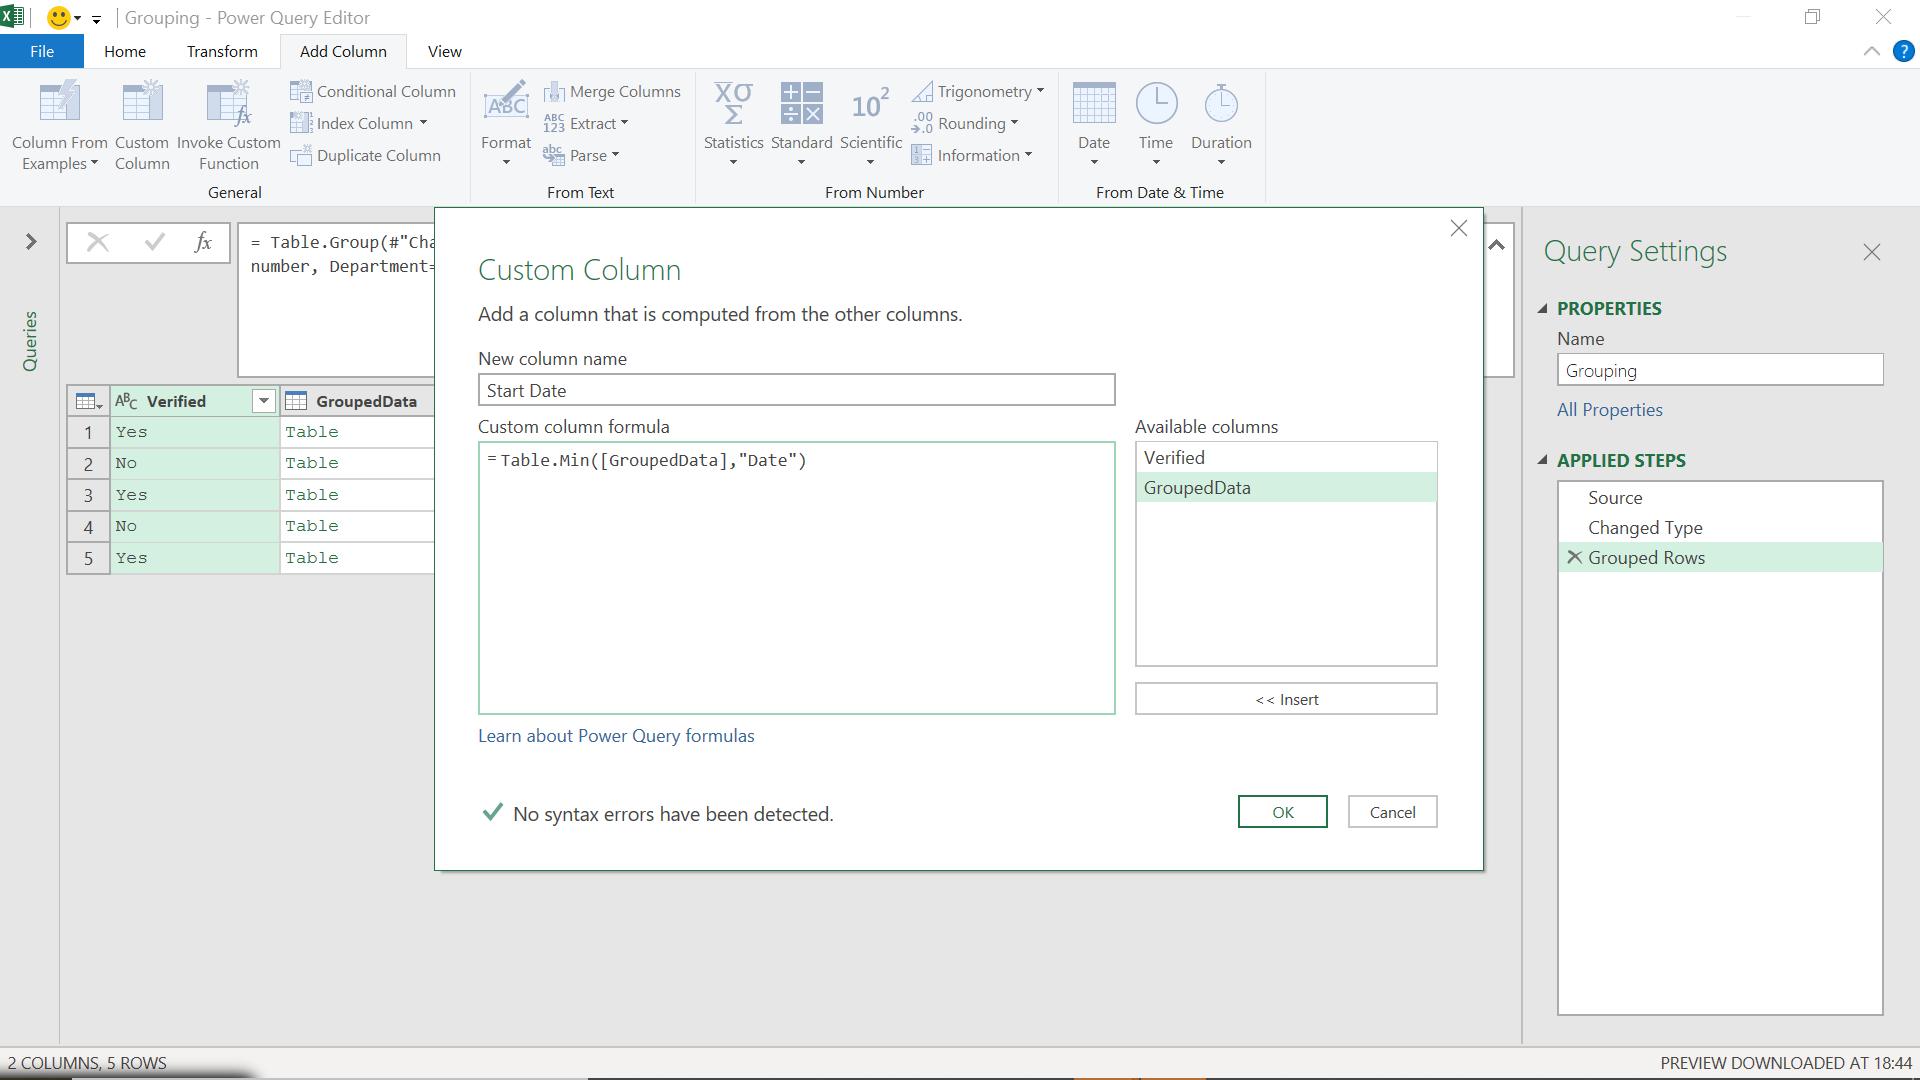
This has worked, giving me separate groups for each range of dates corresponding to a change in value on Verified. I can now add start and end columns by extracting the minimum and maximum date value from table GroupedRows.
This gives me the record corresponding to the start date.
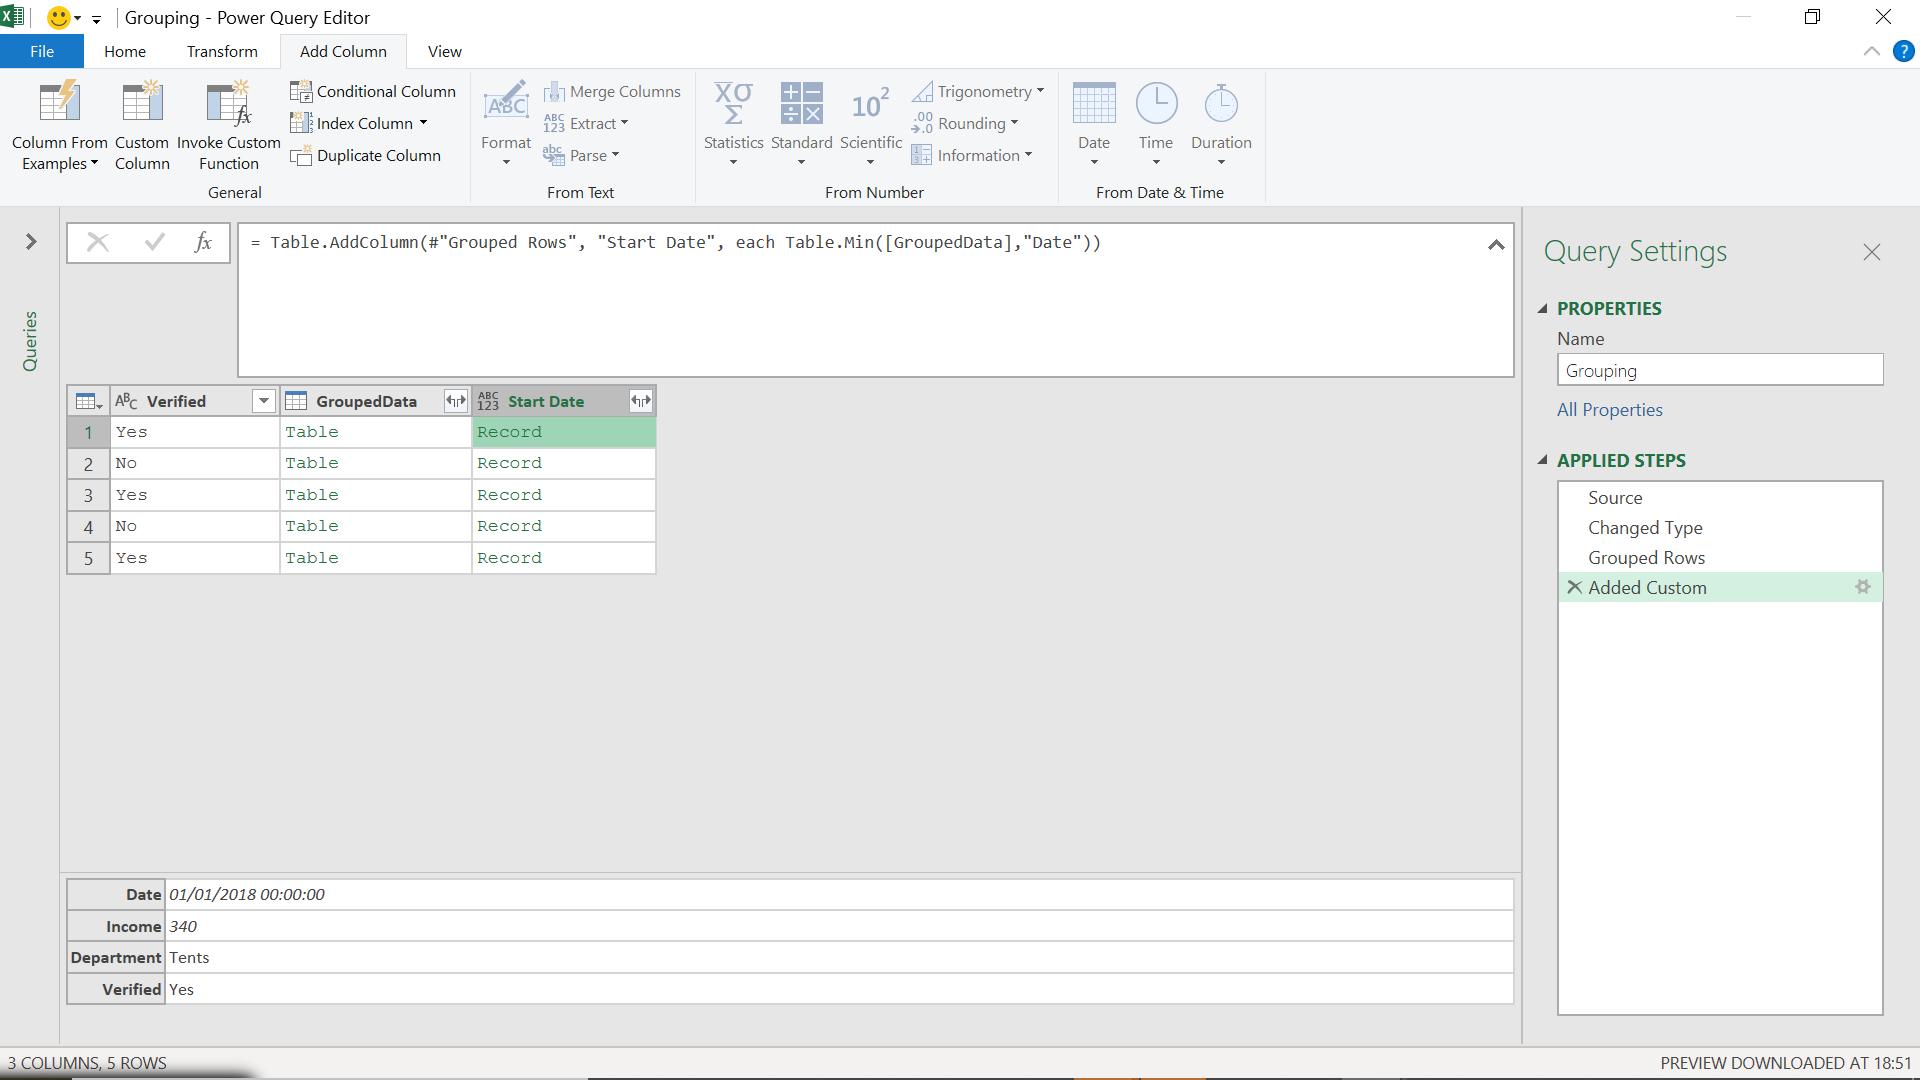
I can then extract the date.
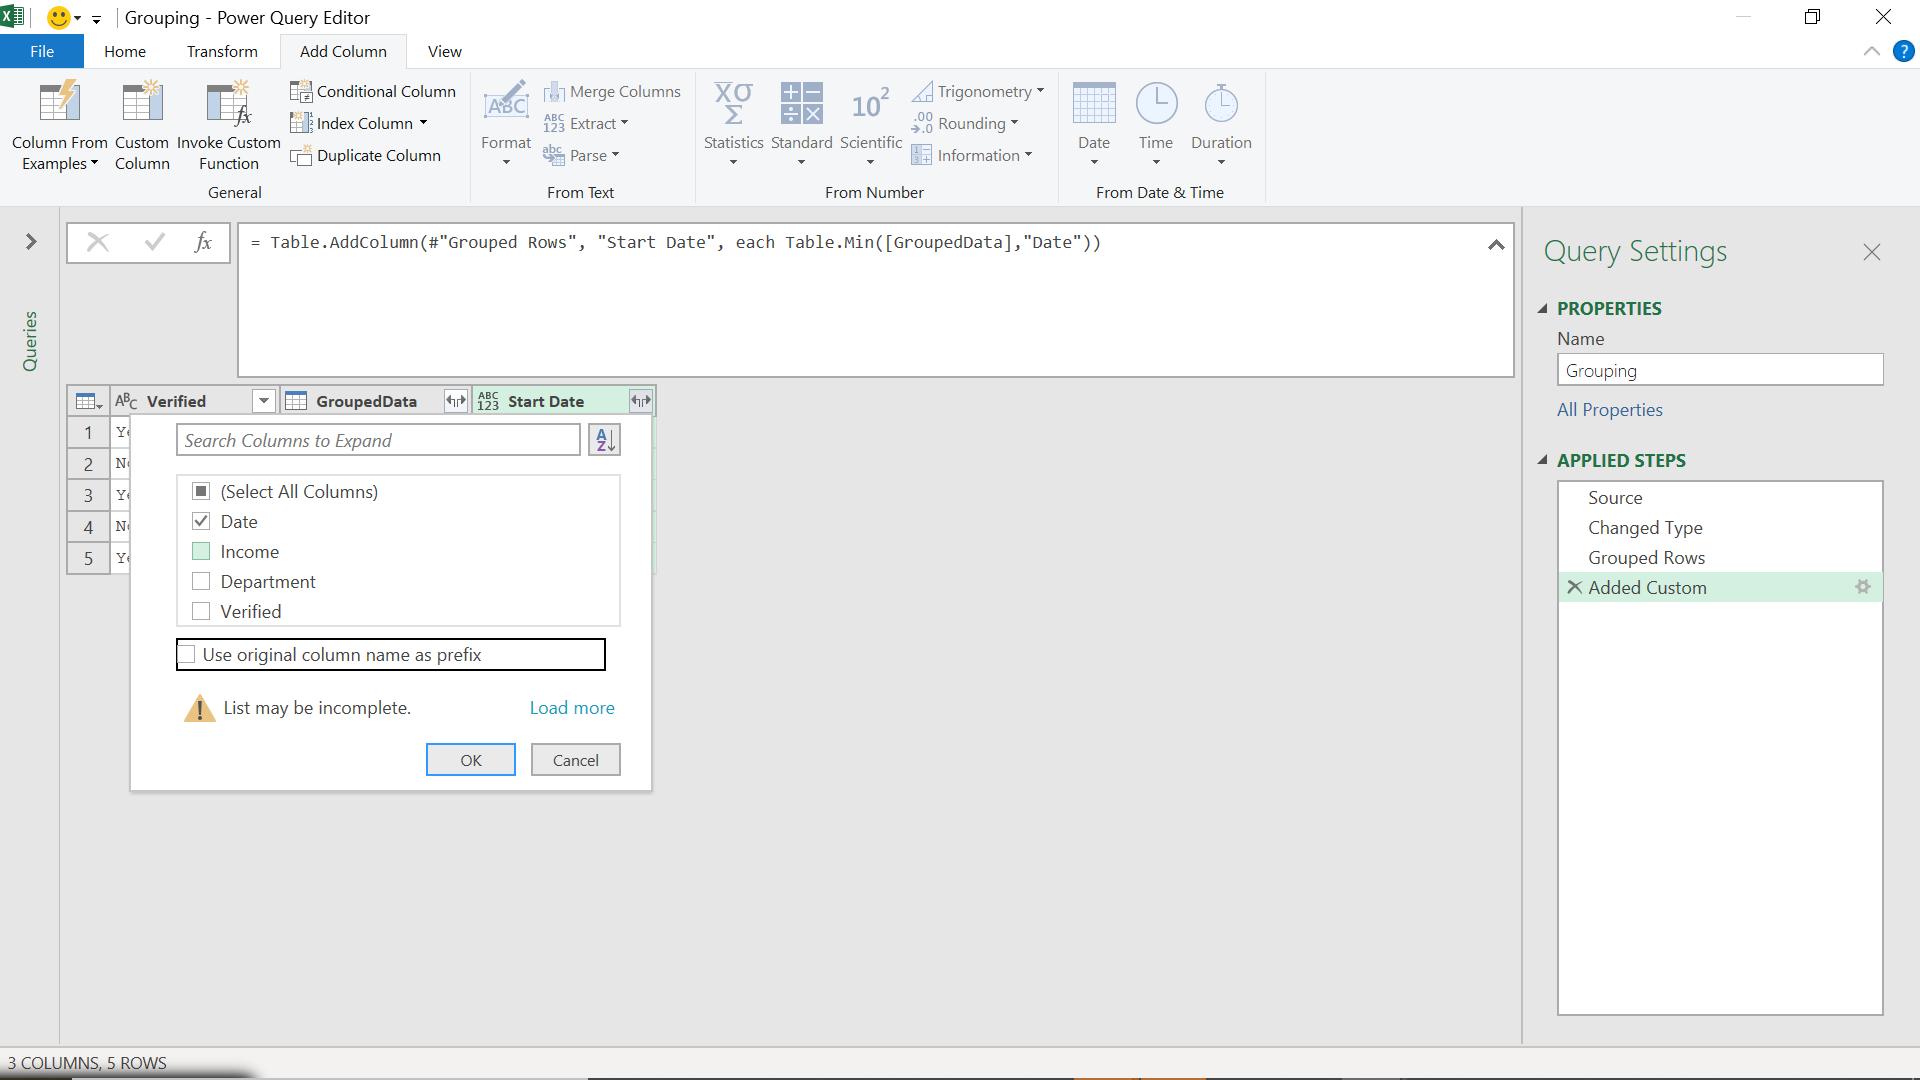
I only want the date, so I expand this.
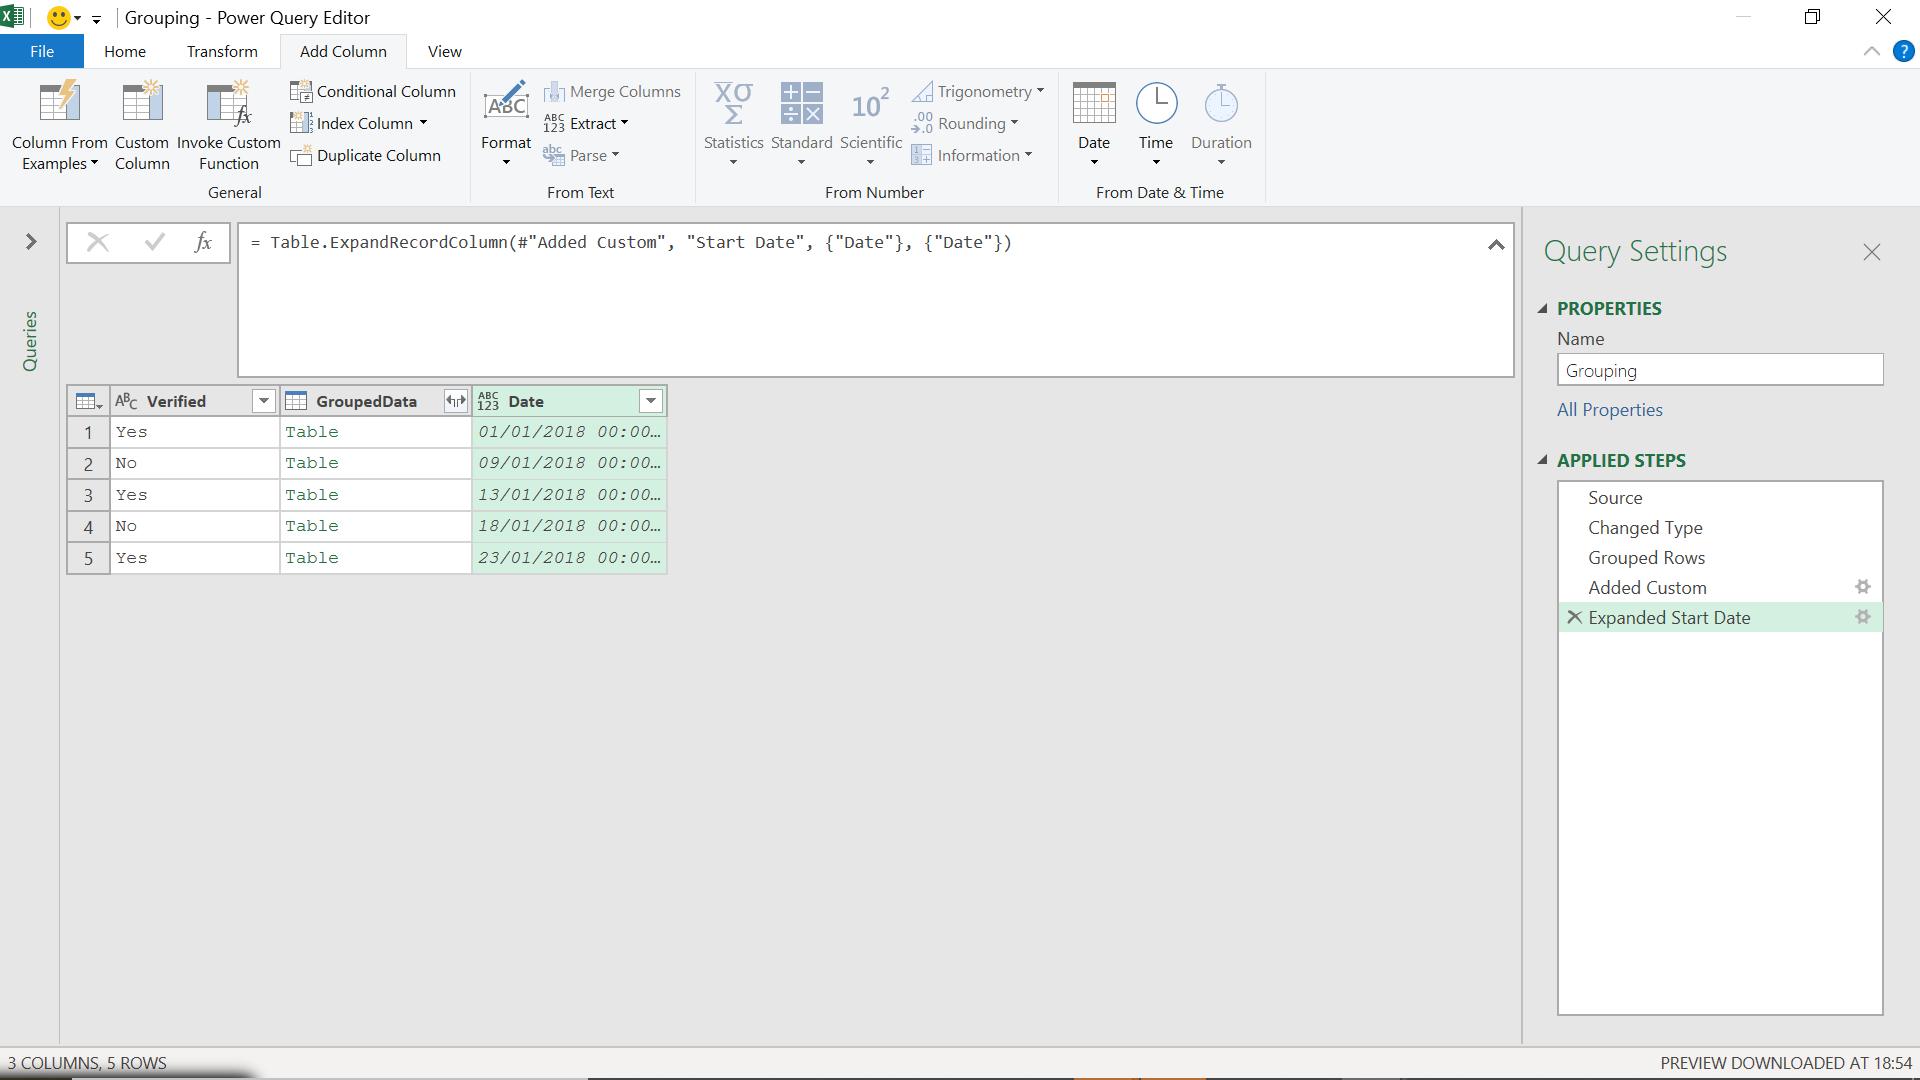
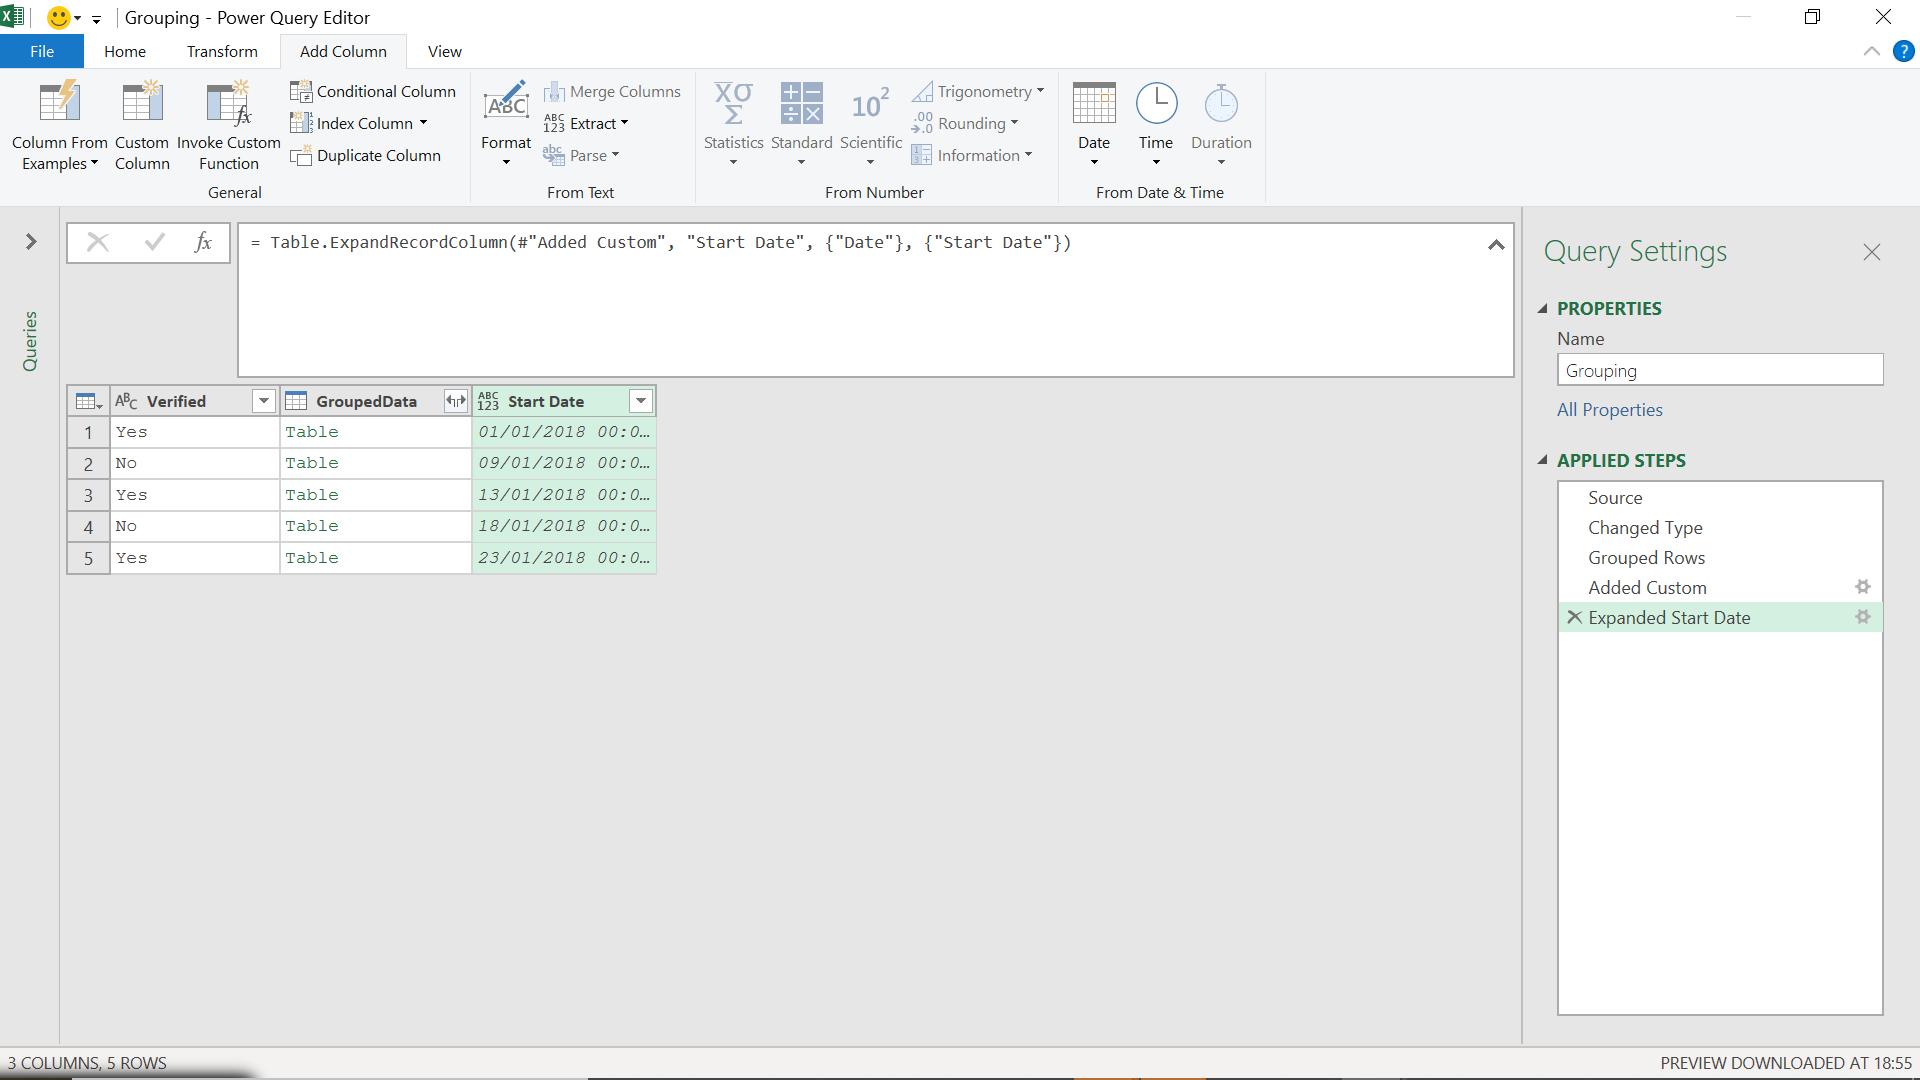
The default is to call the column Date, I can amend this step to call it ‘Start Date’.
I now carry out the same sequence of steps to get to the ‘End Date’.
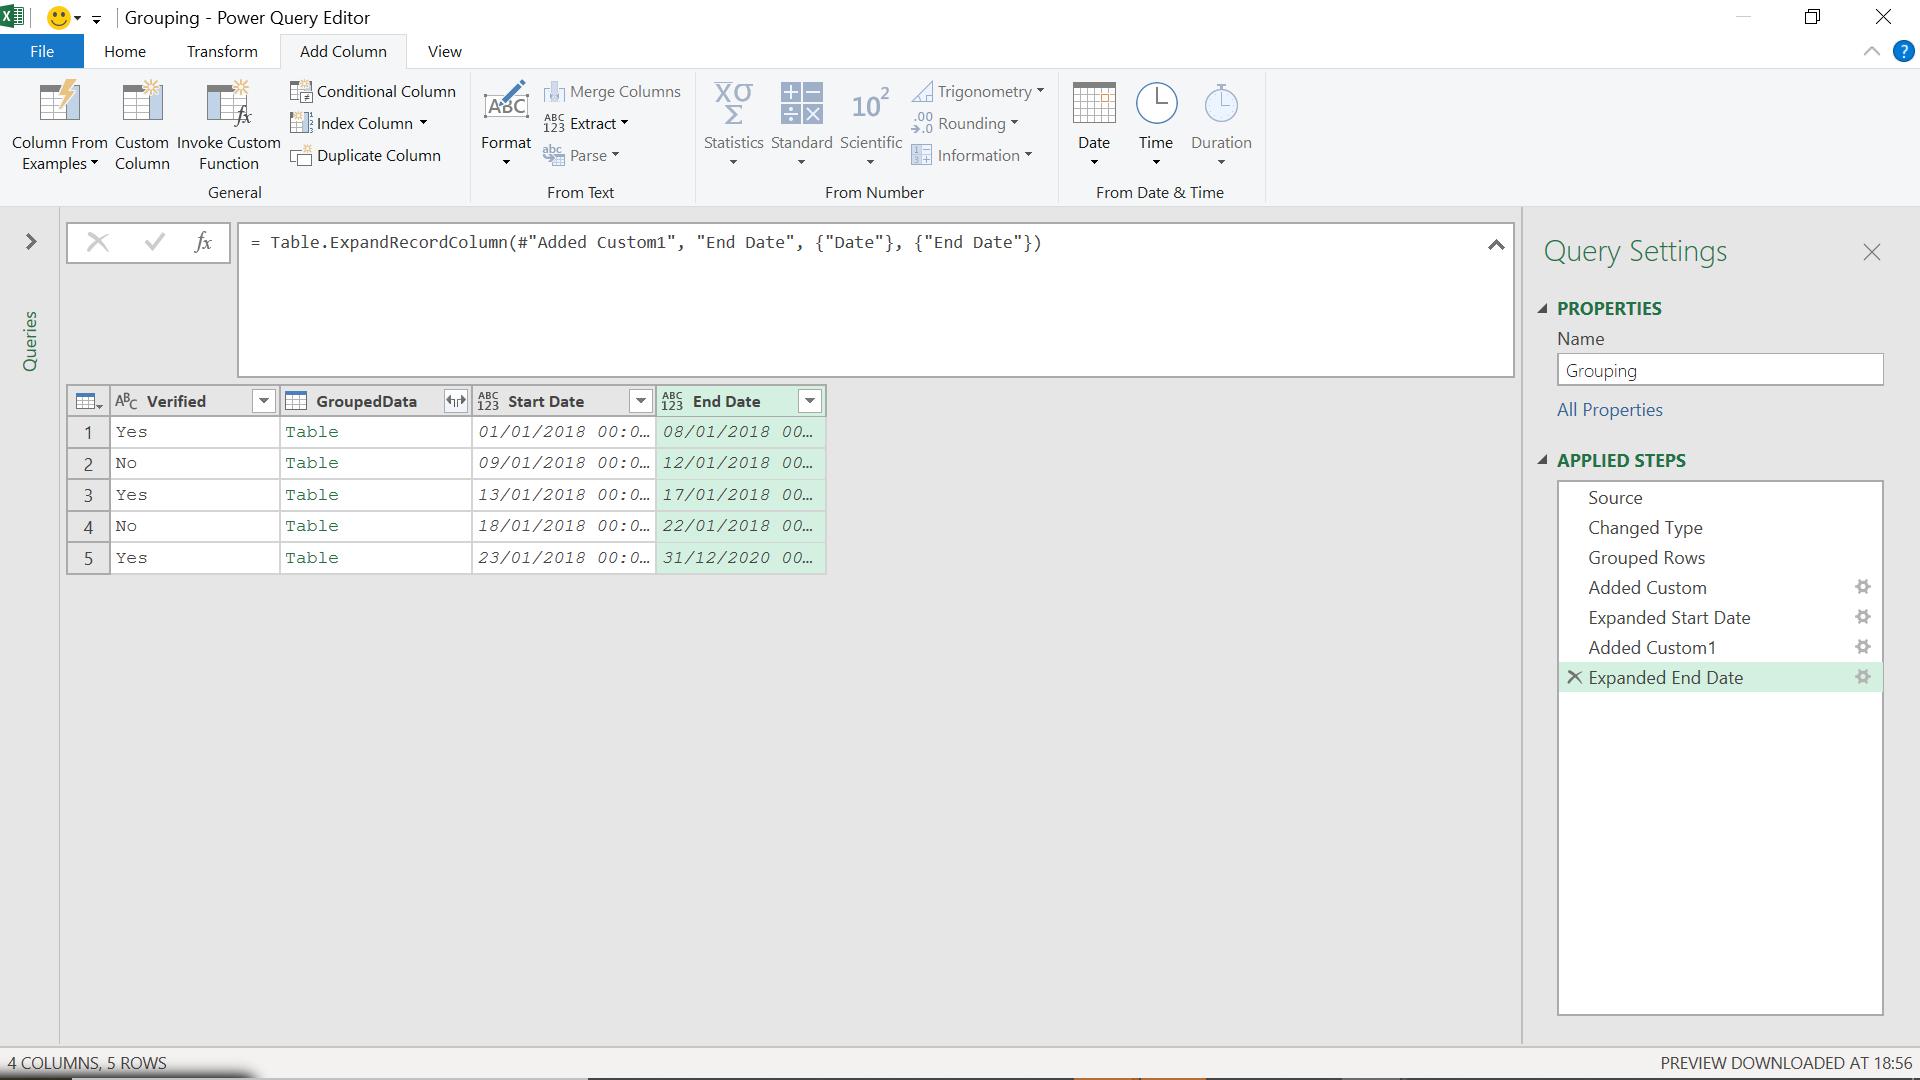
I now have the start and end date for each range of dates that have been verified (or not verified).
Come back next time for more ways to use Power Query!