ALTernative Excel in an Instance
Liam Bastick, director (and Excel MVP) with SumProduct Pty Ltd, highlights some of the common issues and scenarios in financial modelling / Excel spreadsheeting. This time he looks at instances of Excel – and why you should know what they are.
Picture the scene. You have deadlines galore and that “blue circle of death” on a whited-out screen is holding you back. For example, you could be running a long macro, manipulating large volumes of data or are refreshing Power Query / Get & Transform. During an intensive task in one spreadsheet, other spreadsheets cannot be used – because the resources are all tied up.
That’s because you are using what is known as the same instance of Excel. But it doesn’t have to be this way. In fact, you may not be familiar with the term, but you are probably aware of a workaround already. Let me explain.
Working with multiple screens has been with us for many years as they have become cheaper to purchase and make it easier for us to do our work. However, Excel didn’t necessarily keep up with the price reductions. If you worked with Excel, all of your files had to be displayed on one screen (unless you were very inventive) – because they were all running from the same initiation of the program – an instance. To circumvent this, you opened Excel again et voila! you could have Excel omnipresent across your display surfaces.
With the advent of Excel 2013, we forgot this trick. Microsoft made our lives easier by allowing you to put Excel on two or more screens from the same instance. You could link to sheets on other screens (something you cannot do with multiple instances. All was good in the world again.
However, Excel 2013 onwards never ignored its origins. You could still open a separate instance: you just had to do it differently. And there were more ways to do it too. So, if you find yourself stuck with Excel running a resource-intensive task, here’s how you can open a second independent Excel application in an instance (get it?).
I offer you no less than four alternatives.
1. An ALTernative Experience
Right click on the Excel icon in the taskbar. As the menu appears, hold down the ALT key and left-click on the ‘Excel’ menu option.
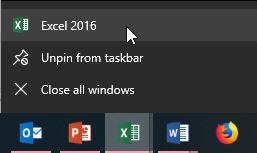
Continue to hold down the ALT key until the below window pops up. Press ‘Yes’ to open a new instance.
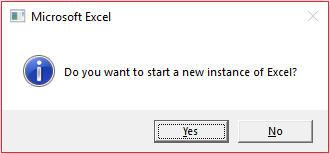
In fact, you can also hold down the ALT key, hover your mouse over the Excel icon in the taskbar and click your scroll-button. This has the same effect and takes even less clicks for those that are scared they might tire themselves out unnecessarily.
2. Run Away with Excel
You can use the Run window, by clicking on ‘Start’ (depending upon which version of Windows you have and entering ‘Run’ or by right-clicking on that
Windows icon in Windows 10 and selecting ‘Run’. Then you type in ‘Excel.exe /x’ and press ENTER viz.
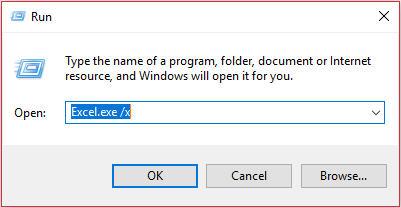
In fact, if you have Cortana, you can even just type the text directly in:
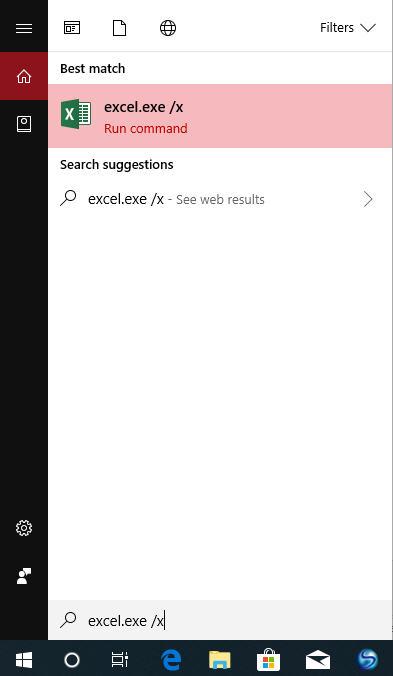
However you do it, a new Excel instance will open.
3. Using VBA
For those so inclined, you can write a macro in Visual Basic for Applications (VBA). Simply run the code below to open a second Excel instance.
Sub OpenNewExcelInstance()
Dim xlApp As Excel.Application
Set xlApp = New Excel.Application
xlApp.Workbooks.Add
xlApp.Visible = True
Set xlApp = Nothing
End Sub
Do note, this method does not show a pop-up dialog to indicate you have initiated a new instance.
4. Most Dangerous: Use the Registry
You can force Excel to open a new instance by default. I show this for completion, but be very careful working with the registry. It’s a great way to make friends with your local IT department and learn how to re-format your hard drive. However, whilst this approach is inherently the most dangerous / complex, it’s the only one where you can make Excel open a new instance each time.
Having said that, this method only works when you use the Excel icon to open a new spreadsheet. When opening a new spreadsheet from within a file from File Explorer or by using File -> Open in Excel, the file still opens in the current Excel instance.
Never edit the registry without creating a backup. Adjusting the wrong entries may cause serious problems (no, I don’t mean “opportunities”). Therefore, to create a backup:
Click ‘Start’ (or the Windows key), then type ‘Regedit’ and finally click on ‘Regedit’ in the search results:

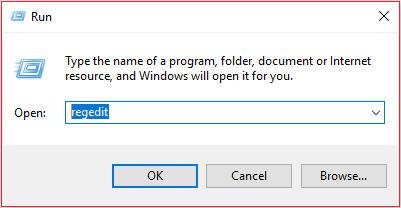
You can just type ‘regedit; in the Run’ dialog as well:
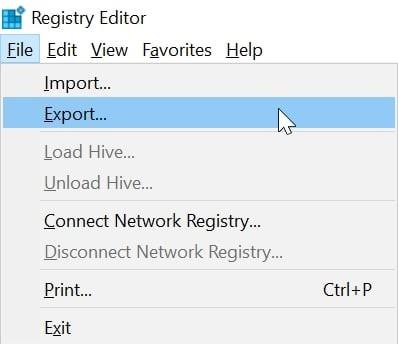
Press File -> Export -> Select Export Range ‘All’ -> Save the backup in a safe location:
Now you may wreak havoc. To edit the registry:
- close all instances of Excel
- open the Registry Editor (as explained in the backup step)
- go to HKEY_CURRENT_USER\Software\Microsoft\Office\16.0\Excel\Options (this is for Excel 2016; for Excel 2013, use HKEY_CURRENT_USER\Software\Microsoft\Office\15.0\Excel\Options)
- click ‘Edit’ in the menu, press ‘New’, and select ‘DWORD (32-bit) Value’ (this seems to be what you must do even if you are using 64-bit Excel)
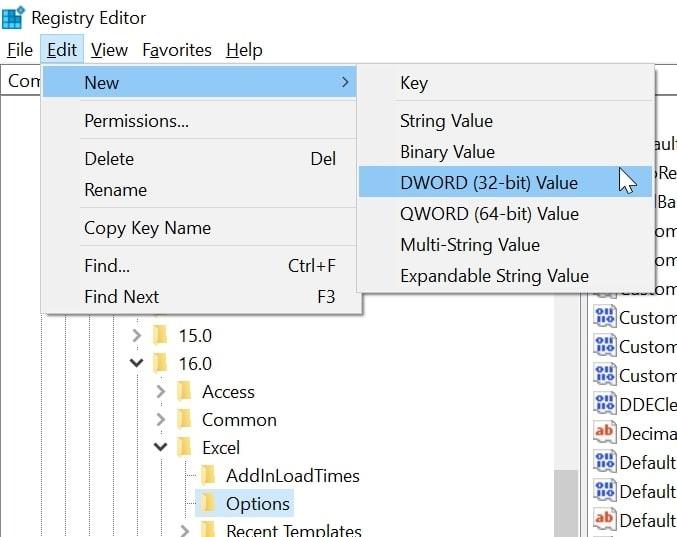
- name the entry ‘DisableMergeInstance’, press ENTER
- right-click the entry DisableMergeInstance, and select ‘Modify’
- in the ‘Value’ data box, enter 1 and click OK.
Next time you open a new Excel window using the taskbar icon, it will open in a new instance.
Word to the Wise
In all instances (sorry, I couldn’t resist the pun), use CTRL+ TAB to switch you from one file to the next file within the same instance.
If you have a query for the Thought section, please feel free to drop Liam a line at liam.bastick@sumproduct.com or visit the SumProduct website.

