Excel for Mac: Conditional Formatting
6 September 2024
This week in our series about Microsoft Excel for Mac, we show how to set up conditional formatting, and how it’s different from what you might be familiar with on Windows.
The good news is that Conditional Formatting has the same capability and generally works the same way in Excel for Mac as it does in Windows. However, the dialogs used to set up new conditional formatting rules are organized quite differently. We’ll clear it all up here.
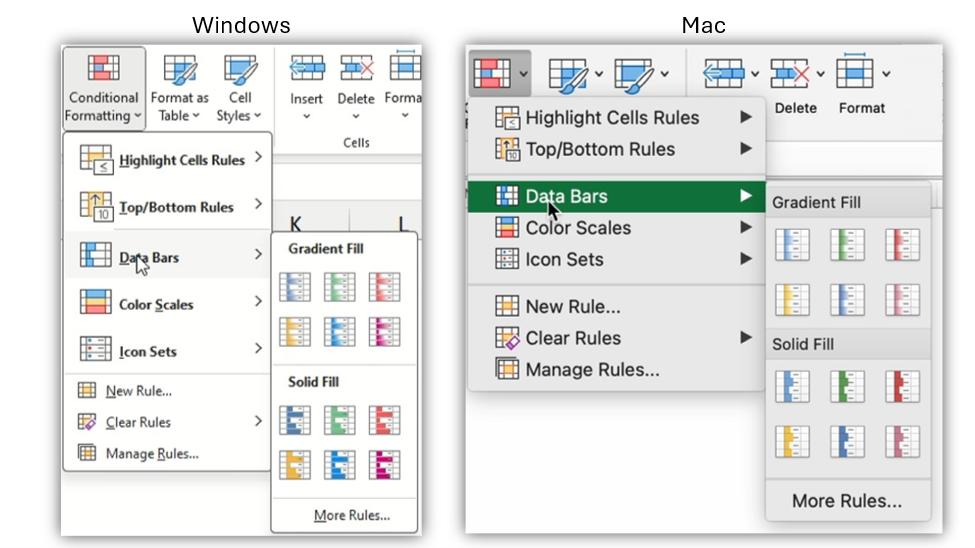
Conditional Formatting menu – similar
As you can see in the screen shots below, the ‘Conditional Formatting menu’ is similar on Windows and Mac, so getting started with one-click options is very easy and you don’t need to learn anything different on Mac. The difference comes when you press the ‘New Rule…’ button, so we’ll focus on that.
‘New Rule’ dialog
This is where the big differences are. When you click 'New Rule', if you’re expecting to see what you’re familiar with from Windows, you may be scratching your head trying to find out where the same options are. Don’t worry, the same options are there, it’s just organised in a different way and doesn’t show you the list of ‘Rule Types’.
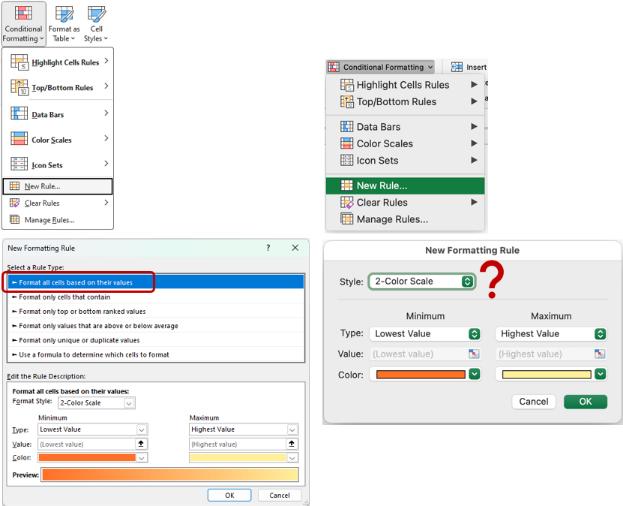
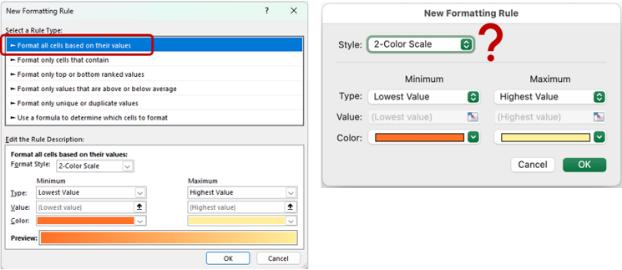
As you can see in the screen shots, you can choose from a list of the ‘Rule Types’ in Windows, but in Mac, it only shows you the options for the “2-Color Scale” style. Don’t worry, you didn’t miss a step. You just need to explore a bit to find all the other ‘Rule Types’.
Where are the ‘Rule Types’?
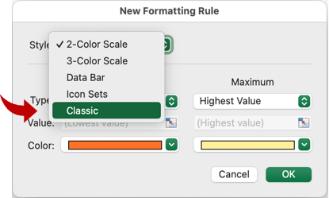
To find the ‘Rule Types’ that you see immediately in Windows, you need to open the Style drop-down (“pop-up” in Mac lingo). Then choose Classic from the list of choices.
Then you need to open the pop-up that says, ‘Format only cells that contain’ (there’s no label on this pop-up button). Here you’ll find the other ‘Rule Types’ that were a bit hidden before. You’ll notice the items in the list that pops up are all shown at the top of the dialog on Windows.
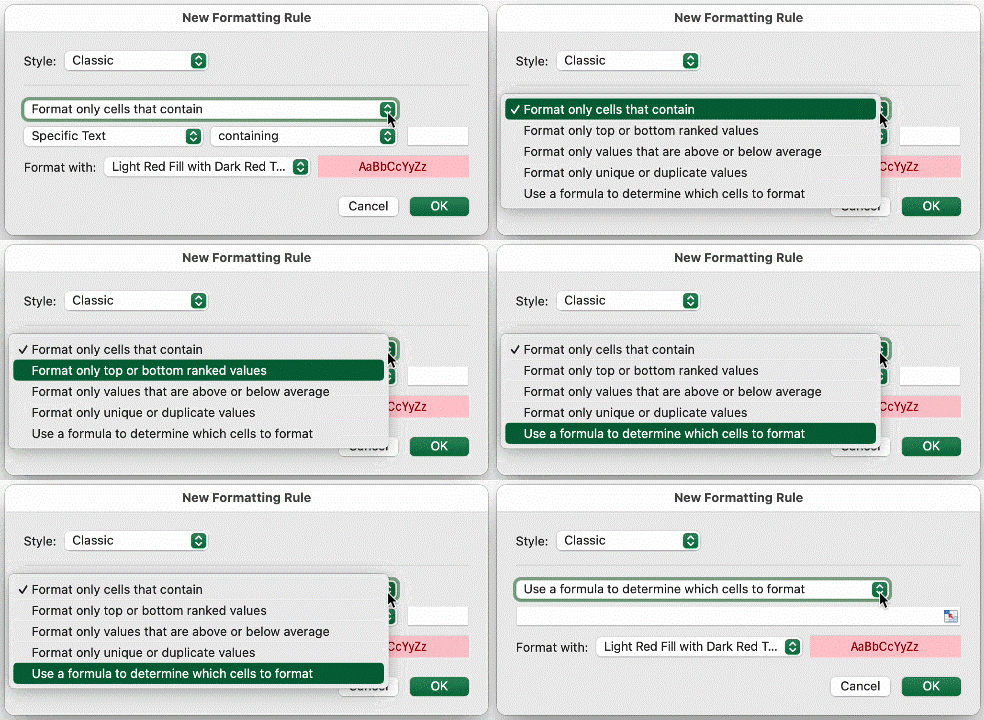
Still one ‘Rule Type’ missing
If you look closely, you’ll find that one ‘Rule Type’ that we see in Windows is not in our list on Mac: ‘Format all cells based on their values’. You can still use all the options for that ‘Rule Type’, it’s just presented differently in the dialog. On Mac, that ‘Rule Type’ is what you get if you choose anything other than ‘Classic’ from the Style list.
Once you realise how the styles and rule types are organised on Mac, it’s easy to find what you want, even though it’s not quite as easy to discover as on Windows.
The basic difference is that in Windows, you always see the list of Rule Types’ in the upper portion of the dialog. On Mac, it starts by showing you the ‘2-Color Scale’ style, which is one of the ‘Format all cells based on their values’ type of rule. If you want to see other types, you need to pick ‘Classic’ from the Style list.
Managing rules
The dialog used to manage your conditional formatting rules is very similar on Mac compared to Windows. The most important difference is that if you want to edit the ‘Applies to’ range on Mac, you need to select the rule first, then edit the range in the field near the bottom of the dialog.
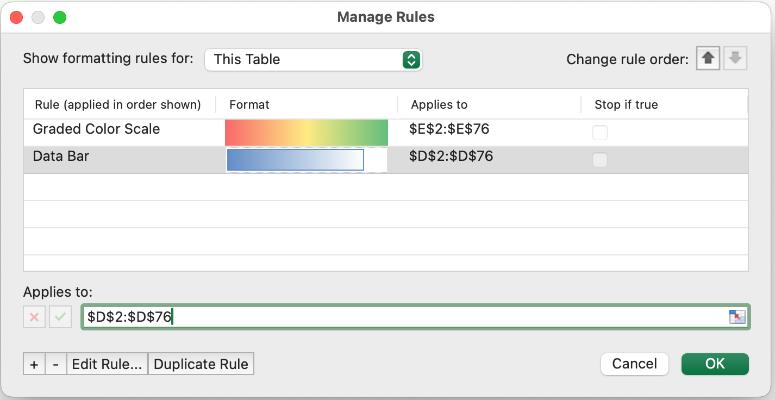
On Windows, the ‘Applies to’ range is in-line with the rule itself. Just edit where it is. Easy when you know how!
We hope you found this topic helpful. Check back for more details about Excel for Mac and how it’s different to Excel for Windows.

