Power BI Blog: Power BI Report Creation with Copilot
28 November 2024
Welcome back to this week’s edition of the Power BI blog series. This week, we consider creating reports with Copilot, currently in Preview.
Improvements have been made to the page creation capability in Power BI with Copilot. These updates are designed to make the user experience clearer and more transparent.
Increased clarity and contextual awareness
To help build reports, Copilot can now engage with users to gather more details before creating a page. This ensures that Copilot has a comprehensive understanding of your needs right from the start to create a more relevant page for you. Copilot can also offer recommendations on fields and measures to use in a report.
Page outline and increasing transparency
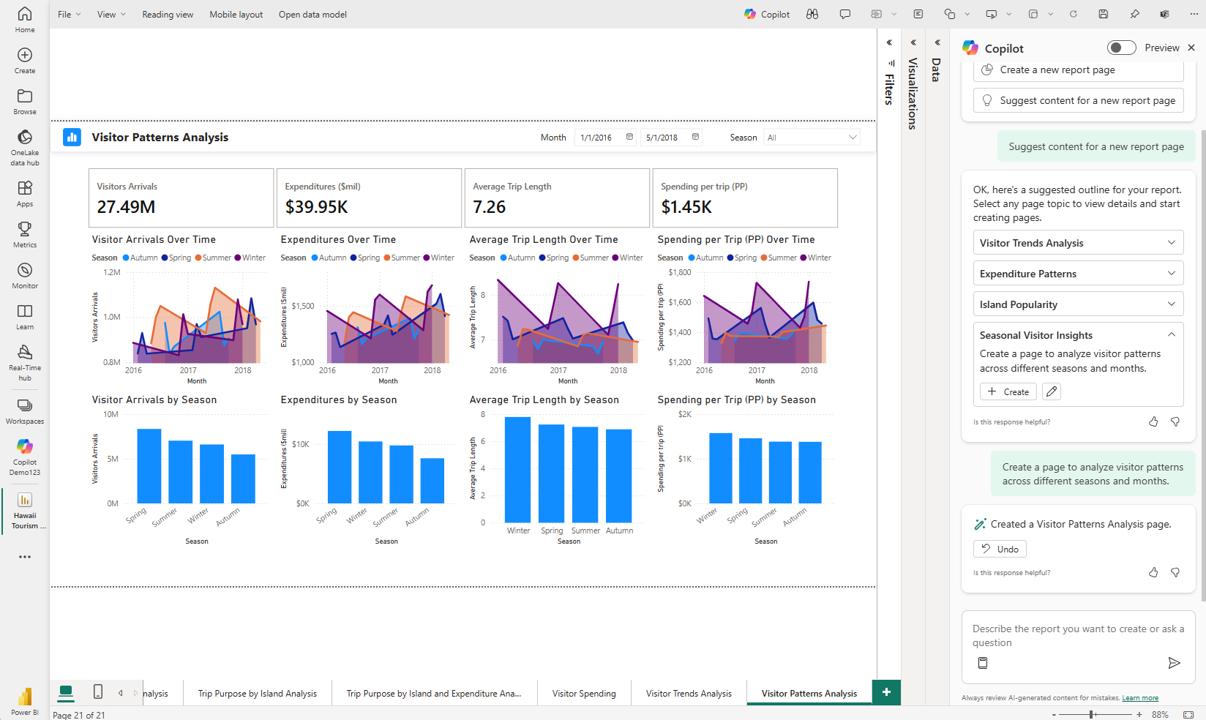
After creating a page with Copilot, you’ll now see an outline in the Copilot chat pane. This allows you to review the content and ensure that the page meets your requirements. The outline also helps add transparency so users can see what data fields copilot is using to build out the report.
Using Copilot
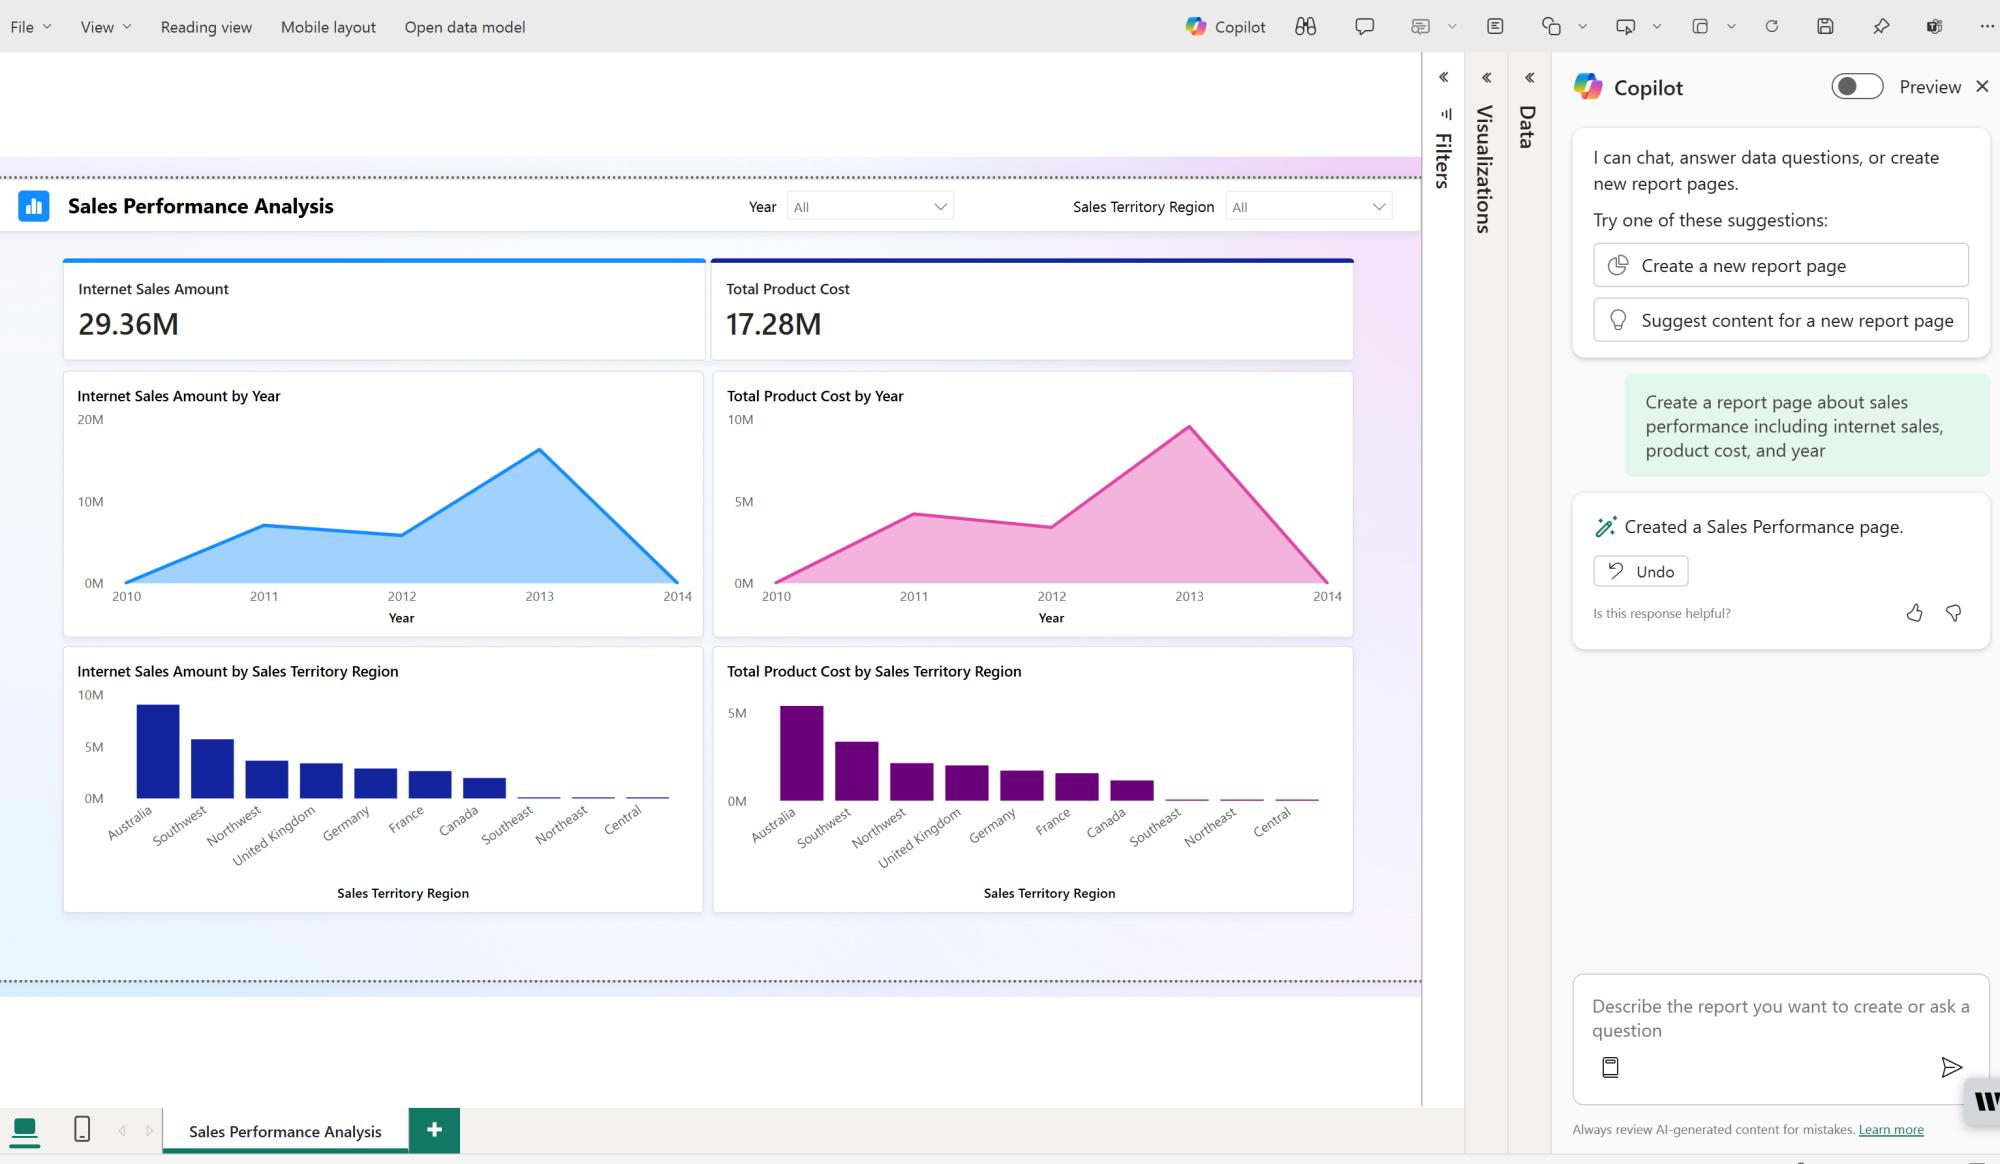
You need to select a compatible workspace that you have write access to. It needs to be a workspace that's assigned to a Copilot-enabled capacity, in other words, a paid Fabric capacity (F64 or higher) or a Power BI Premium capacity (P1 or higher). In particular:
- your administrator needs to enable Copilot in Microsoft Fabric
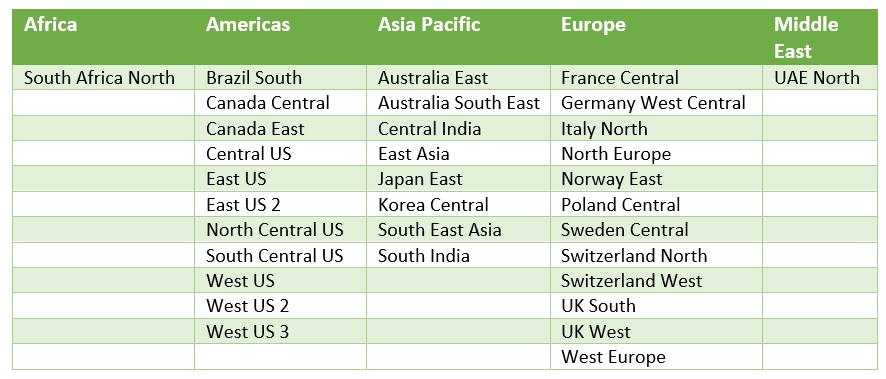
- your F64 or P1 capacity needs to be in one of the regions below; if it isn't, you can't use Copilot
- Your administrator needs to enable the tenant switch before you start using Copilot. See the article Copilot tenant settings for details
- If your tenant or capacity is outside the US or France, Copilot is disabled by default unless your Fabric tenant admin enables the Data sent to Azure OpenAI can be processed outside your tenant's geographic region, compliance boundary, or national cloud instance tenant setting in the Fabric Admin portal
- Copilot in Microsoft Fabric isn't supported on trial SKUs. Only paid SKUs (F64 or higher, or P1 or higher) are supported.
To use Copilot in the Power BI Service, you will need to ensure that reports are located in a workspace in the right capacity. The workspace must be in either Premium Power BI (P1 and above) or paid Fabric (F64 and above) capacity.
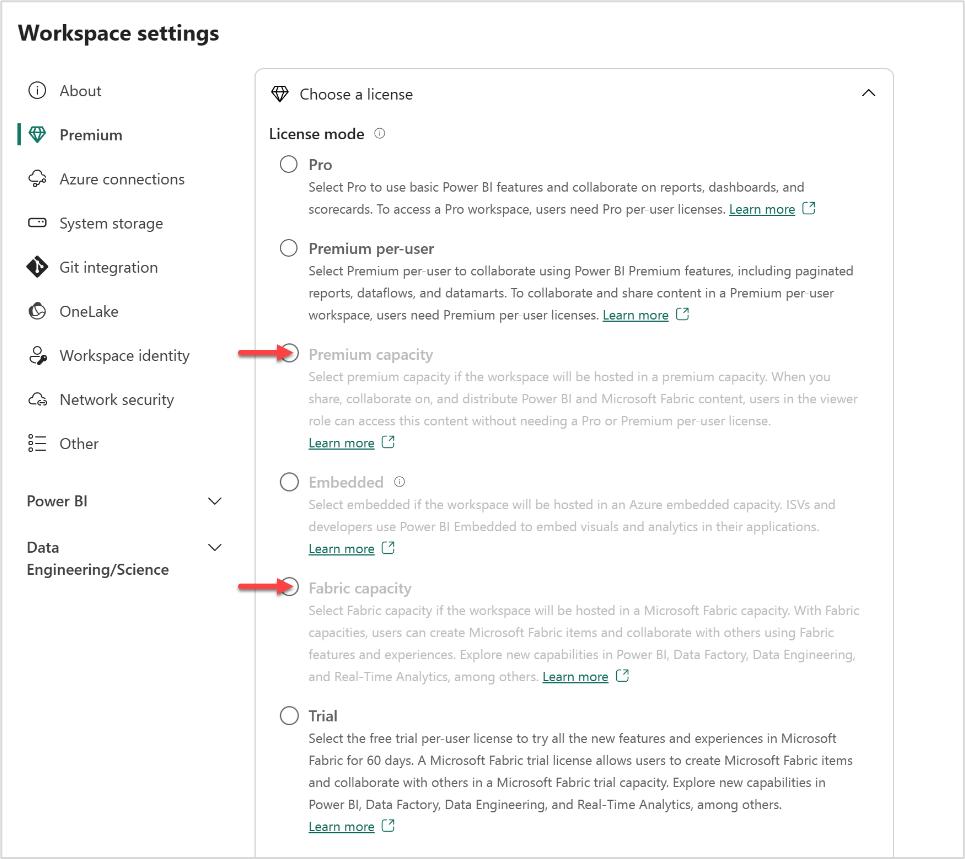
Check your license type in the Workspace settings:
- Select More to navigate to the Workspace settings

- Apply
either ‘Premium capacity’ or ‘Fabric capacity’ to the workspace and use the ‘X’
to exit workspace settings. You
can see which license mode is applied to your workspace under Premium. If License modes are greyed out, this
workspace doesn't have access to the appropriate capacity
- Now you're ready to create a report with Copilot in the Power BI Service.
To see the Copilot button in your report, you first need to select a semantic model.
- If this is your first time using Copilot in the Power BI Service, check the Admin portal:
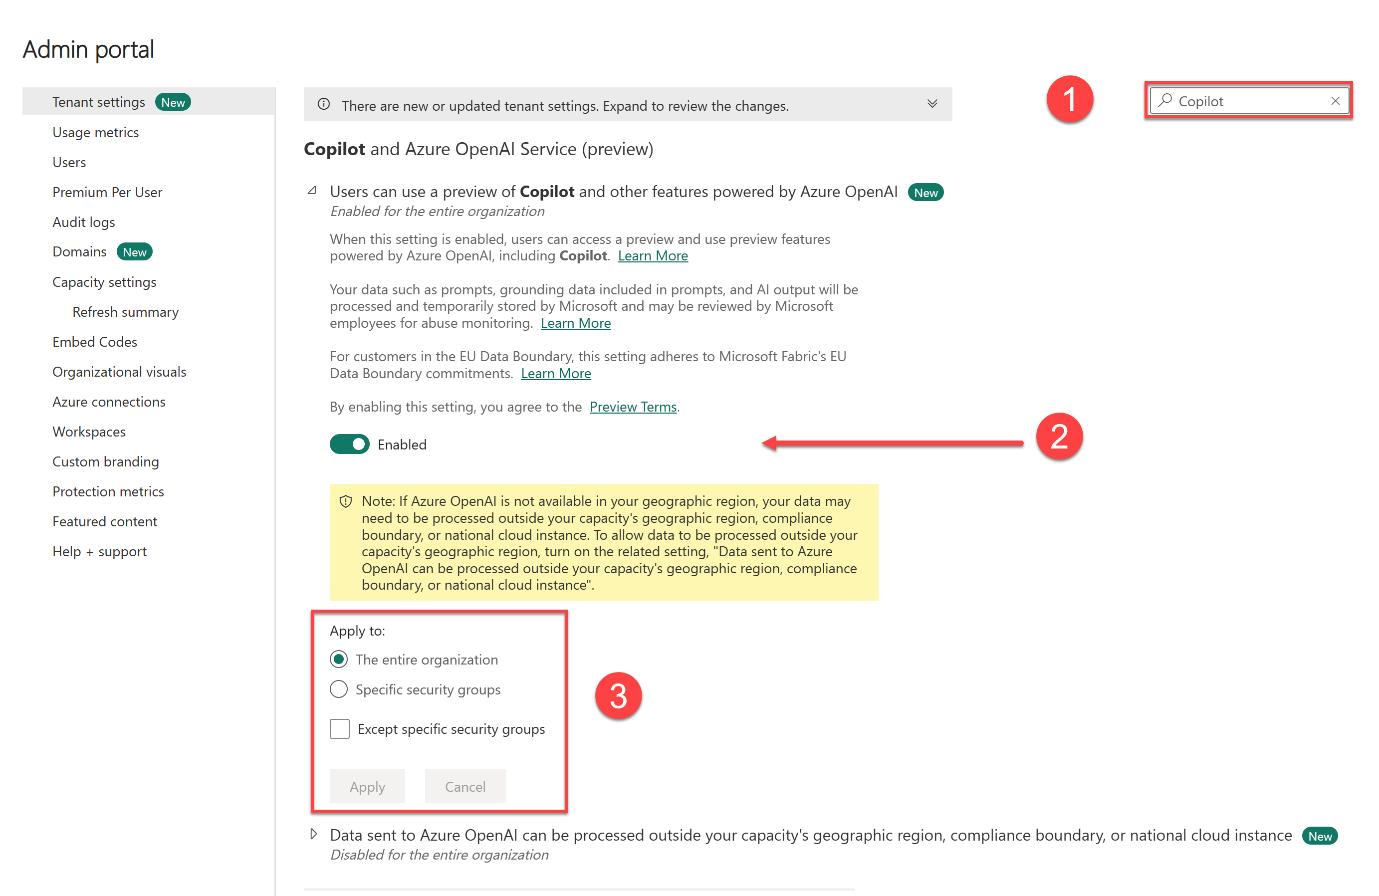
- Use the search bar (or scroll) to find the ‘Copilot and Azure OpenAI Service (Preview)’ settings
- Toggle the switch to the on position
- Specify who can access Copilot in Fabric; select ‘Apply’ to save your changes.
- Select the Data hub, then select ‘More options’ (...)
for the dataset you want to explore, and then ‘Create report’
- In the Ribbon, select the Copilot icon. If you don't see Copilot, your administrators may not have enabled it in Microsoft Fabric or you may not have selected a semantic model. Select a semantic model to see it
- In the Copilot pane, select ‘Suggest content for this report’. Copilot evaluates the data and makes suggestions:
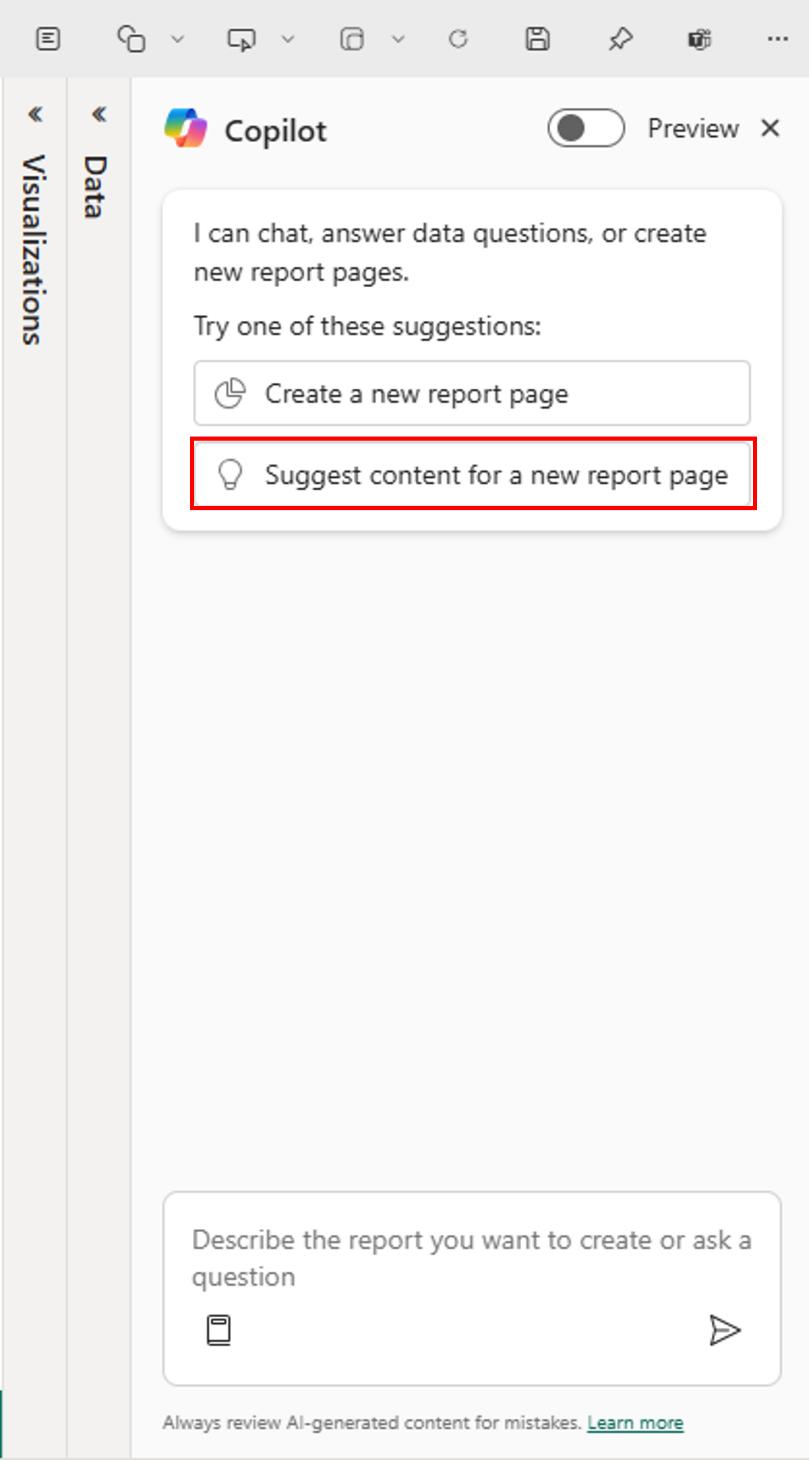
- Copilot suggests possible pages for your report
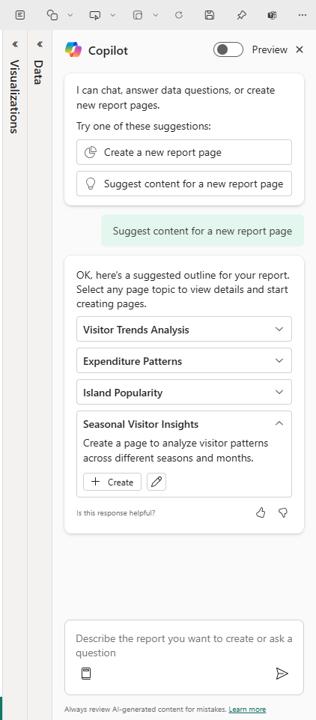
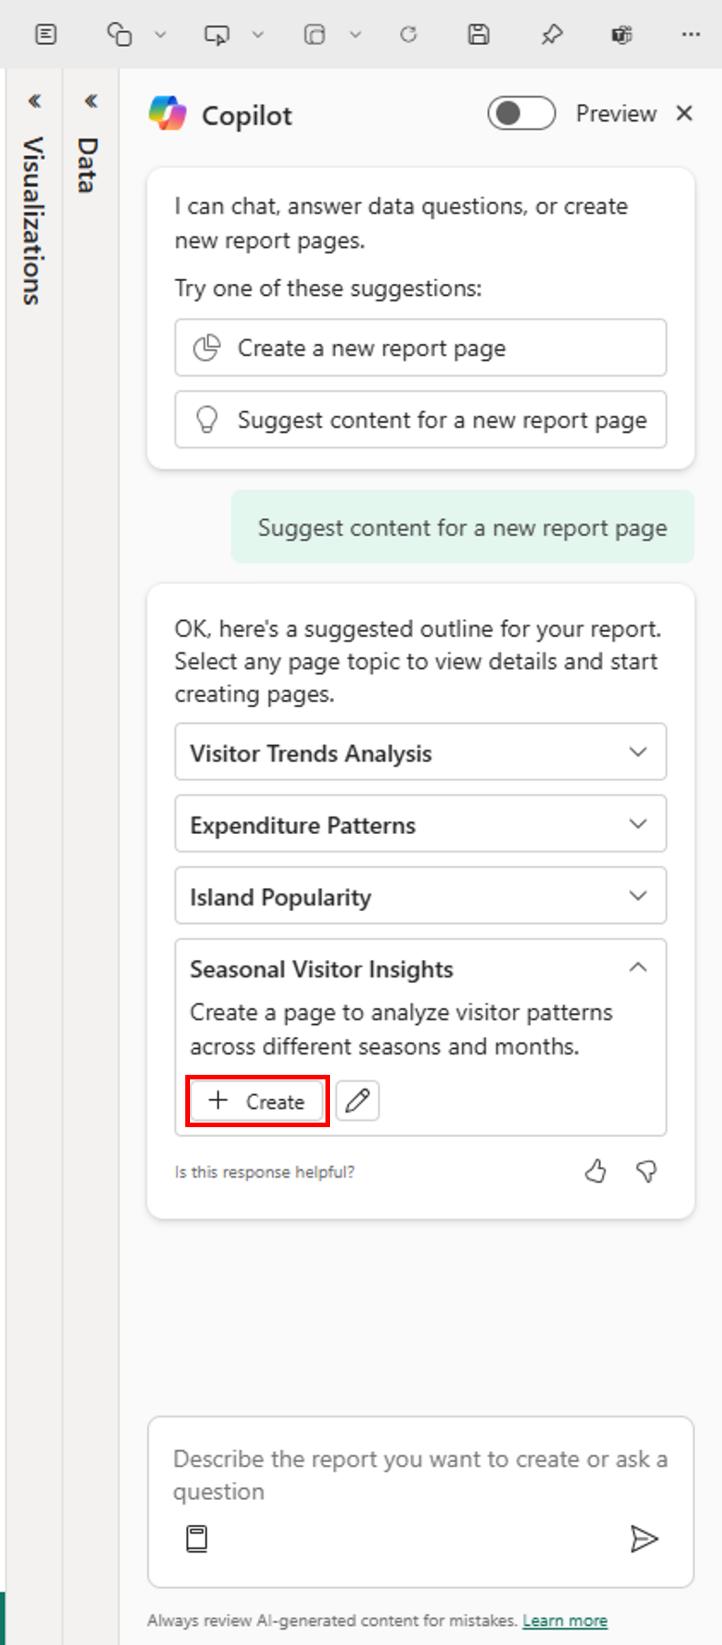
- Select ‘Create’ next to the first page you want Copilot to create
- Copilot creates that page
- Continue creating the pages that Copilot suggests. Otherwise, select ‘Create a report that shows’ and provide guidance on what you want in the report.
You can also use Copilot for Power BI to create a narrative summary with just a few clicks. This narrative can summarize the entire report, specific pages or even specific visuals.
After Copilot generates the page, then you can review it. You have the option to start over by selecting the Undo button. If you select the Undo button, Copilot starts over. The content on the page is removed and you start over with topic selection by either generating new topics or selecting the one from the top, when you first started.
When you're satisfied with the report, you save the report just like any other report. If you close and reopen the report that Copilot generated in the Power BI Service, the report is in Reading view and you don't see Copilot. Simply select Edit to see the Copilot button again.
There are limitations related to creating pages in specific semantic model scenarios:
- Real-Time Streaming Models: report pages can't be created by Copilot for semantic models utilising real-time streaming
- Live Connection to Analysis Services: semantic models connected live to Analysis Services aren't supported by page creation
- Semantic models with implicit measures disabled: in scenarios where implicit measures are disabled in your semantic model, Copilot cannot create report pages.
That’s it for this week. In the meantime, please remember we offer training in Power BI which you can find out more about here. If you wish to catch up on past articles, you can find all of our past Power BI blogs here.

