Power Pivot Principles: Importing Data from Excel
30 January 2018
Welcome back to our Power Pivot blog series, today we discuss how to import data from Excel.
As mentioned in our previous blog here, once data is loaded into Power Pivot it is unable to be changed from the Power Pivot window. To get around this issue, we can load data from Excel (say). Loading data from a table in Excel enables us to make changes to the data in Excel, and have these changes flow through to the Power Pivot data model.
Example
Let’s go through importing a file through Excel:
- Open an Excel workbook and click on the Power Pivot tab:

- Select the ‘Manage’ button to load the Power Pivot window
- In Power Pivot, click ‘Home’ and then ‘Get External Data’
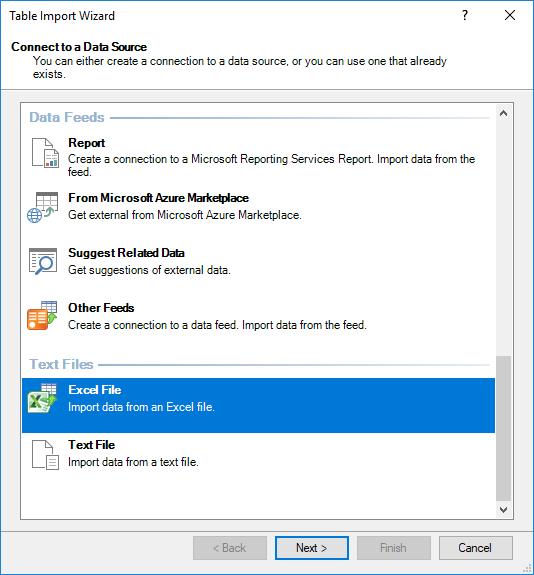
- A selection will need to be made as to where the data is coming from, e.g. an Excel file or a database

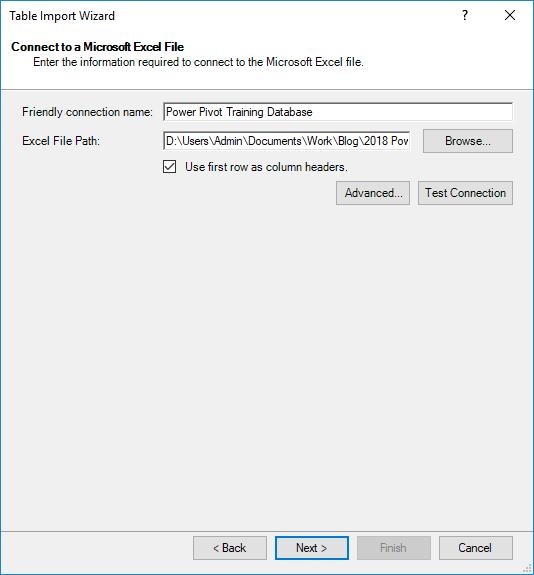
- Click on the ‘Browse’ button and select the file you wish to use
- Tick the checkbox for ‘Use first row as column headers’ and then click on ‘Next’

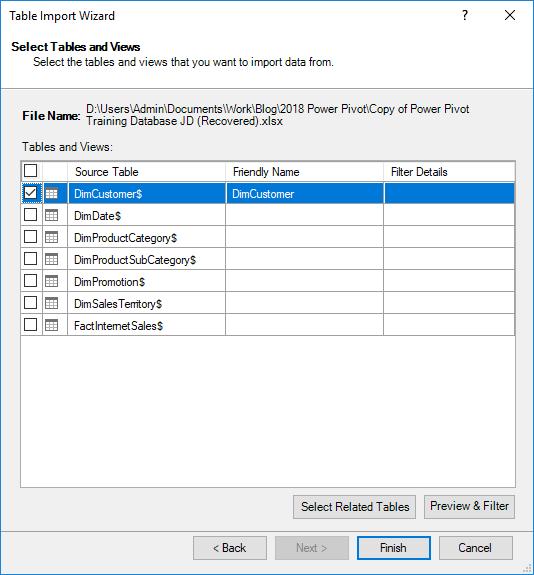
Power Pivot will display all of the worksheets in the file select. We can then select which worksheets we would like to bring in to the model:

- In this case we select just the table ‘DimCustomer$’ after giving it the friendly name (simply type it in) ‘DimCustomer’ (pictured above).
Before we bring the data into the Power Pivot model, note the ‘Preview & Filter’ option which allows you to delete any unnecessary data from each of the worksheets such as columns or rows of data that may not be relevant.
For now though, just select ‘Finish’.

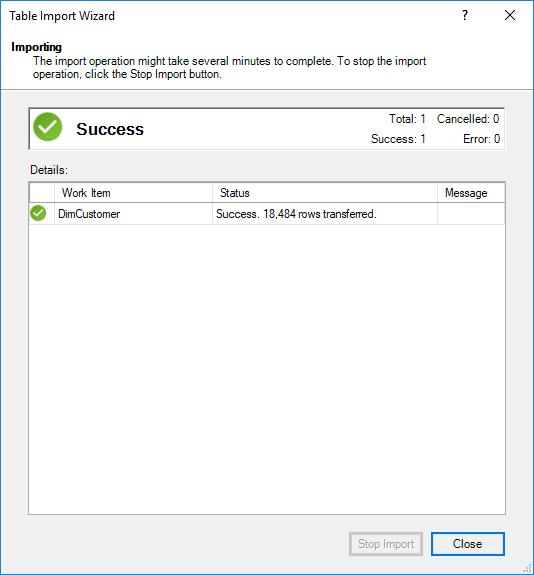
Power Pivot will import the data and we will be set.
Stay tuned for our next post on Power Pivot. In the meantime, please remember we have training in Power Pivot which you can find out more about here. If you wish to catch up on past articles in the meantime, you can find all of our Past Power Pivot blogs here.

