
Power Query: A Tangled Web Part 5
26 March 2025
Welcome to our Power Query blog. This week, I complete my series looking at the M code produced when extracting data from the web.
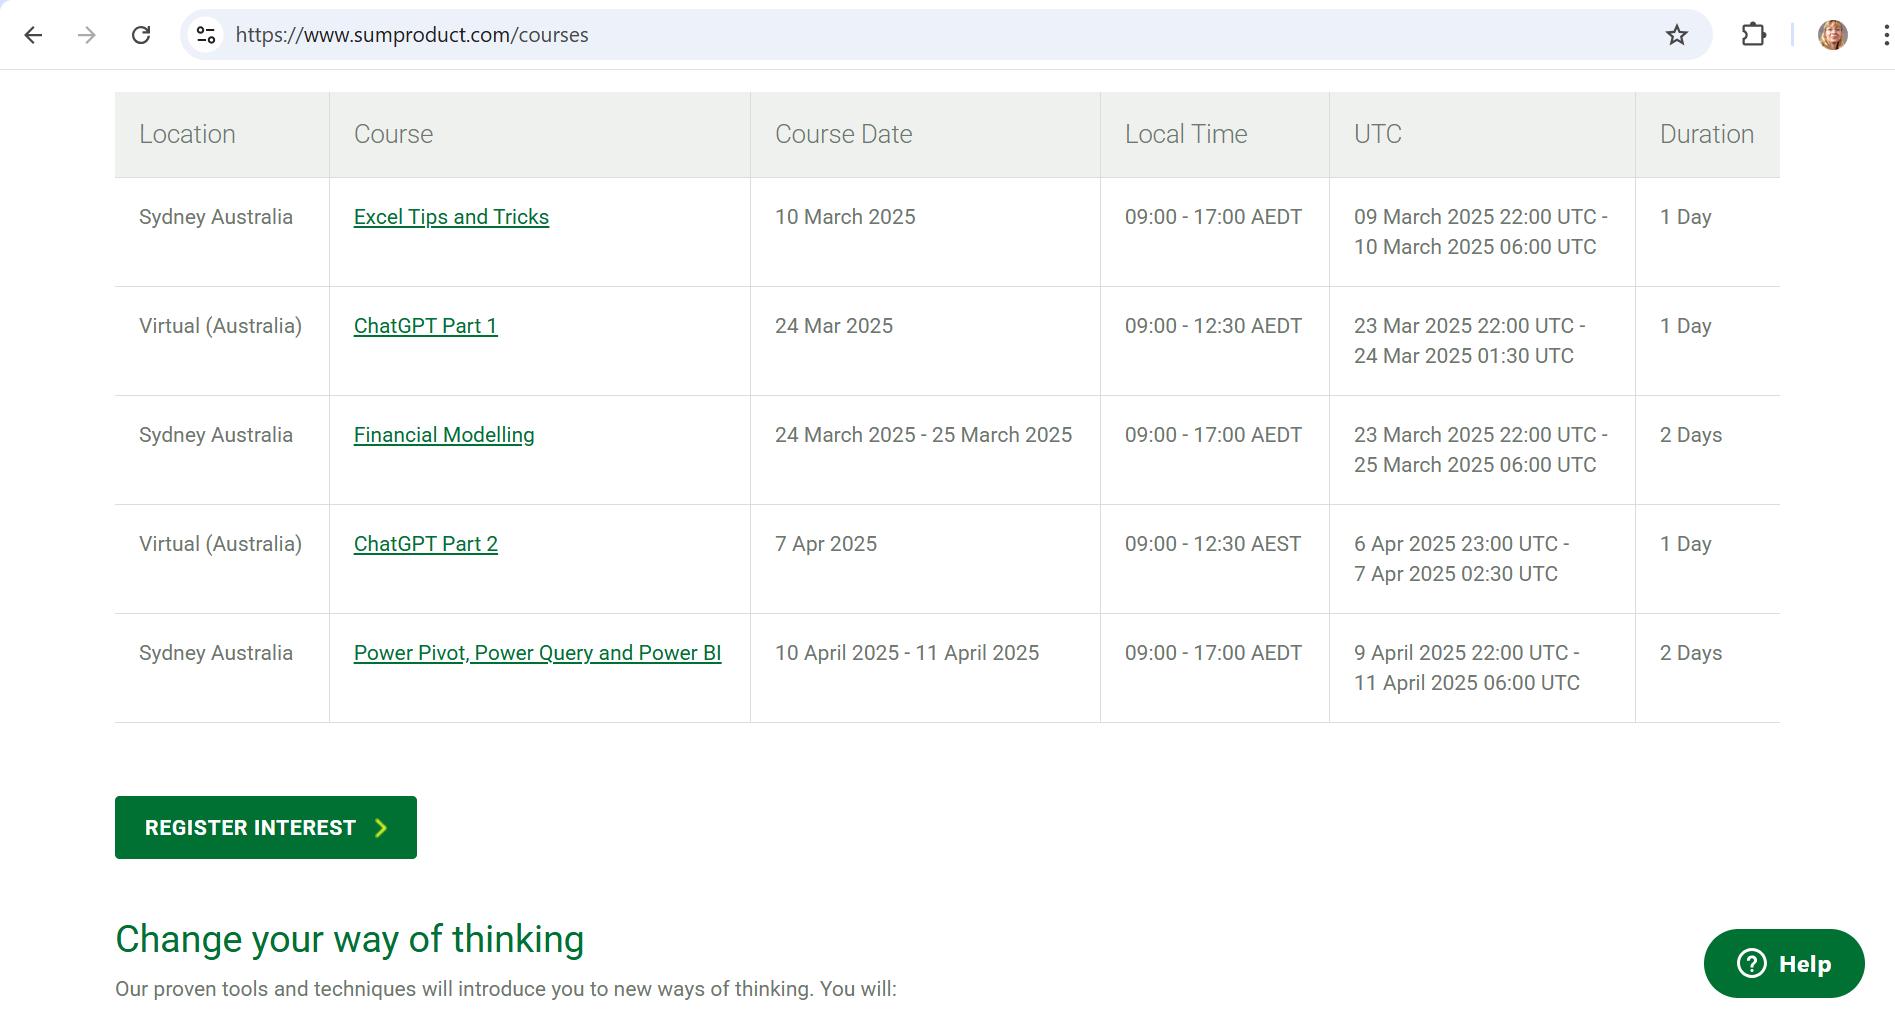
When extracting data from the web, Power Query utilises M code to access the data in a form that can be used in reports. Over the last few blogs, I have examined the M code produced. The data I used to investigate web data came from our very own website:

This page contains a table of upcoming courses, along with various buttons and text:
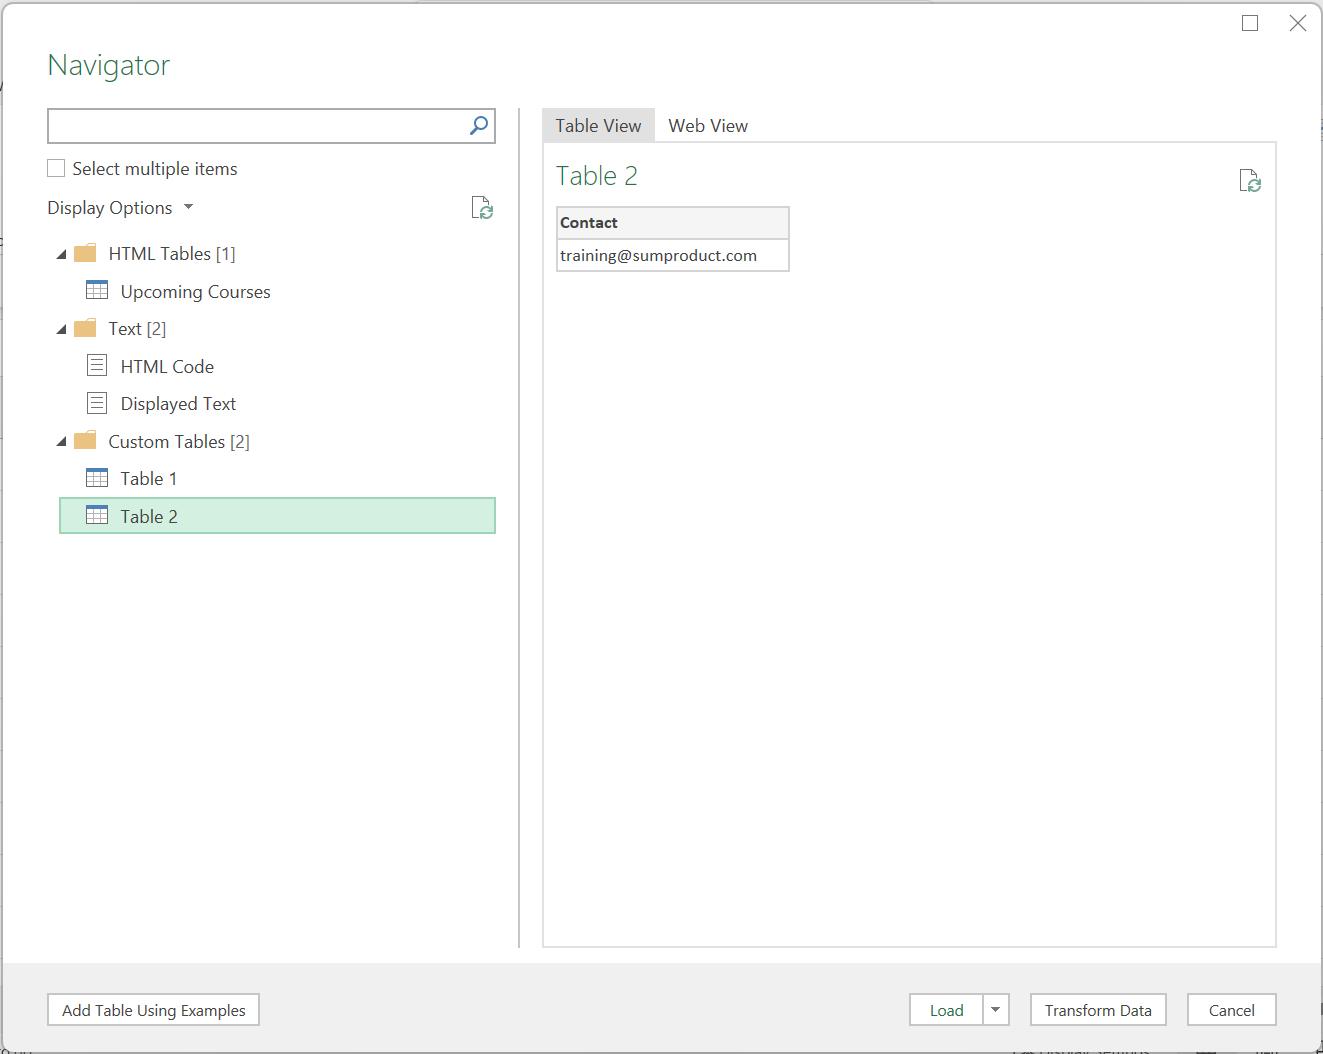
In Part 1, I used the web connector to examine the data in the Navigator dialog.

I also created more tables using the ‘Add Table Using Examples’ functionality.
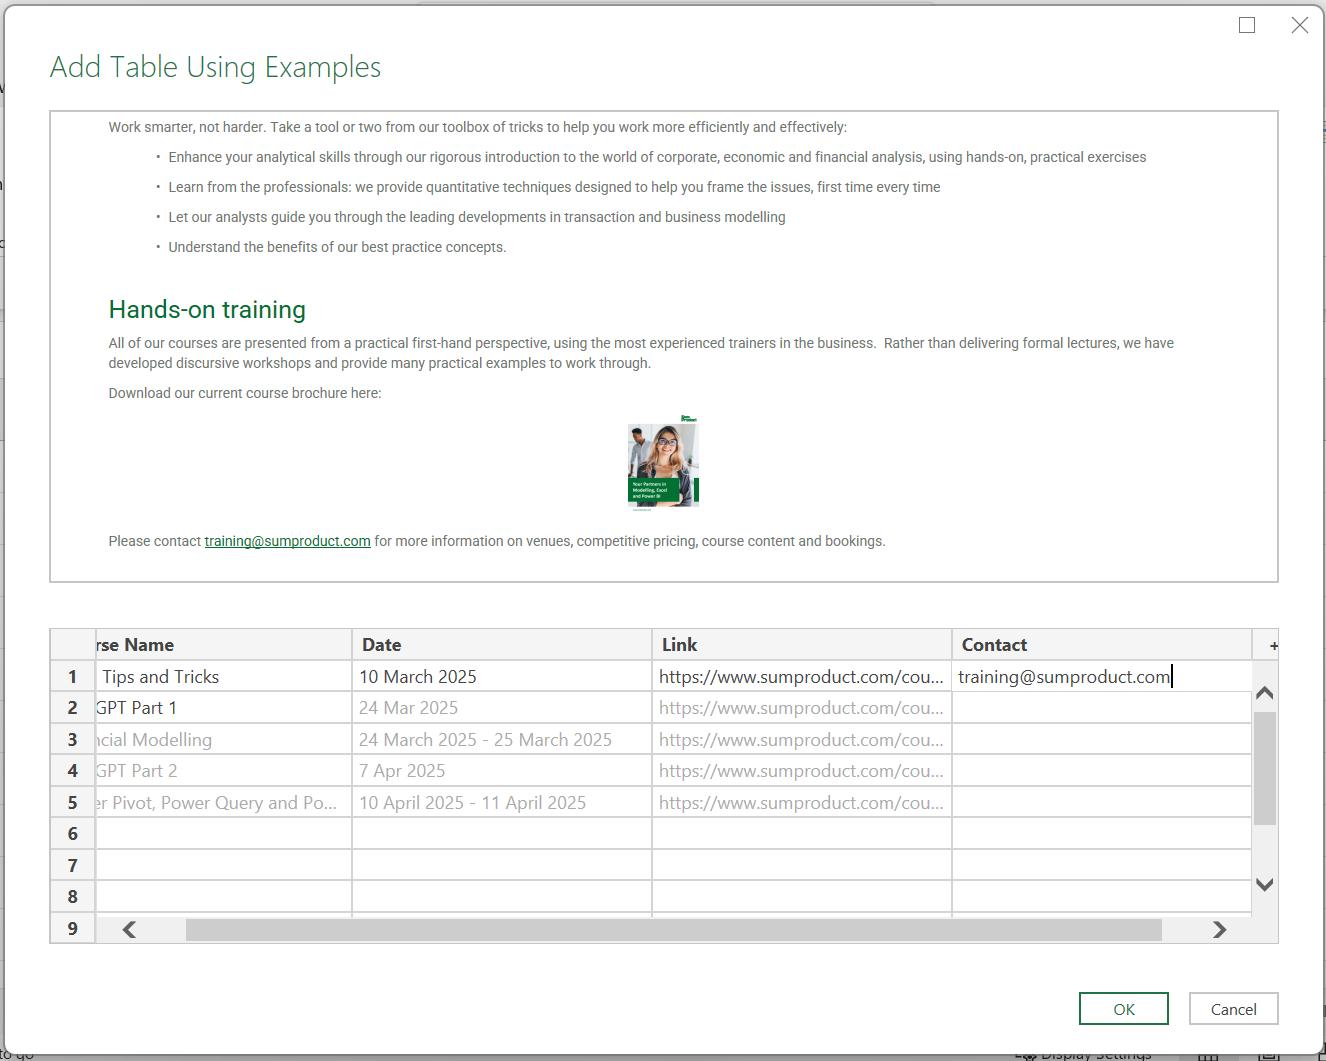
I found that I cannot combine data from inside a table and data outside of that table in the same custom table. Therefore, I added two [2] custom tables:
The training contact data has been captured in Table 2but not in Table 1. In Part 2, I loaded all the queries into the Power Query editor:
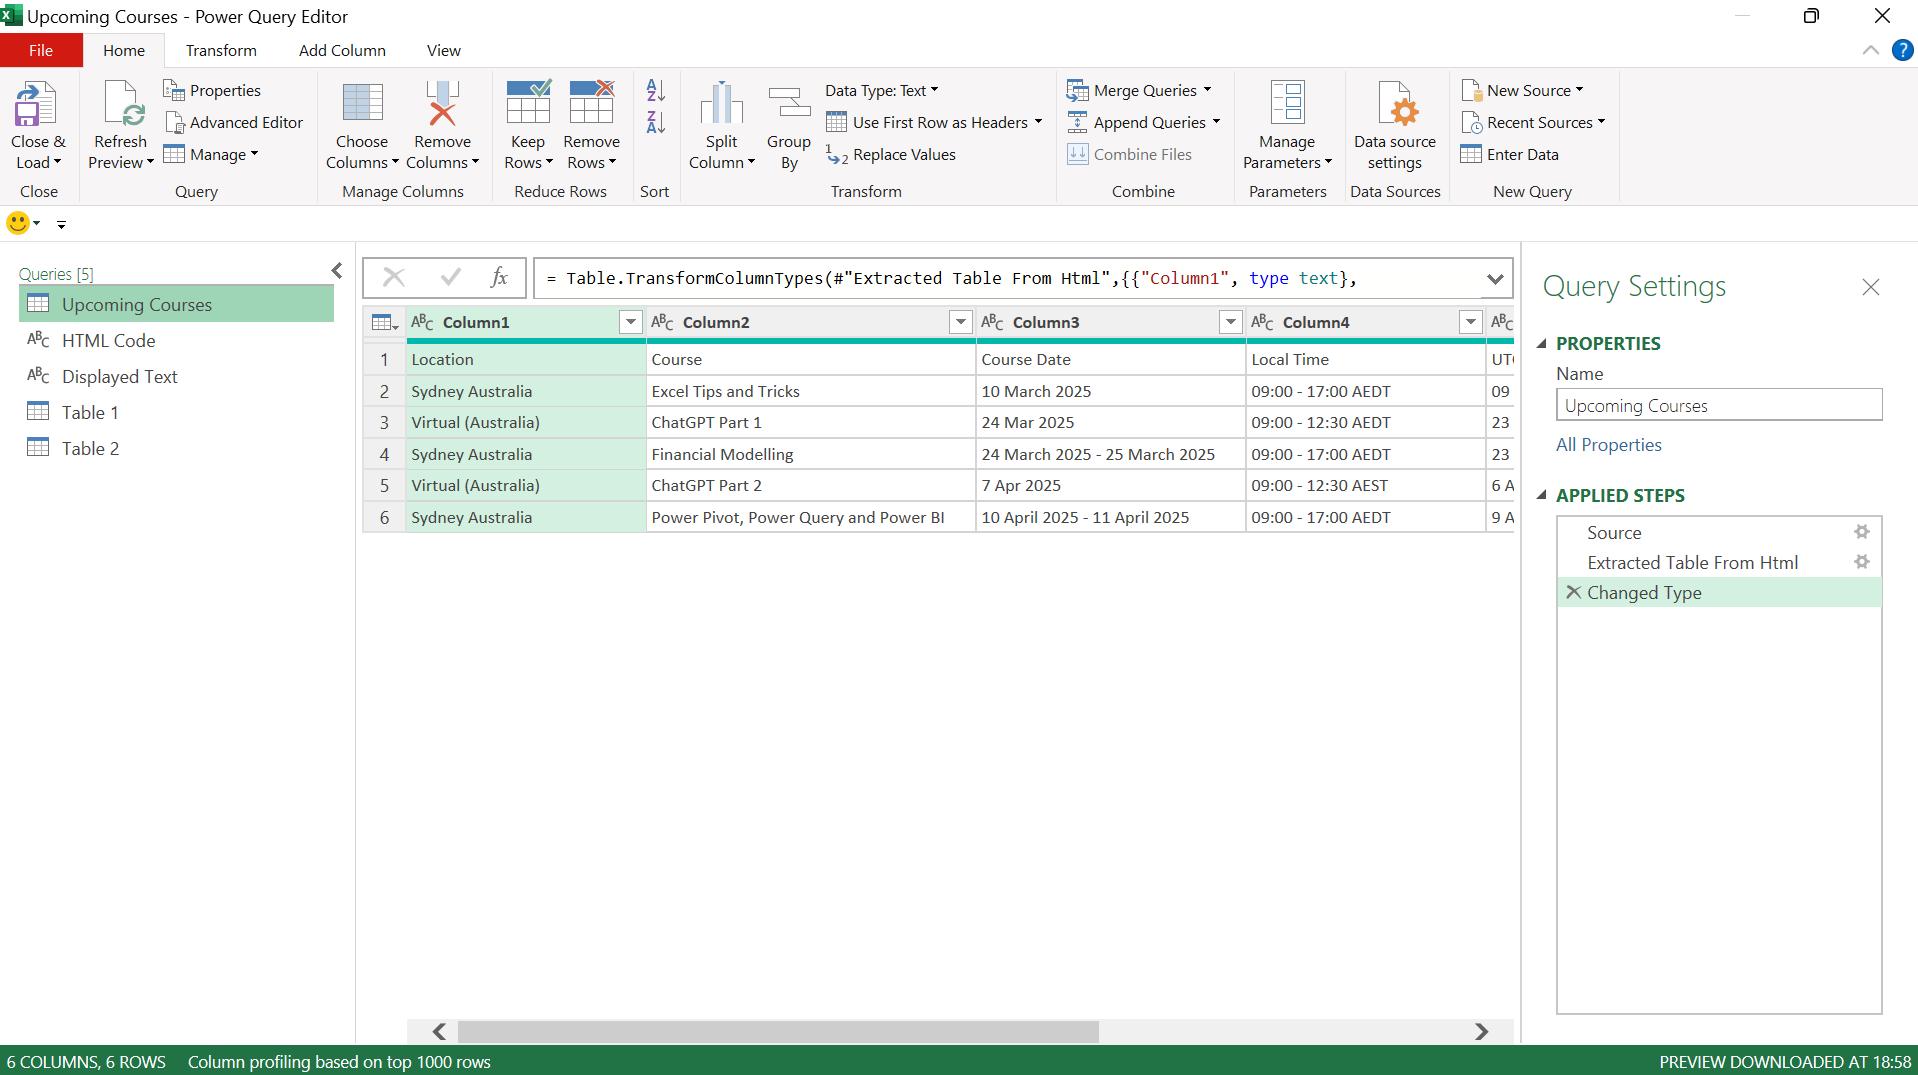
In Part 3, I looked at the M code created in Upcoming Courses, which was the table that was extracted automatically into the Navigator dialog from the webpage.
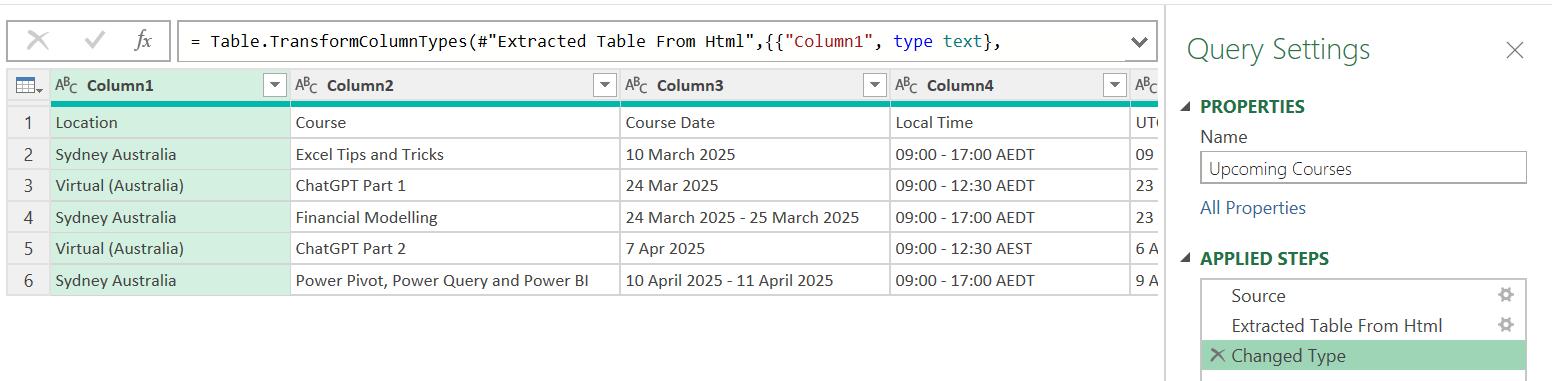
Last week, I looked at the M code generated for Table 1, which I created using ‘Add Table Using Examples’. I found that there were some differences between the M code in ‘Extracted Table From Html’ for Table 1 and the same step in Upcoming Courses.
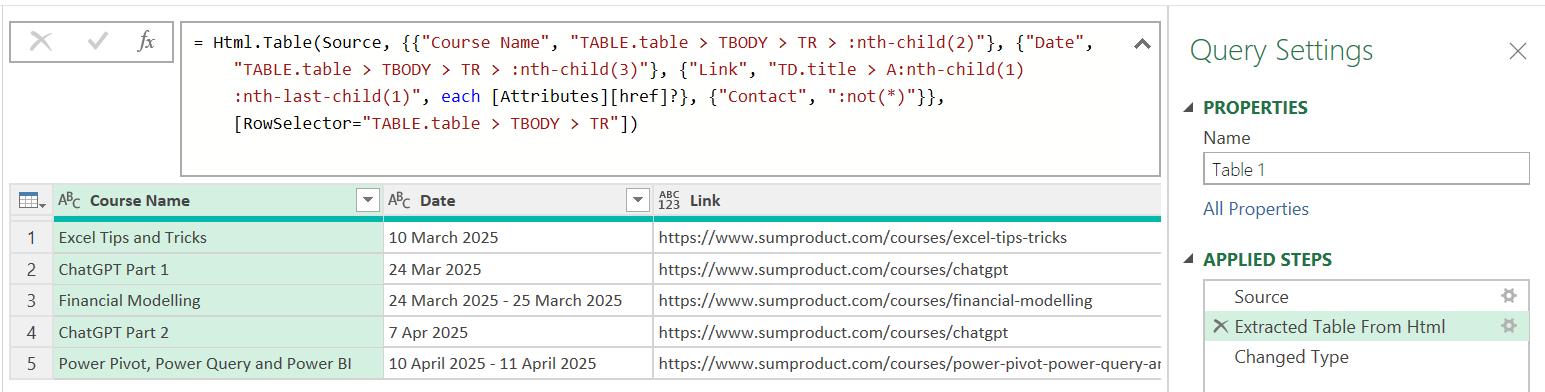
This week, I will look at the M code for the final custom table Table 2 and complete the example by combining my custom tables. As I should expect by now, the ‘APPLIED STEPS’ for Table 2 begin with the same ‘Source’ step as my other web queries, followed by an ‘Extracted Table From Html’ step. As for Table 1, this step extracts the data I specified when creating Table 2:
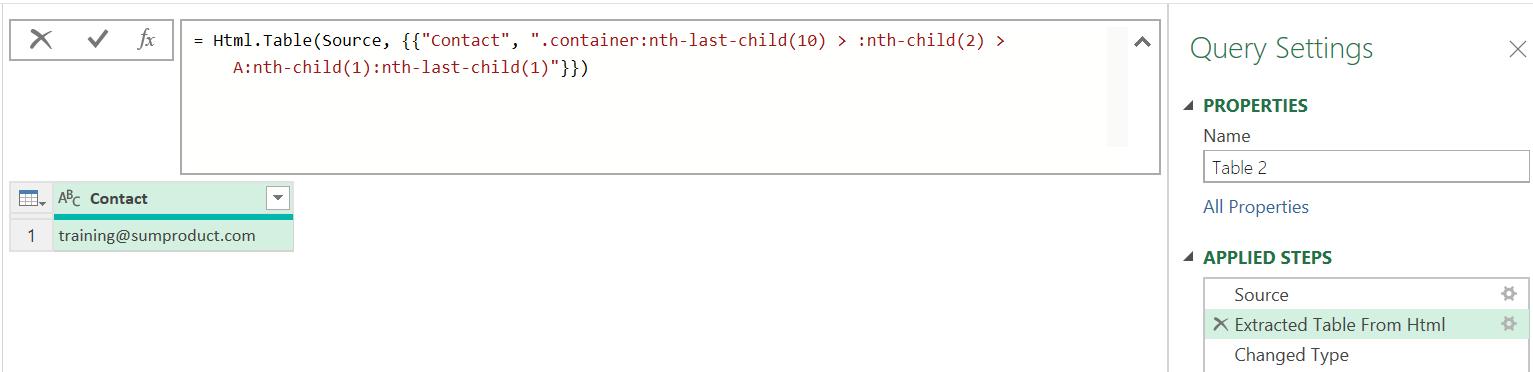
This M code is simpler than it was for Upcoming Courses and Table 1 since I am only selecting one data item:
= Html.Table(Source, {{"Contact", ".container:nth-last-child(10) > :nth-child(2) > A:nth-child(1):nth-last-child(1)"}})
Let’s compare this to the same step for Table 1:
= Html.Table(Source, {{"Course Name", "TABLE.table > TBODY > TR > :nth-child(2)"}, {"Date", "TABLE.table > TBODY > TR > :nth-child(3)"}, {"Link", "TD.title > A:nth-child(1):nth-last-child(1)", each [Attributes][href]?}, {"Contact", ":not(*)"}}, [RowSelector="TABLE.table > TBODY > TR"])
Since the contact information is not in the HTML table, instead of getting table data (TABLE.table etc.) the .container tag is used. The container tag is used to group elements on a webpage. The remainder of the HTML for Table 2 is locating the data for the contact information. Note also that since I am not extracting data from the HTML table, the RowSelector values are not specified in the optional optionsparameter of Html.Table().
Since the M function Html.Table() returns a table, this gives me a table with a single column: Contact:
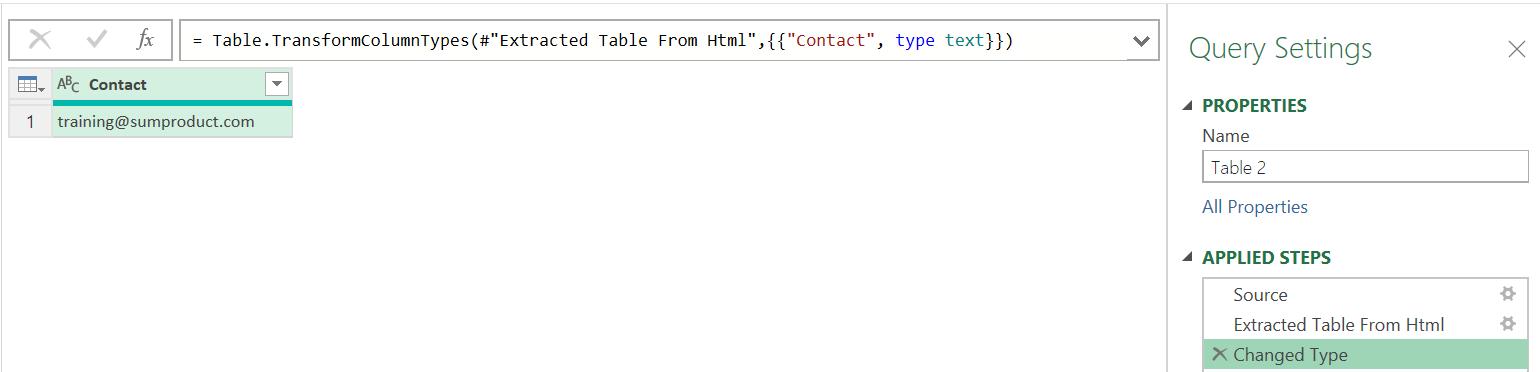
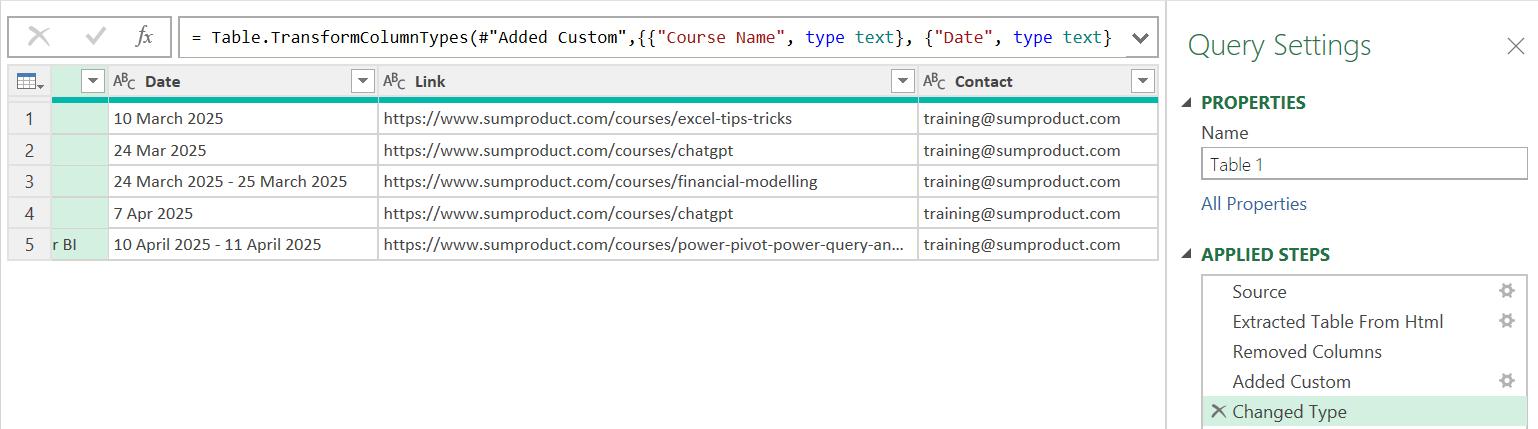
Since the data type had already been established as Text in the ‘Extracted Table From Html’ step, I may remove the superfluous ‘Changed Type’ step.
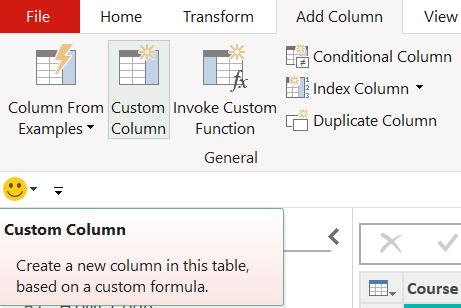
All that remains for this example is to combine the data in Table 1 and Table 2, since ideally I would have extracted this as one table. As is often the case with Power Query, there are several ways I could achieve this. I decide to leave Table 2 as it is and pull the data into Table 1. I delete the existing Contact column, and create a custom column instead from the ‘Custom Column’ option in the ‘Add Column’ tab:
I may access the data from Table 2 by accessing the first row:
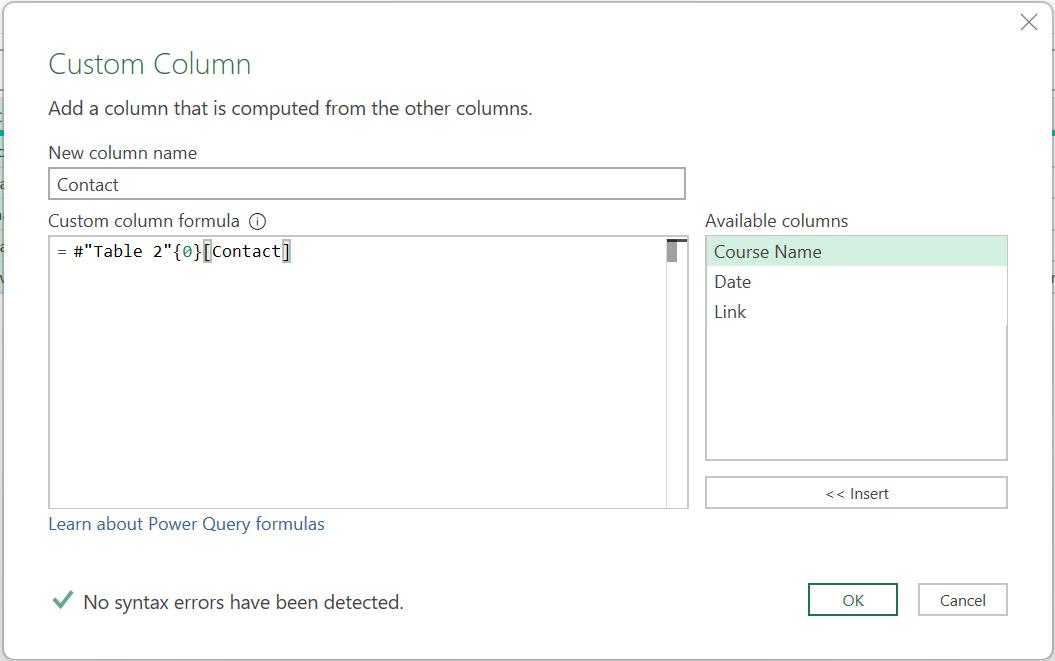
This extracts the Contact column from the first row of Table 2:
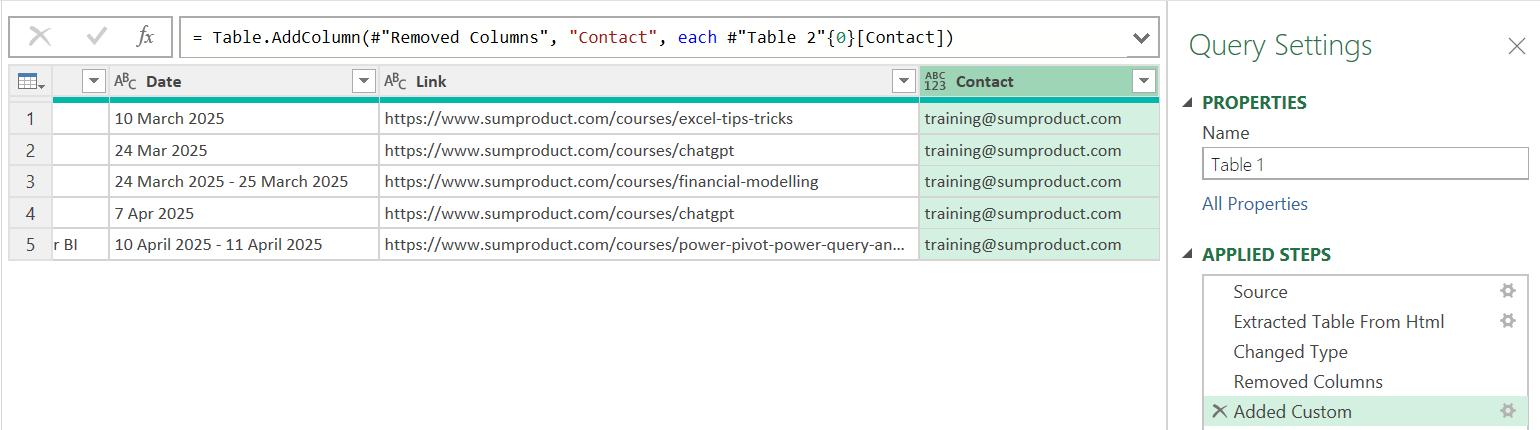
Since the data type has defaulted to Any for the new column I could add another ‘Changed Type’ step. However, since I have replaced the Contact column, and all the other columns are still present, I should be able to move the existing ‘Changed Type’ step down to the end of my query by clicking on and dragging the step, or by right-clicking on the step and choosing to ‘Move after’ (twice):
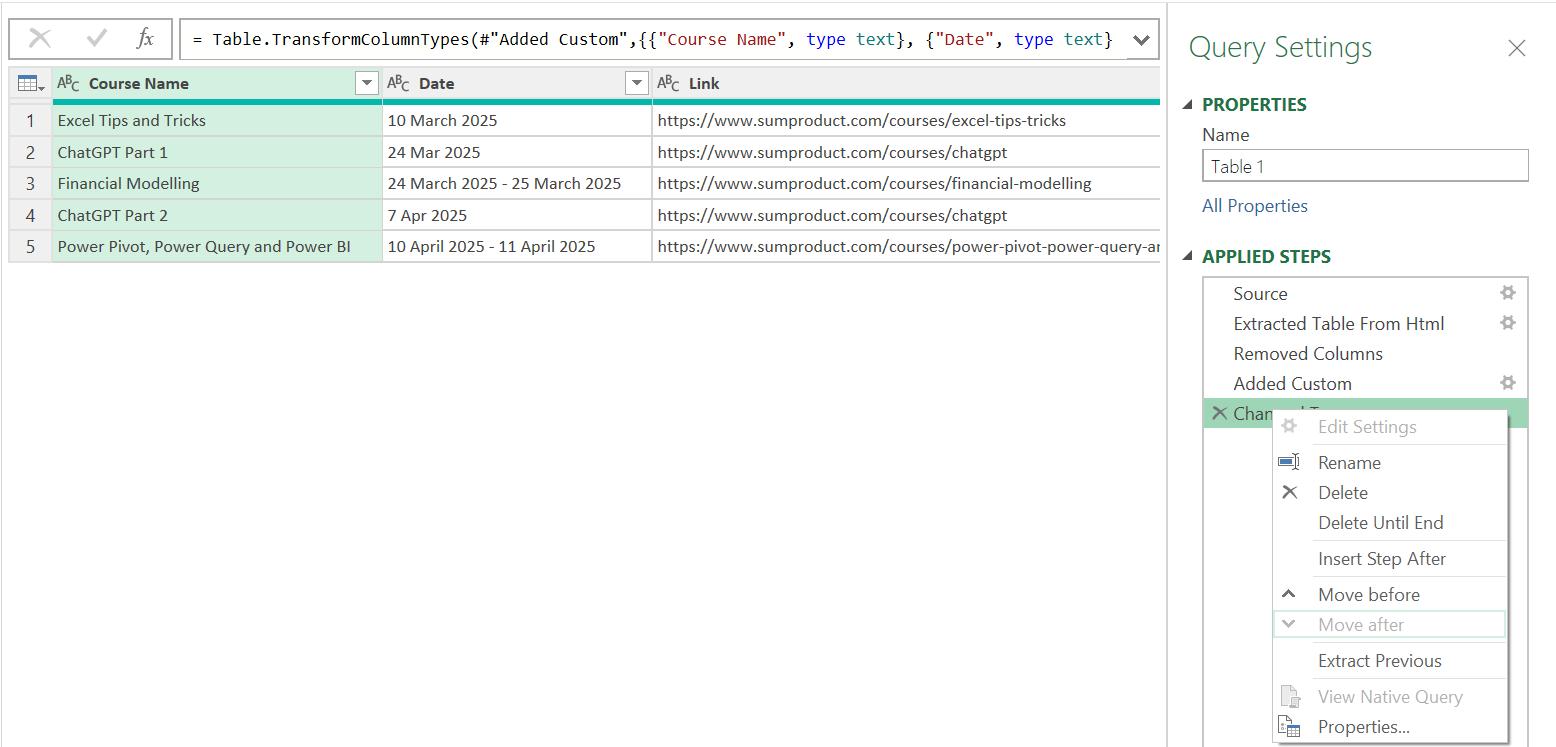
This has now changed the data type of the Contact column to Text:
Come back next time for more ways to use Power Query!