Power Query: Steps to Take – Part 1
14 September 2022
Welcome to our Power Query blog. This week, I am going to look at a worked example.
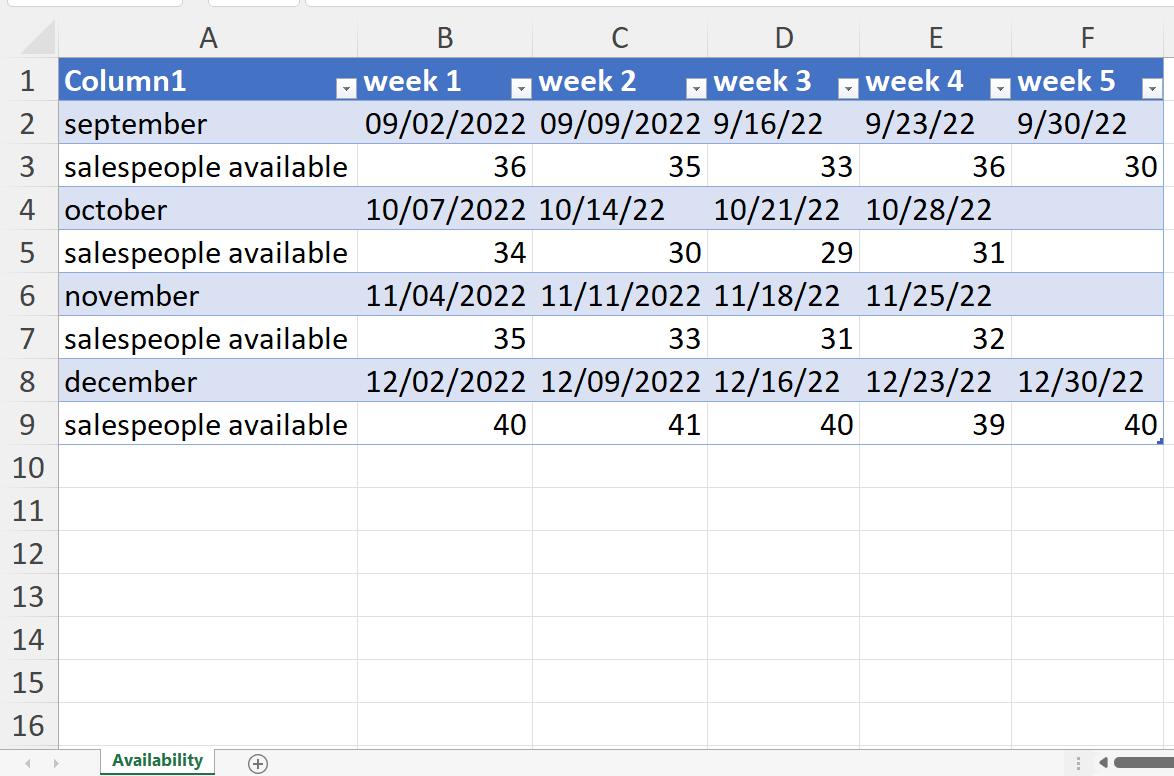
The tent business has a new administrative assistant, who used to work in the United States. George has provided some information, but it’s not yet in a format I can use:
I start in the usual way, by choosing ‘From Table/Range’ in the ‘Get & Transform’ section of the Data tab. This gives me my initial query:

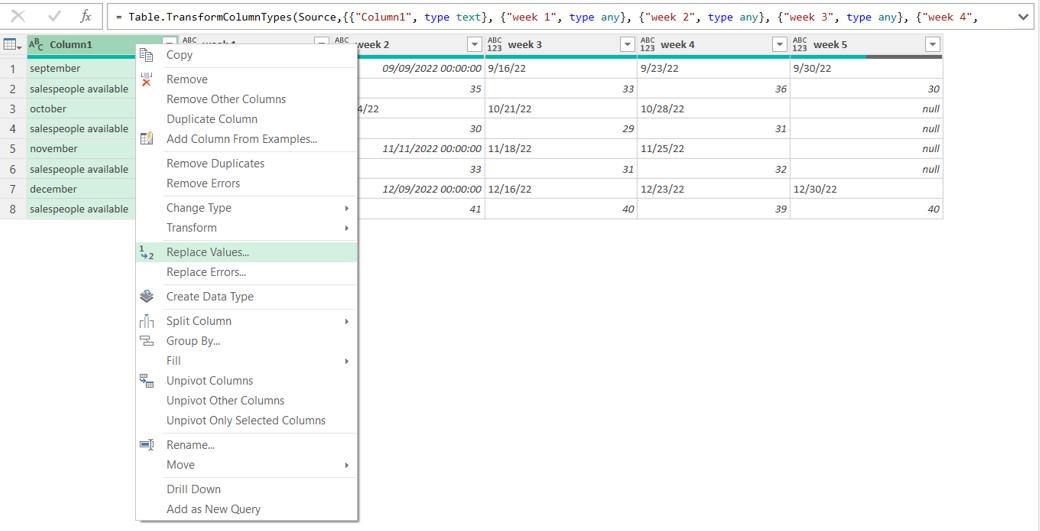
There are of course many ways I can transform this data, but I will begin by establishing a link so that I can keep track of which rows relate to each other. I commence by right-clicking on Column1, and choosing to ‘Replace Values’:
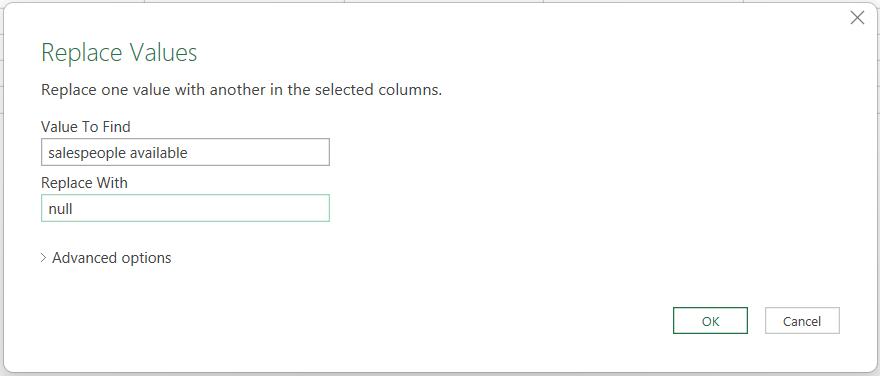
The phrase ‘salespeople available’ is no use to me, so I replace this value with null.
I can now choose ‘Fill’ and then ‘Down’ from the right-click menu for Column1.
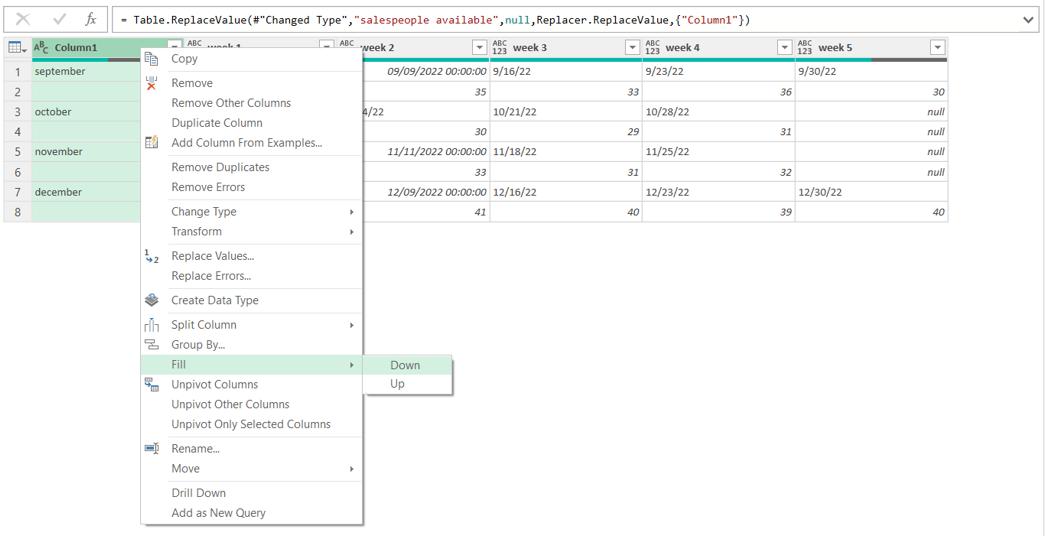
My rows are now linked by month; I rename the column Month for clarity.

I rename this query Base. I then make a Reference copy of Base.
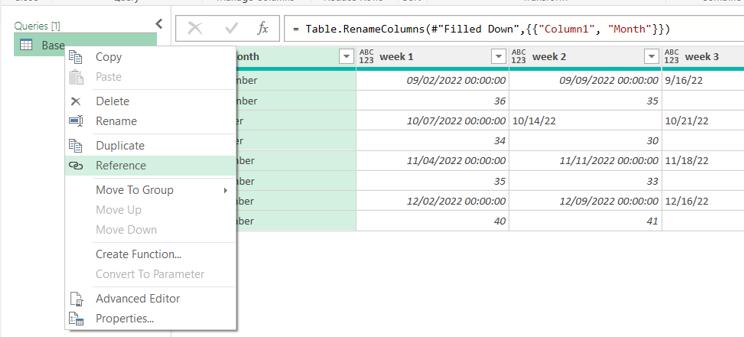
I call this query Quantities. I only want the rows pertaining to quantities. I would like to use text filters, but to do this I need to change the data type of week 1 to Text:

If I click on the filter arrow next to the title, I can use the ‘Does Not Contain’ filter:
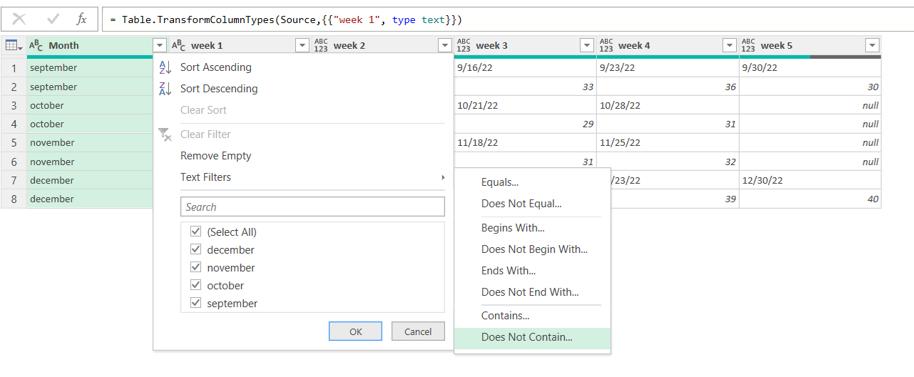
I select those rows that don’t contain a forward slash (/).
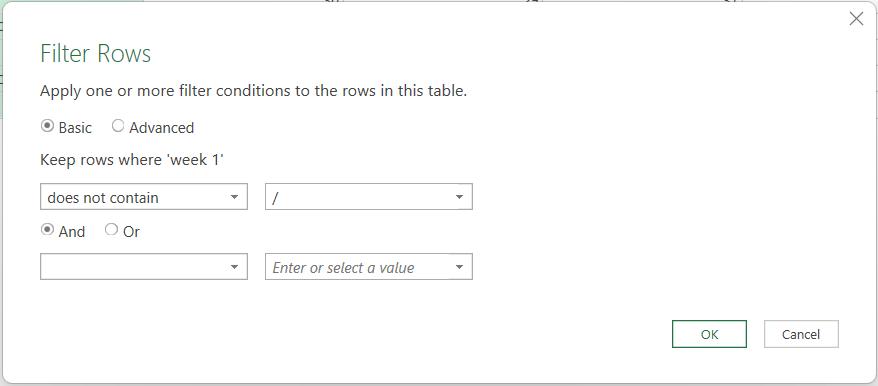
This gives me the rows pertaining to quantity only.

Next time, I will create another query for the date information.
Come back next time for more ways to use Power Query!

