Power Query: Unlimited Importing of Non-Delimited Text Files
10 March 2017
Welcome to our Power Query blog. Today I look at importing data from non-delimited text files.
As a programmer, I was often asked to produce delimited versions of reports which could easily be picked up by Excel. Whilst it is possible to clean non-delimited files in Excel, it’s a laborious and repetitive process, which is why it made more sense to pay for a programmer to automate it. Power Query is a free method of cleaning up these files, and since the steps are recorded, it can be reapplied.
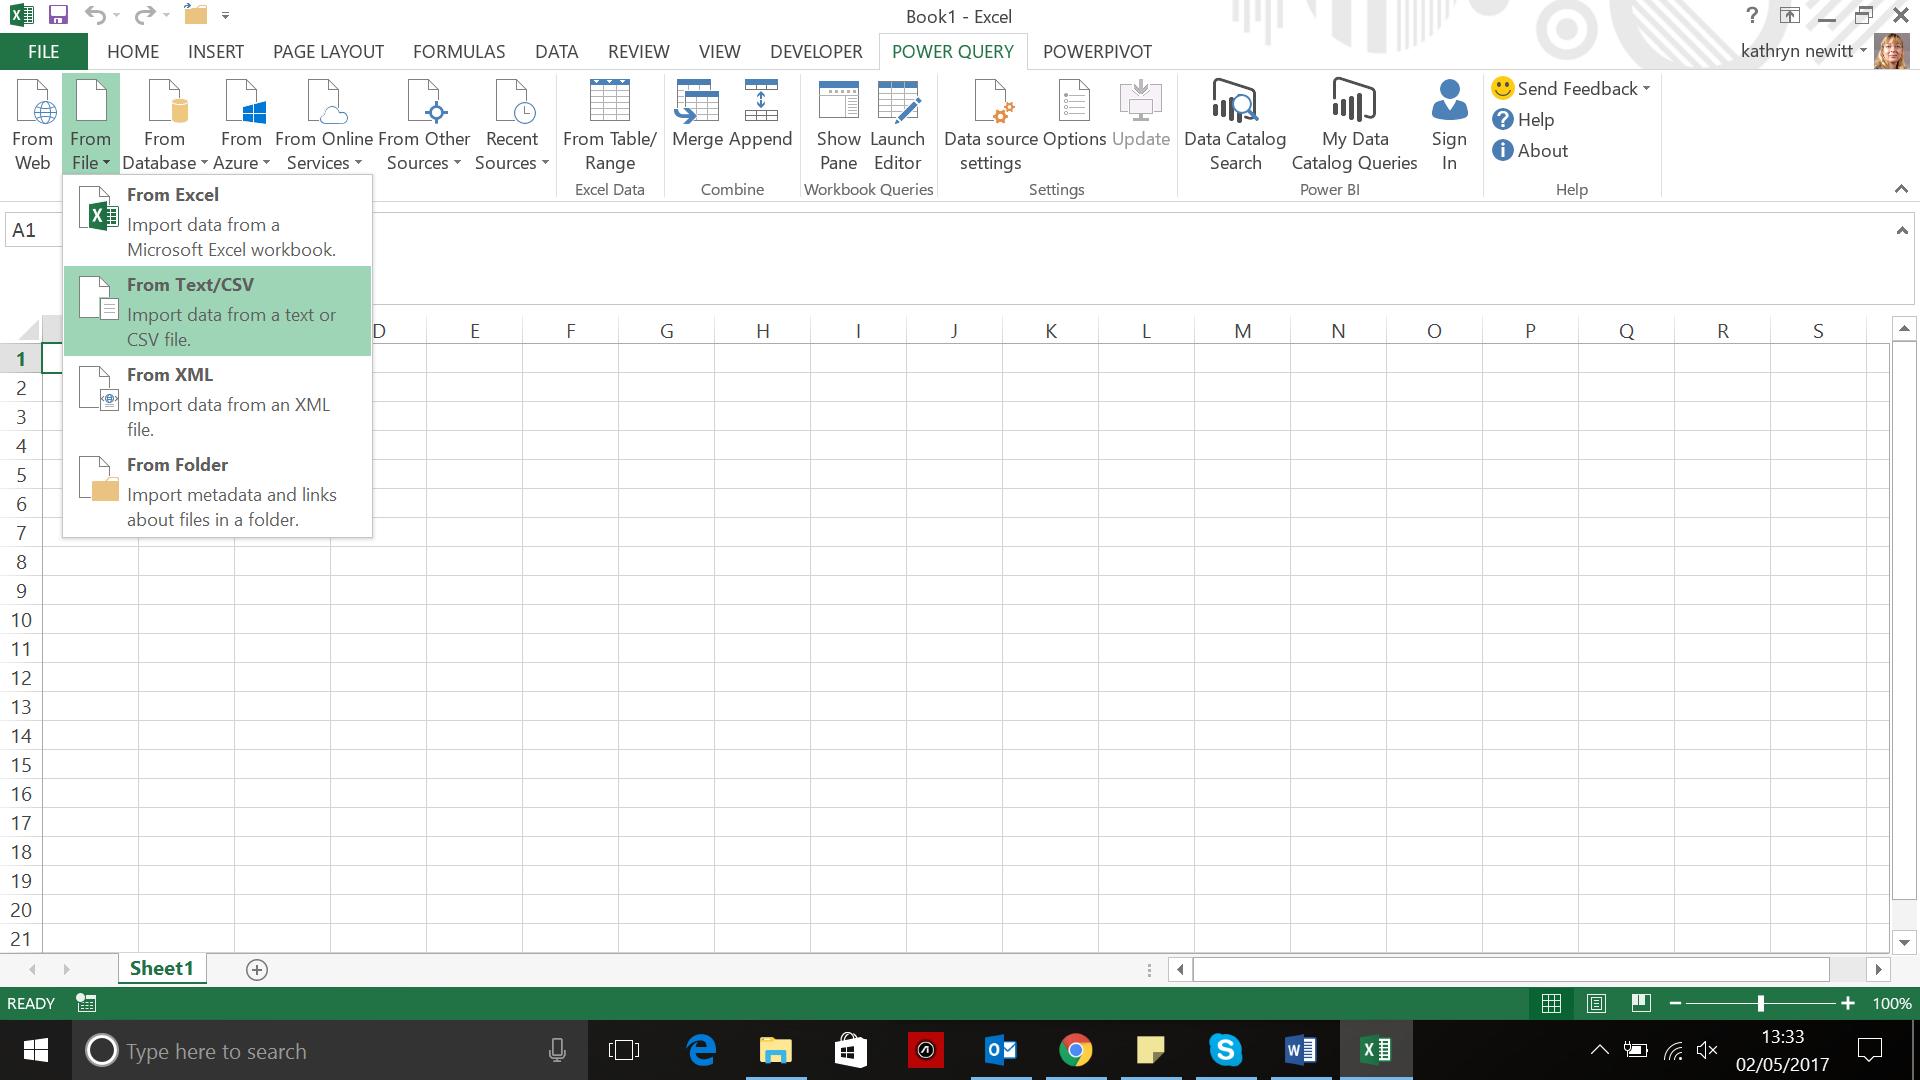
I begin by creating a new query from my file, as shown below:
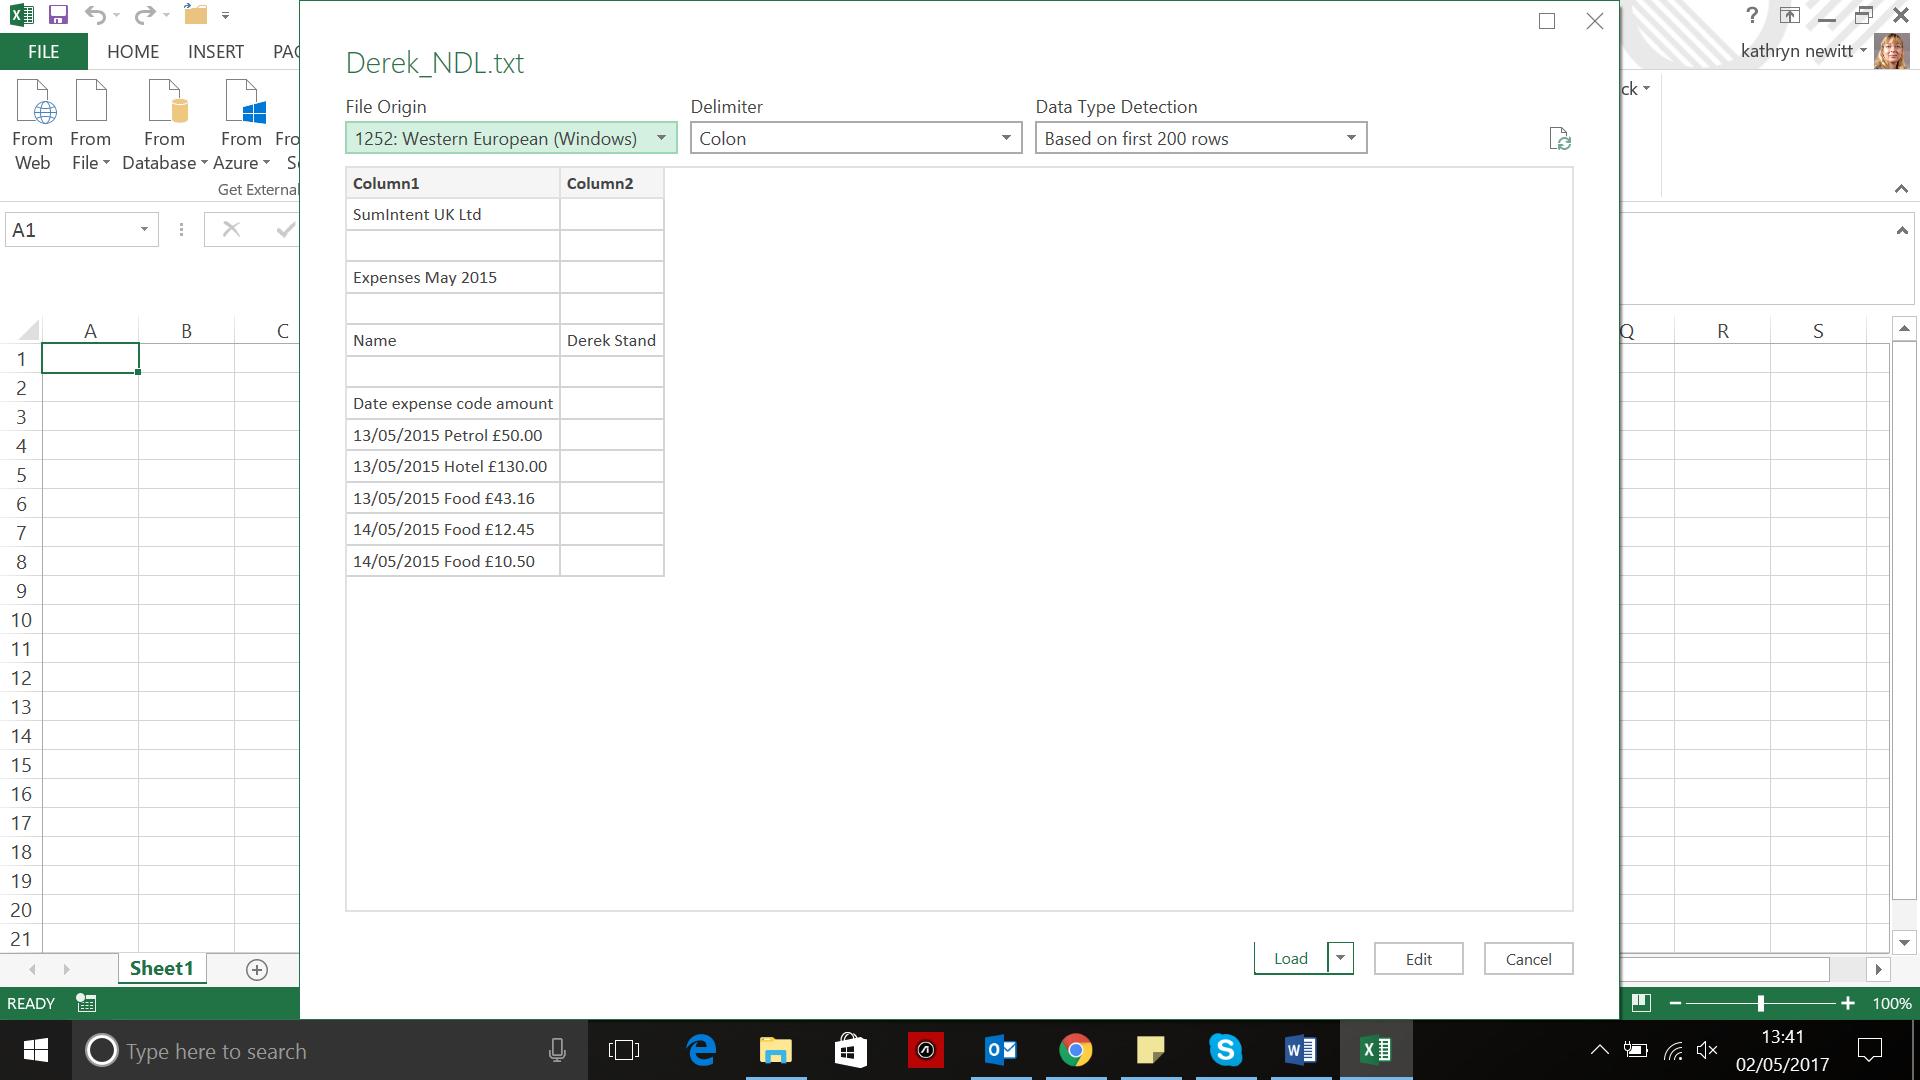
I browse to my file and select it. Power Query has had a valiant effort at delimiting my data as there happened to be a colon between the ‘Name’ title and the name, but most of it is in one column. My goal is to split the data into more columns.
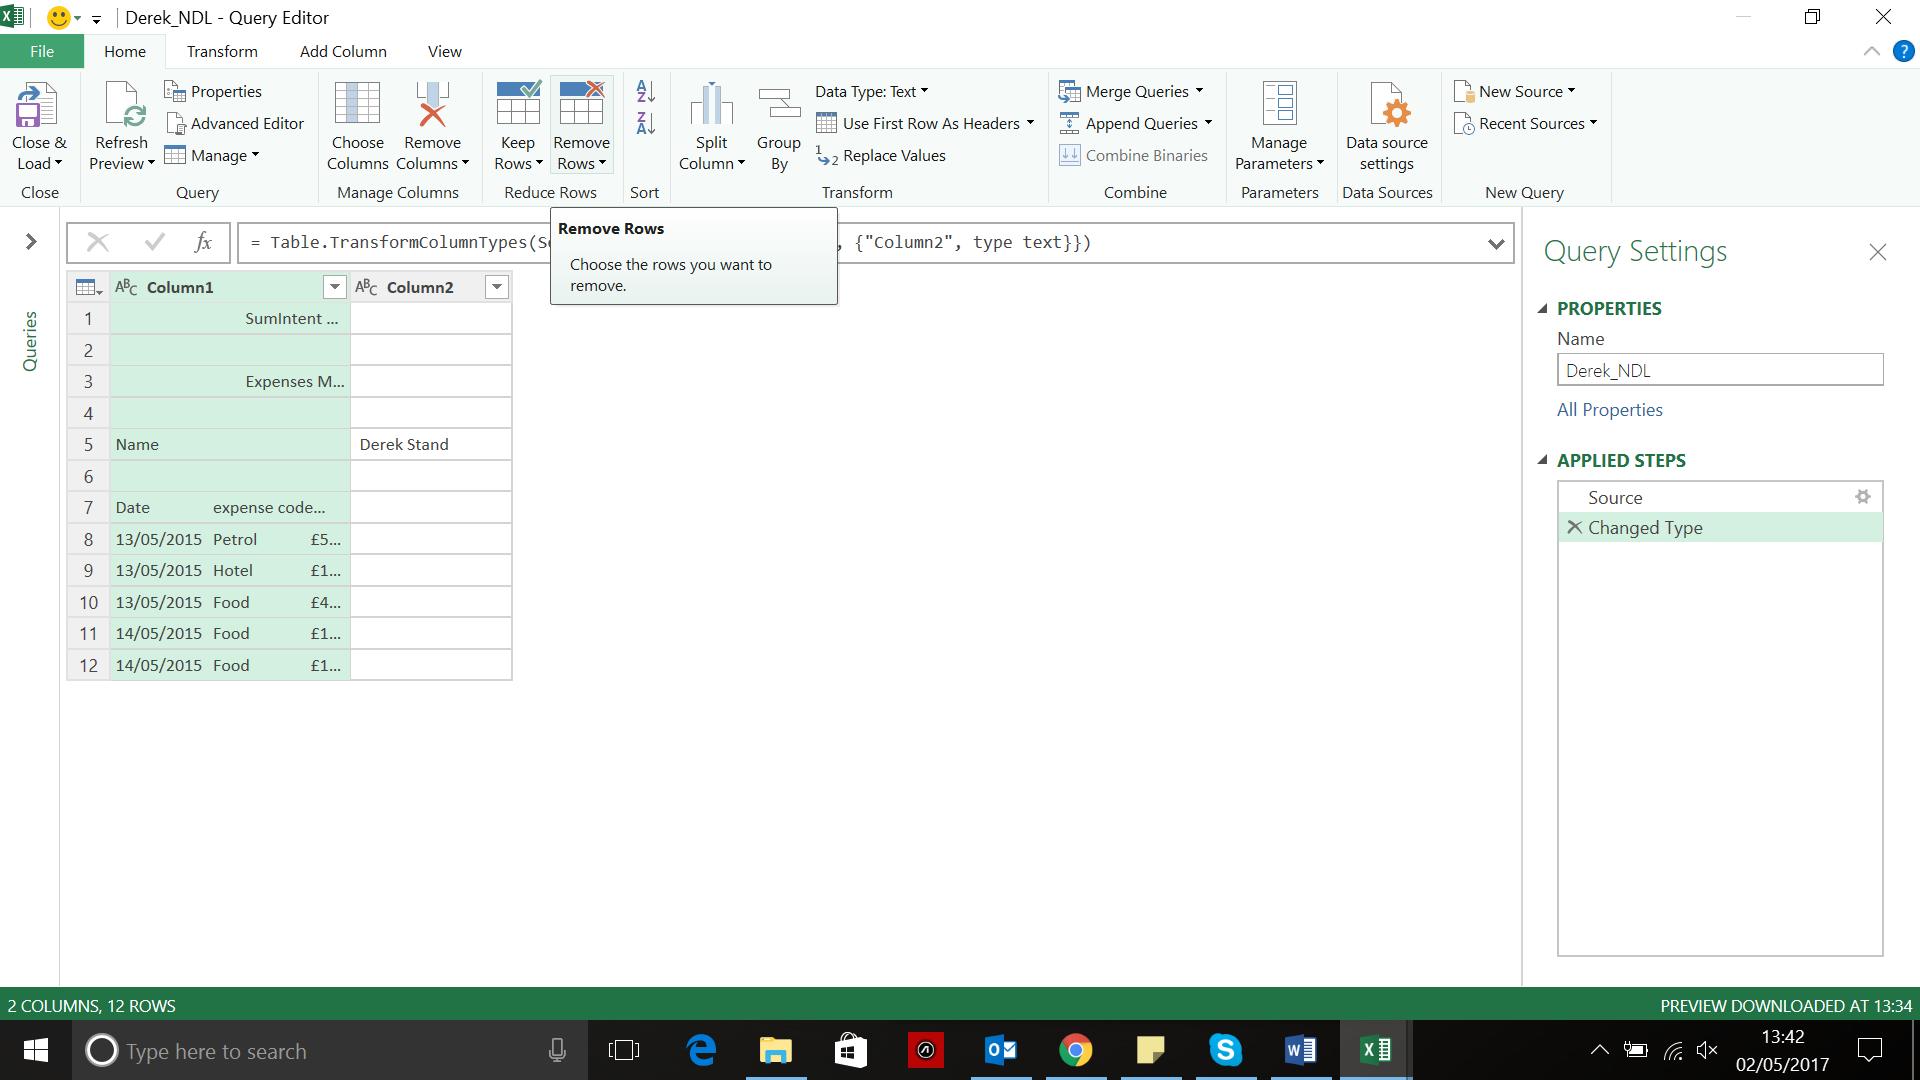
The first four rows don’t include any data I want, so I am going to edit and get rid of these. In the ‘Home’ tab, there is a section to do just this:
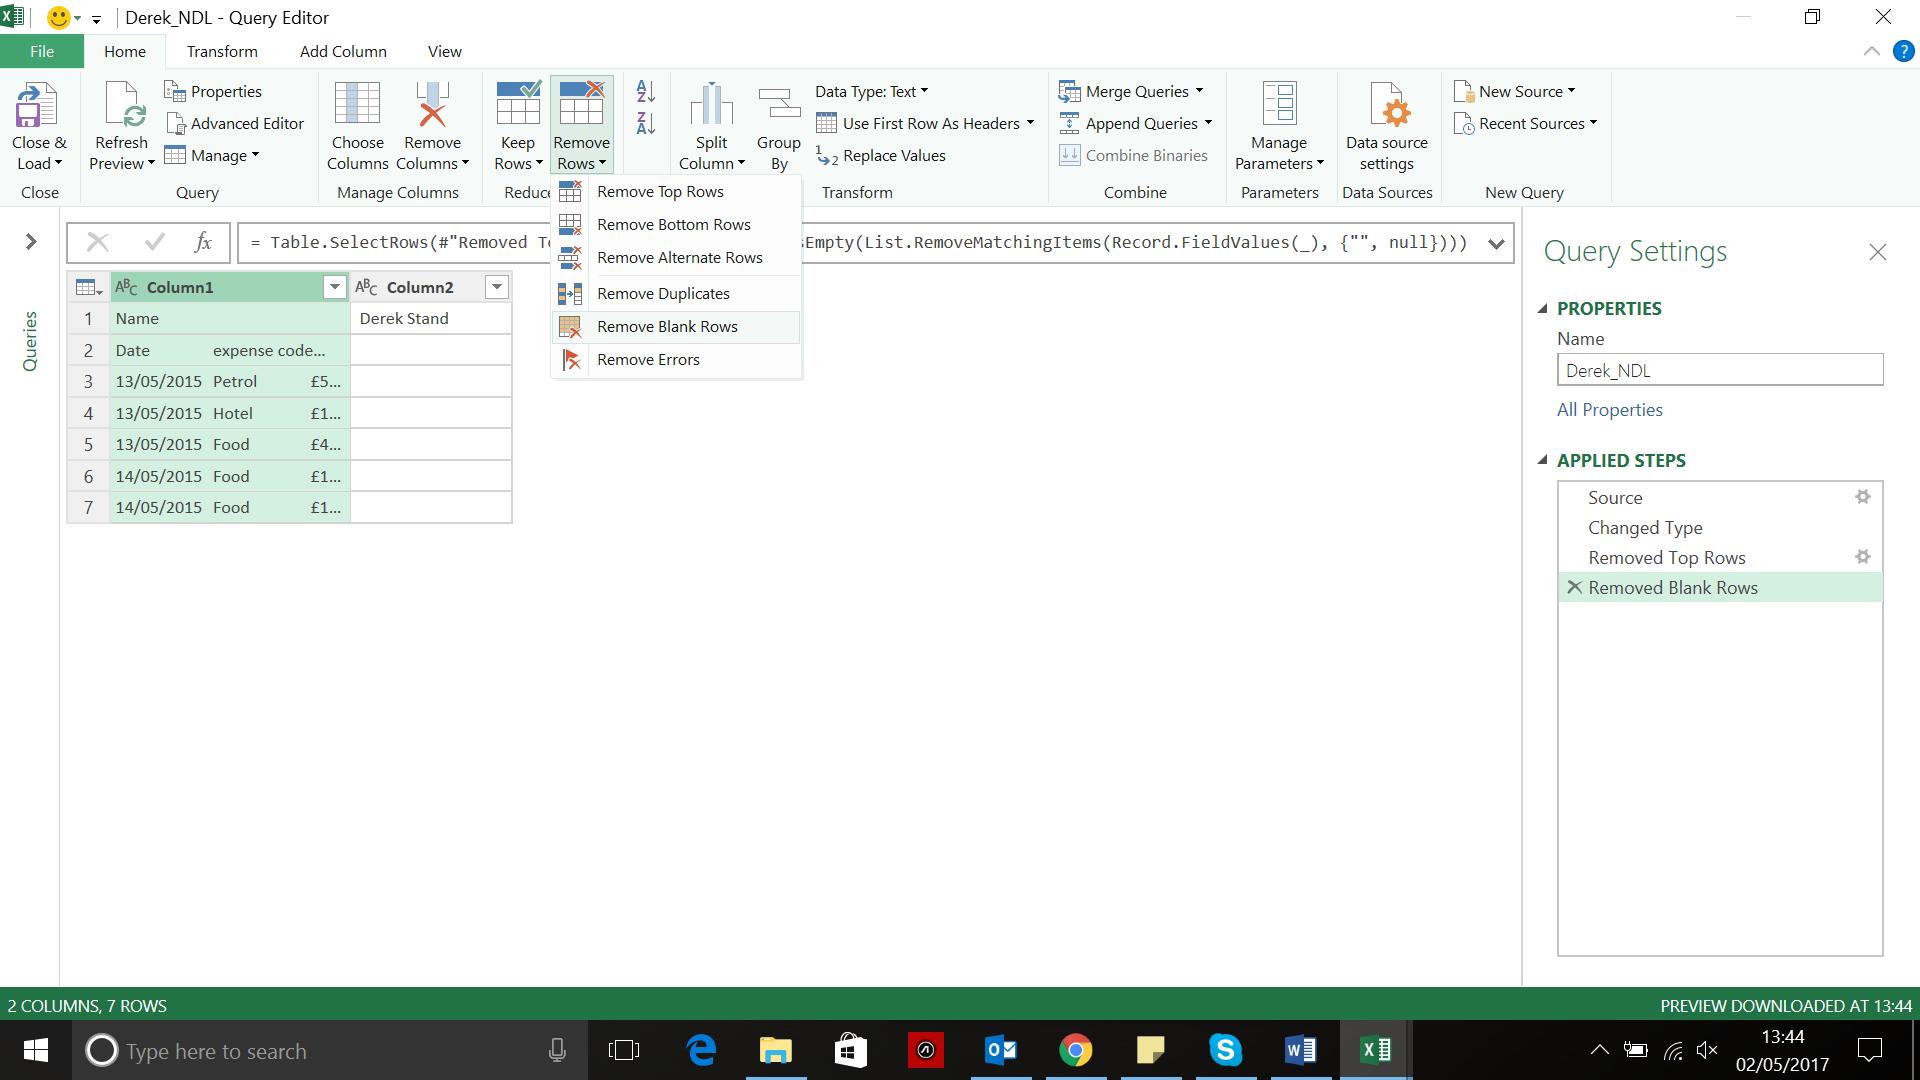
I remove the first four rows and then the blank row after the Name row. I could have done this in one step by just removing the blank rows, as shown below:
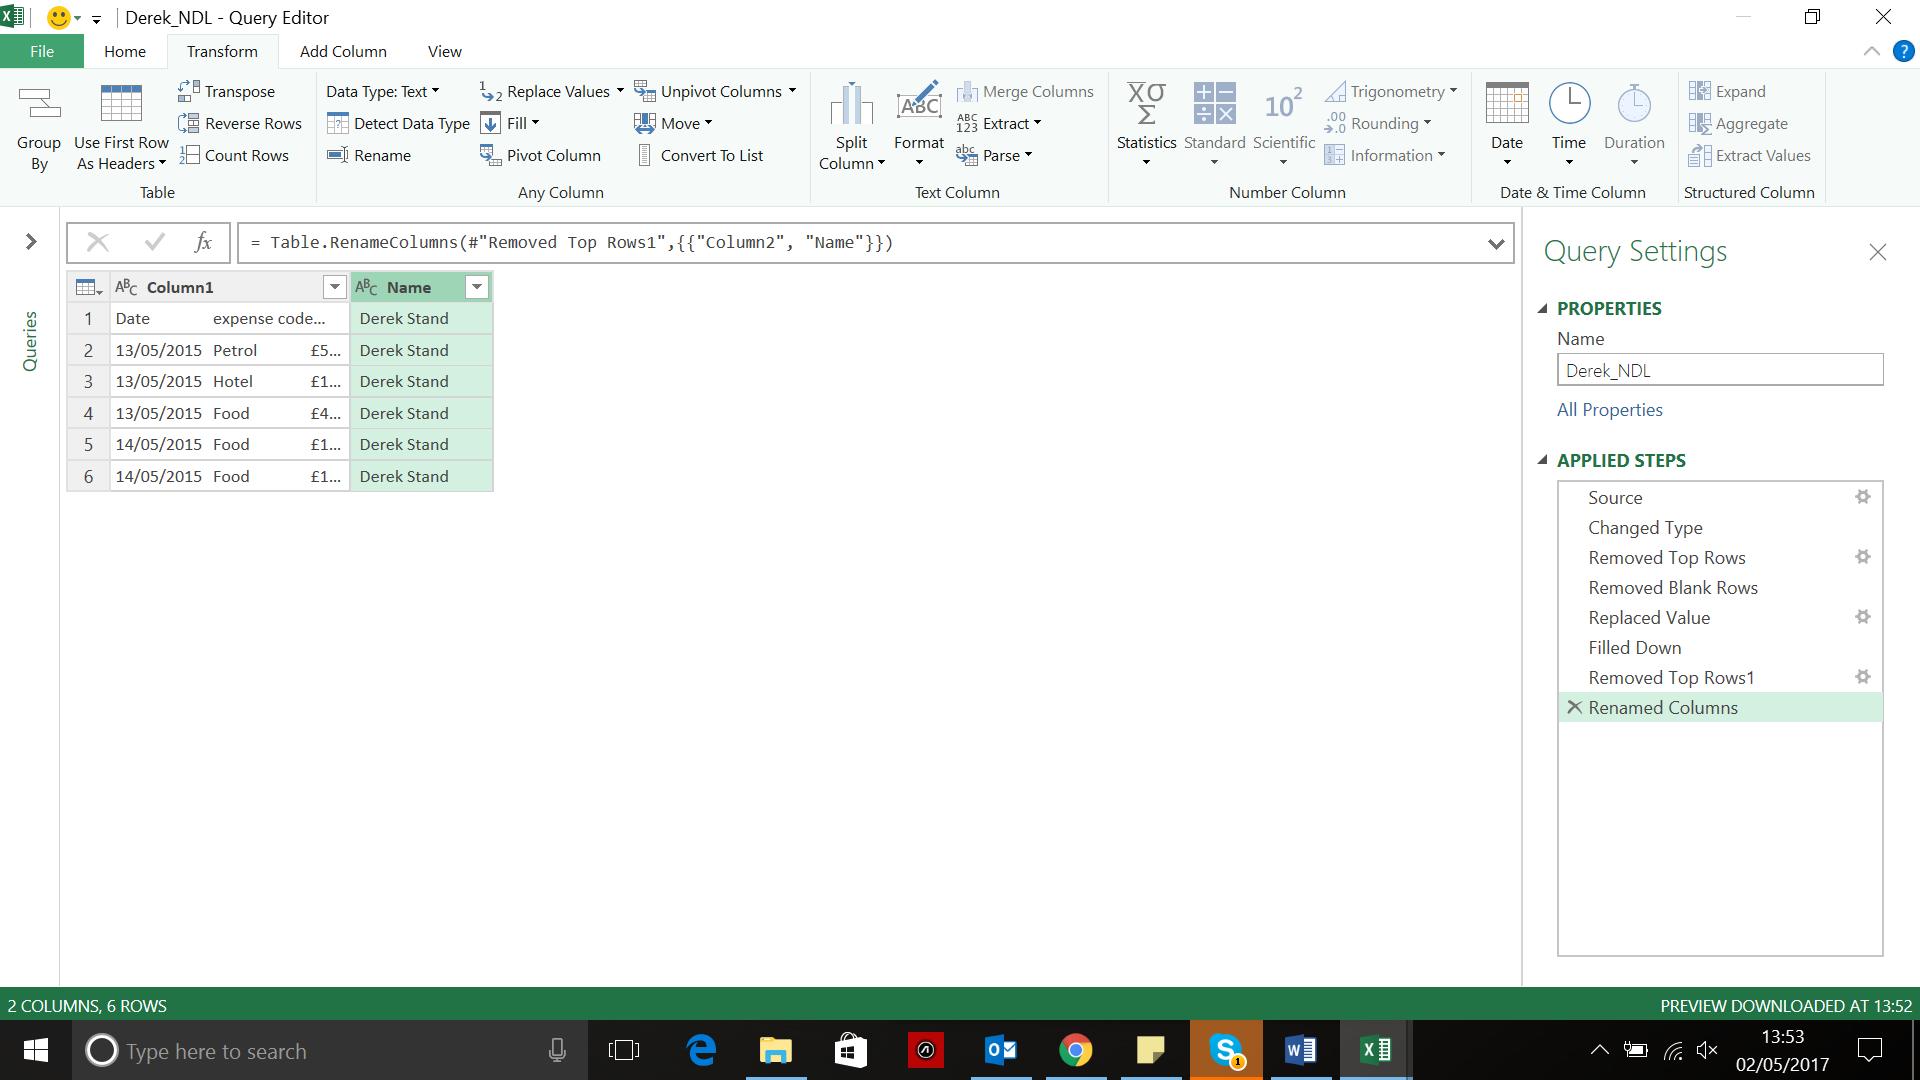
Now I want to populate Column2 all the way down. I described this process in detail in Getting Started where I replace the blank names with null and then fill down. I can then remove the first row and rename the column:
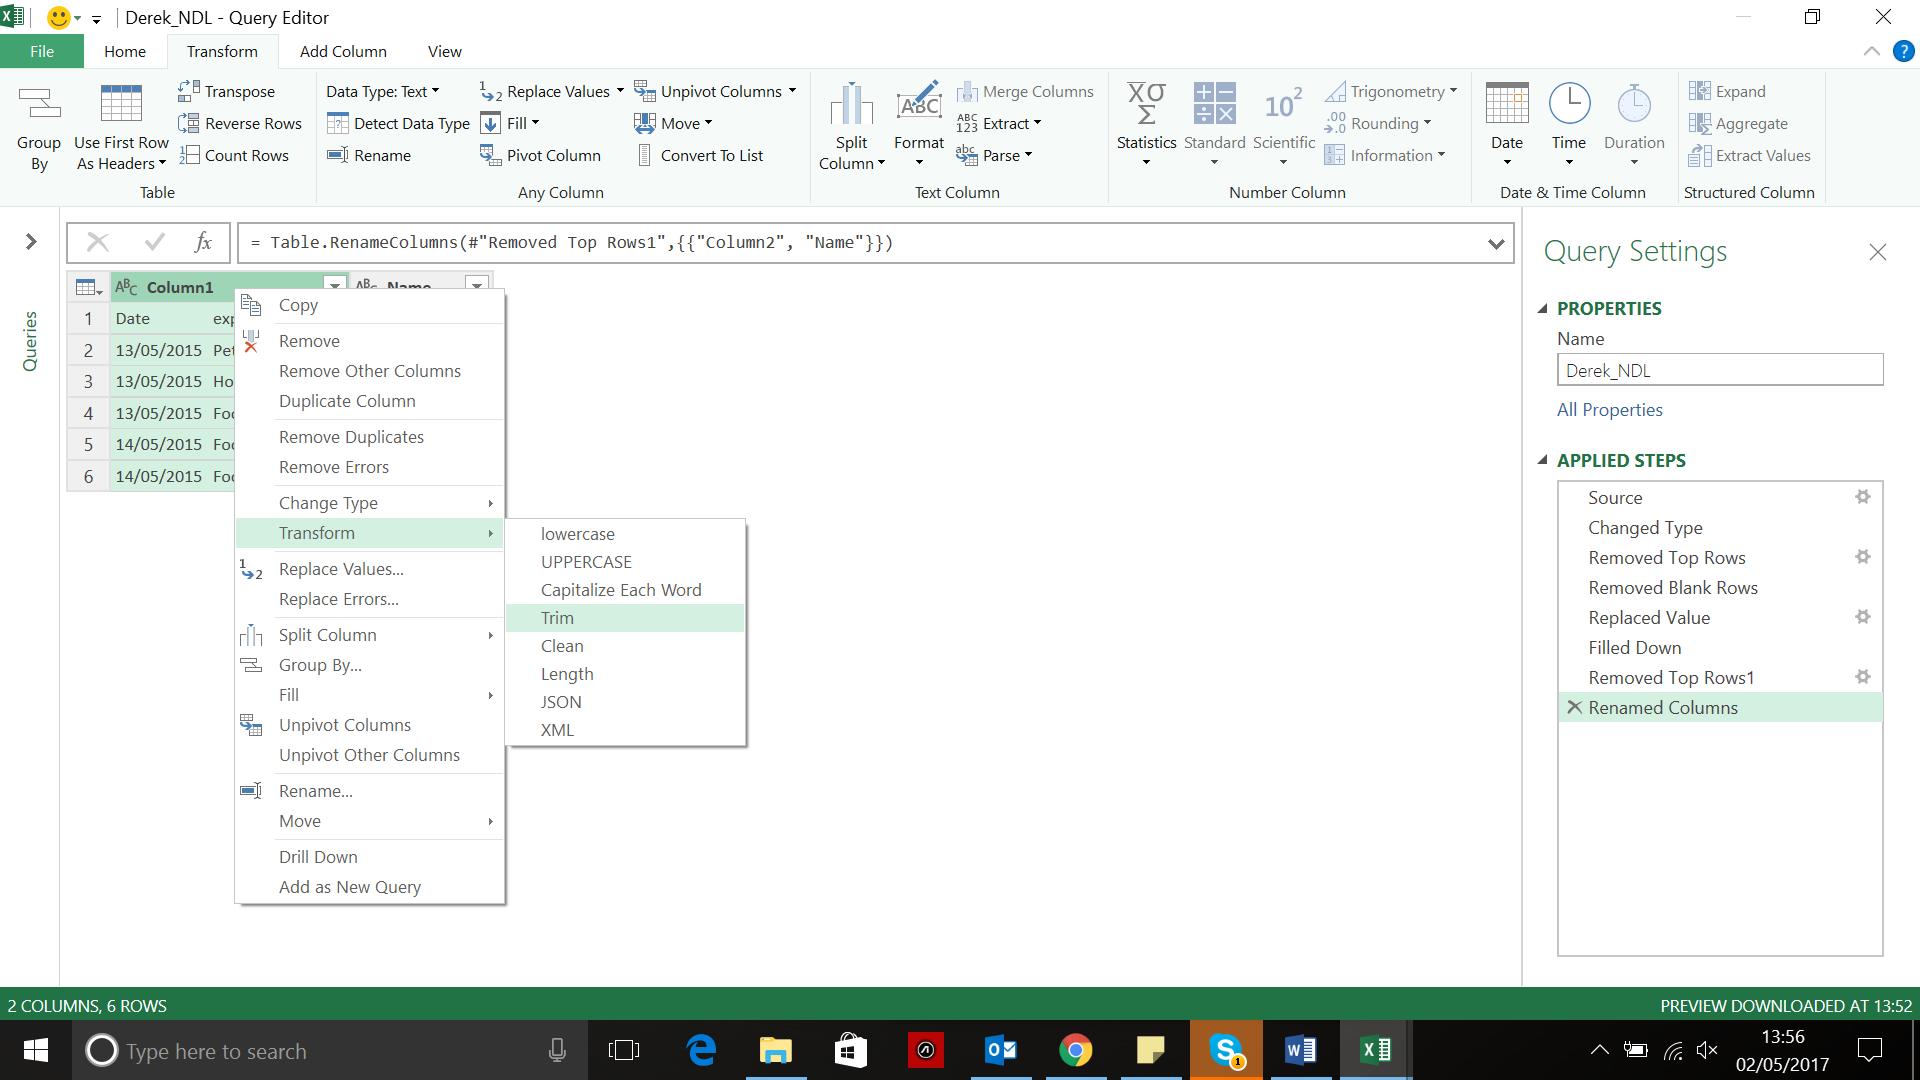
In order to make sure my data in Column1 is as clean as it can be, I trim and clean it in order to remove any leading and trailing spaces, along with any annoying escape codes. Right-clicking the column reveals these options:
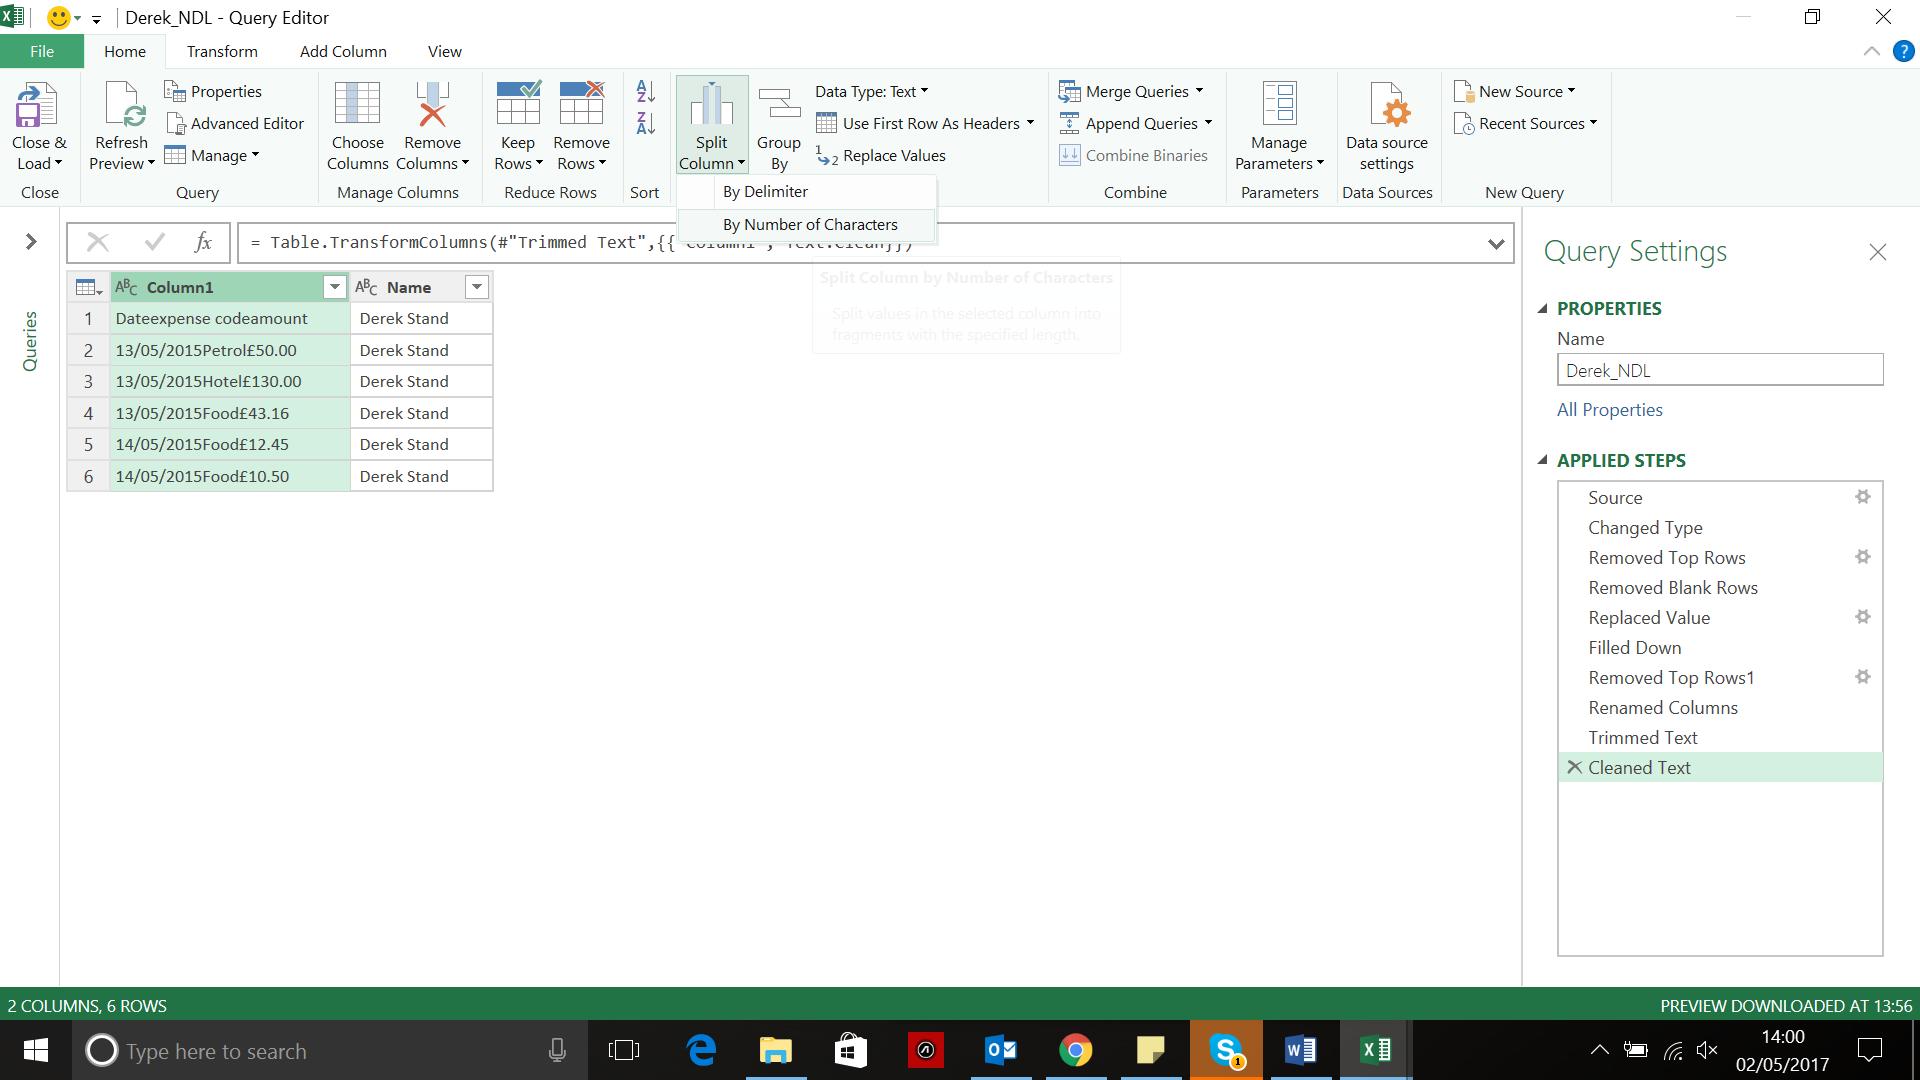
The next step is to break up the data in column 1, and to do this, there is a ‘Split Column’ option in the ‘Home’ section:
I make a guess at where to split my data – since I can edit the step by clicking on the gear next to the step in the ‘APPLIED STEPS’ window, I can adjust this until my data looks right.
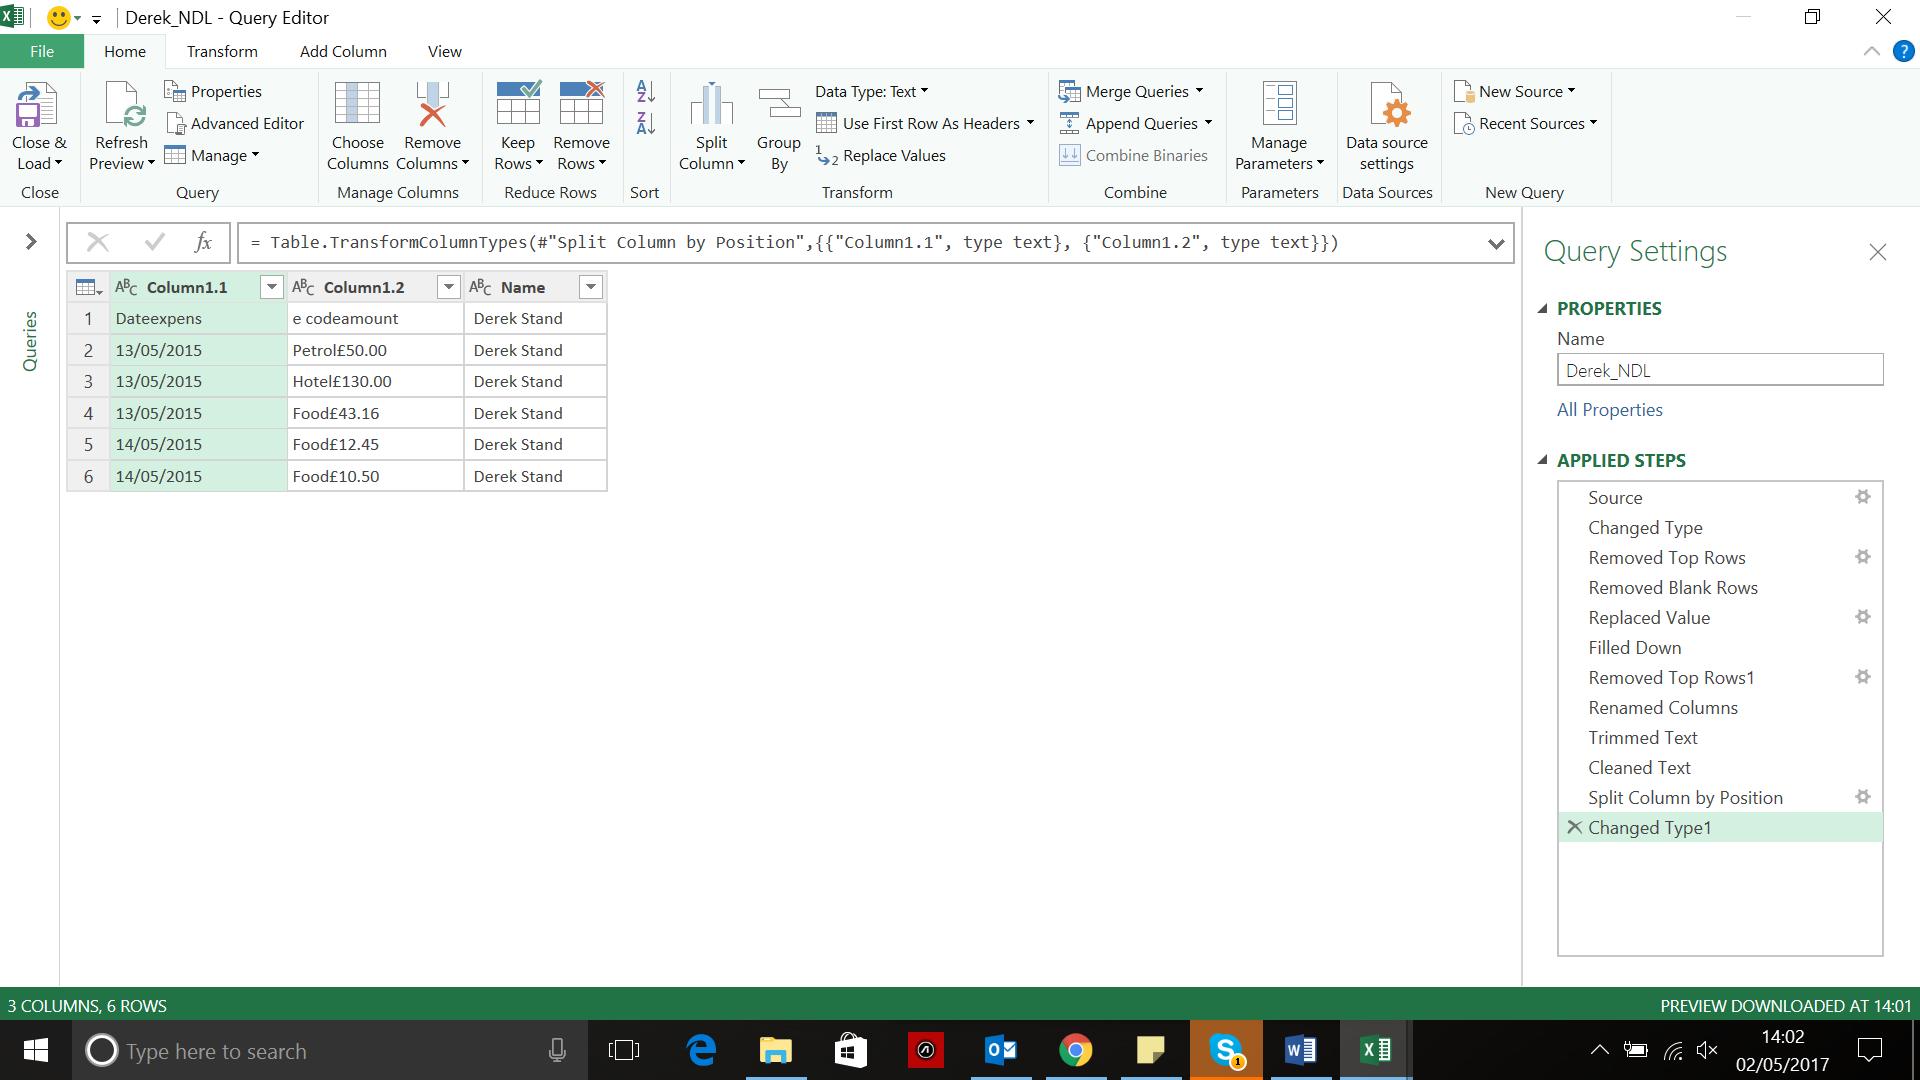
My date data looks good. For my new column Column1.2, I use the ‘£’ sign as a delimiter instead of using a count because my expense codes vary in length:
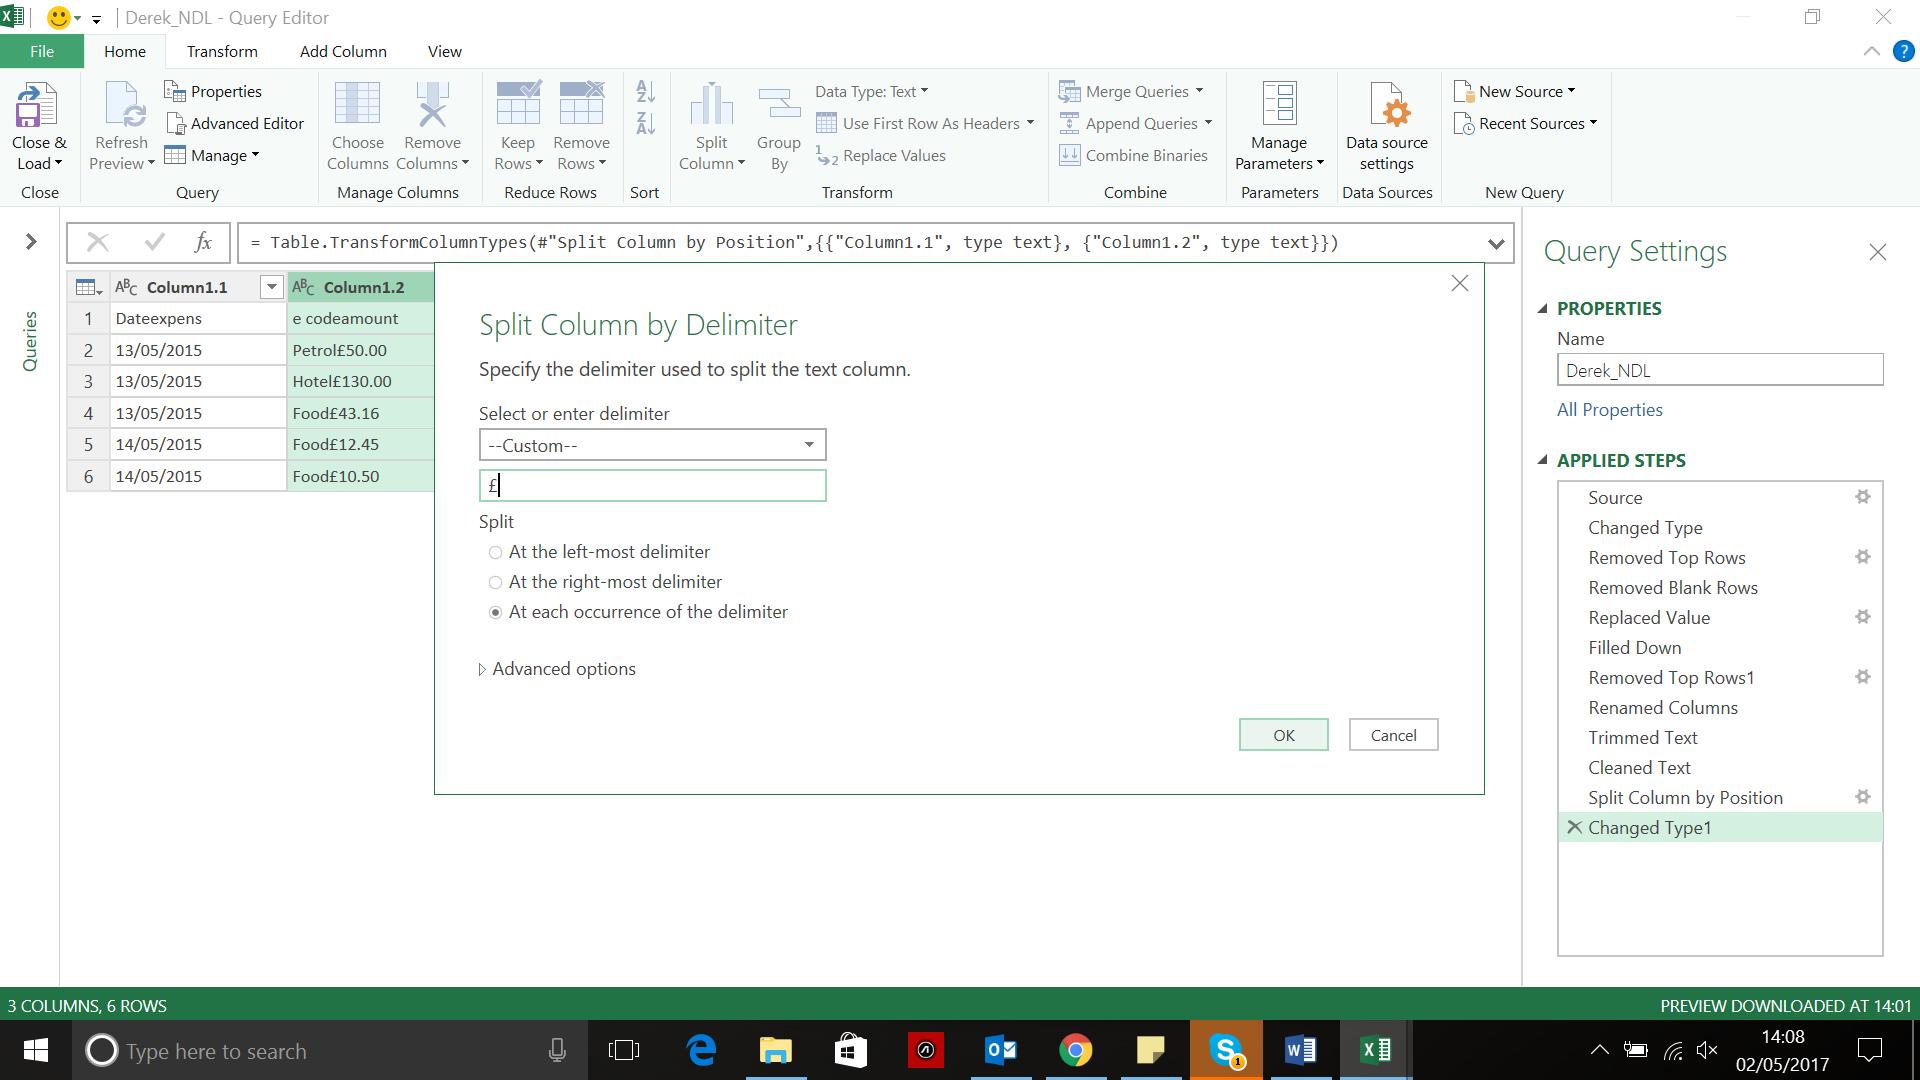
The end result looks promising.
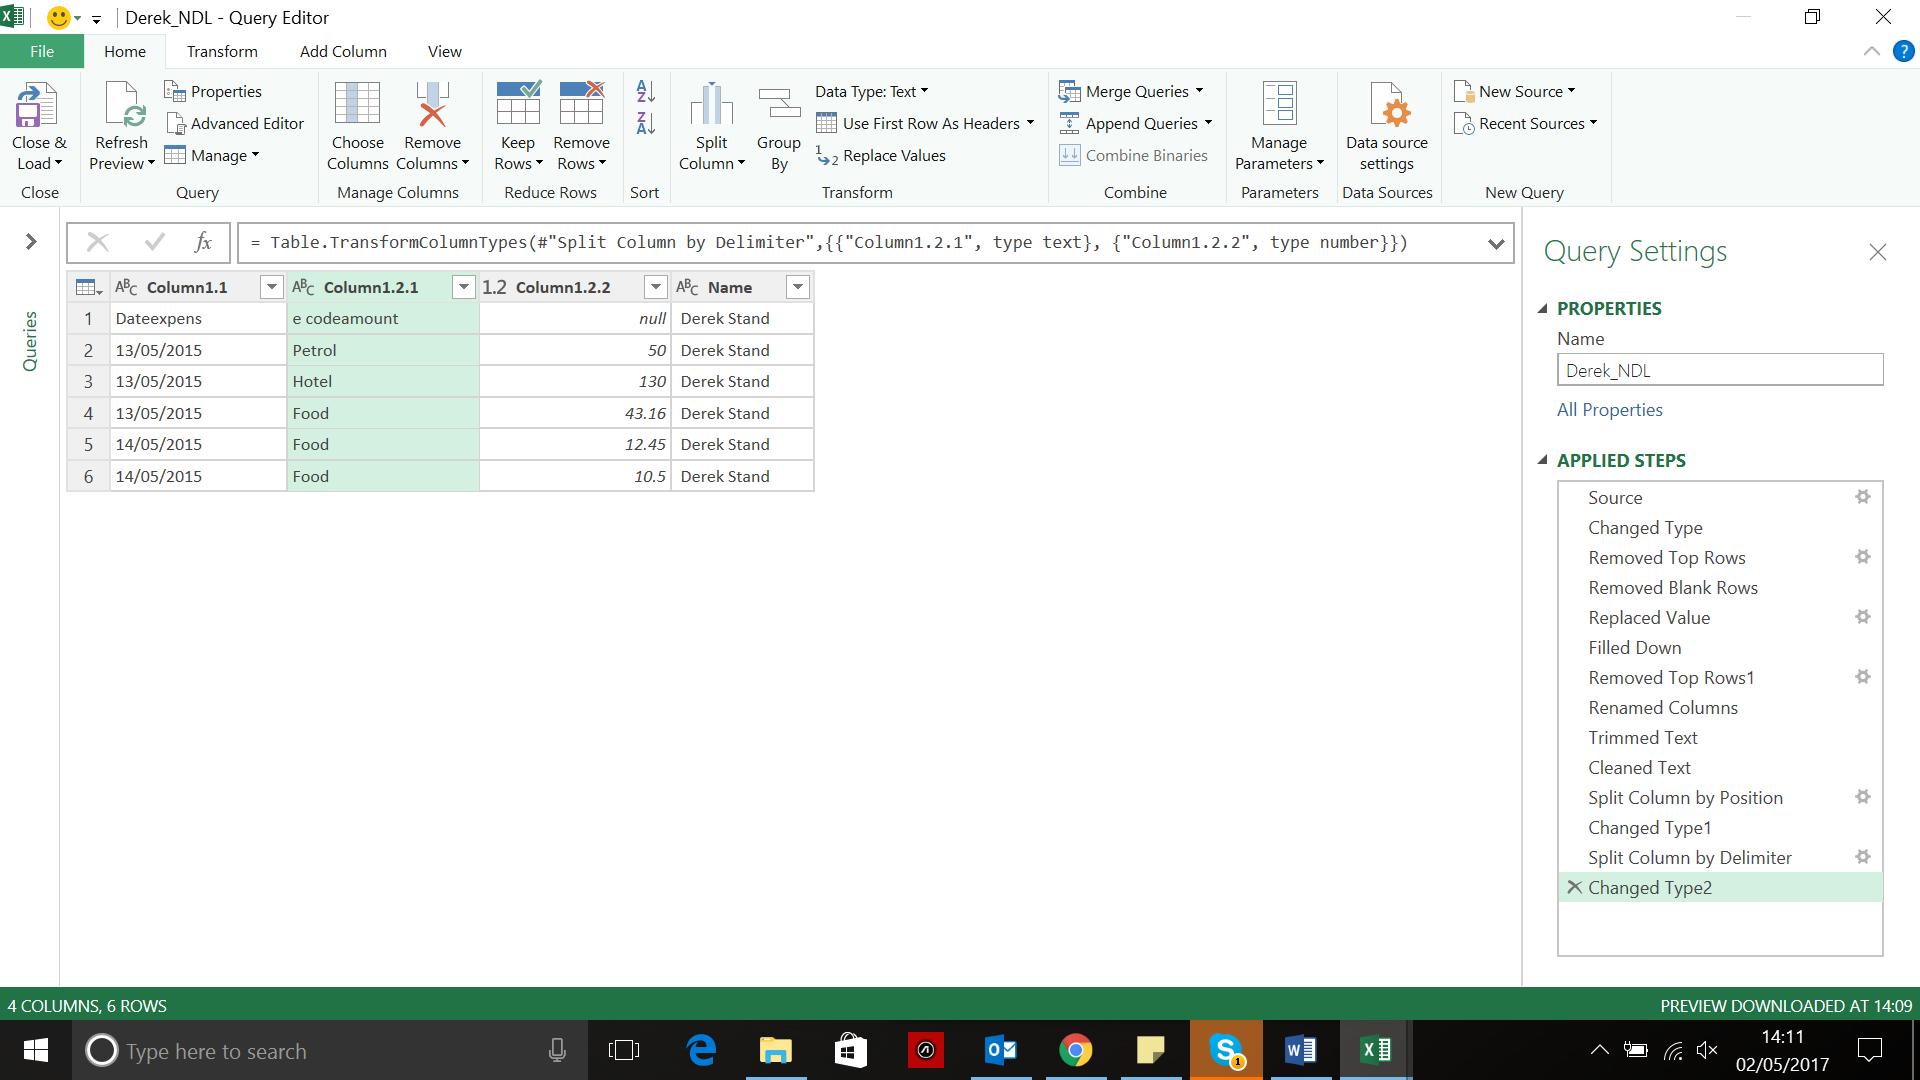
There’s not much point trying to use my top row as headings, so I delete the top row and rename the columns.
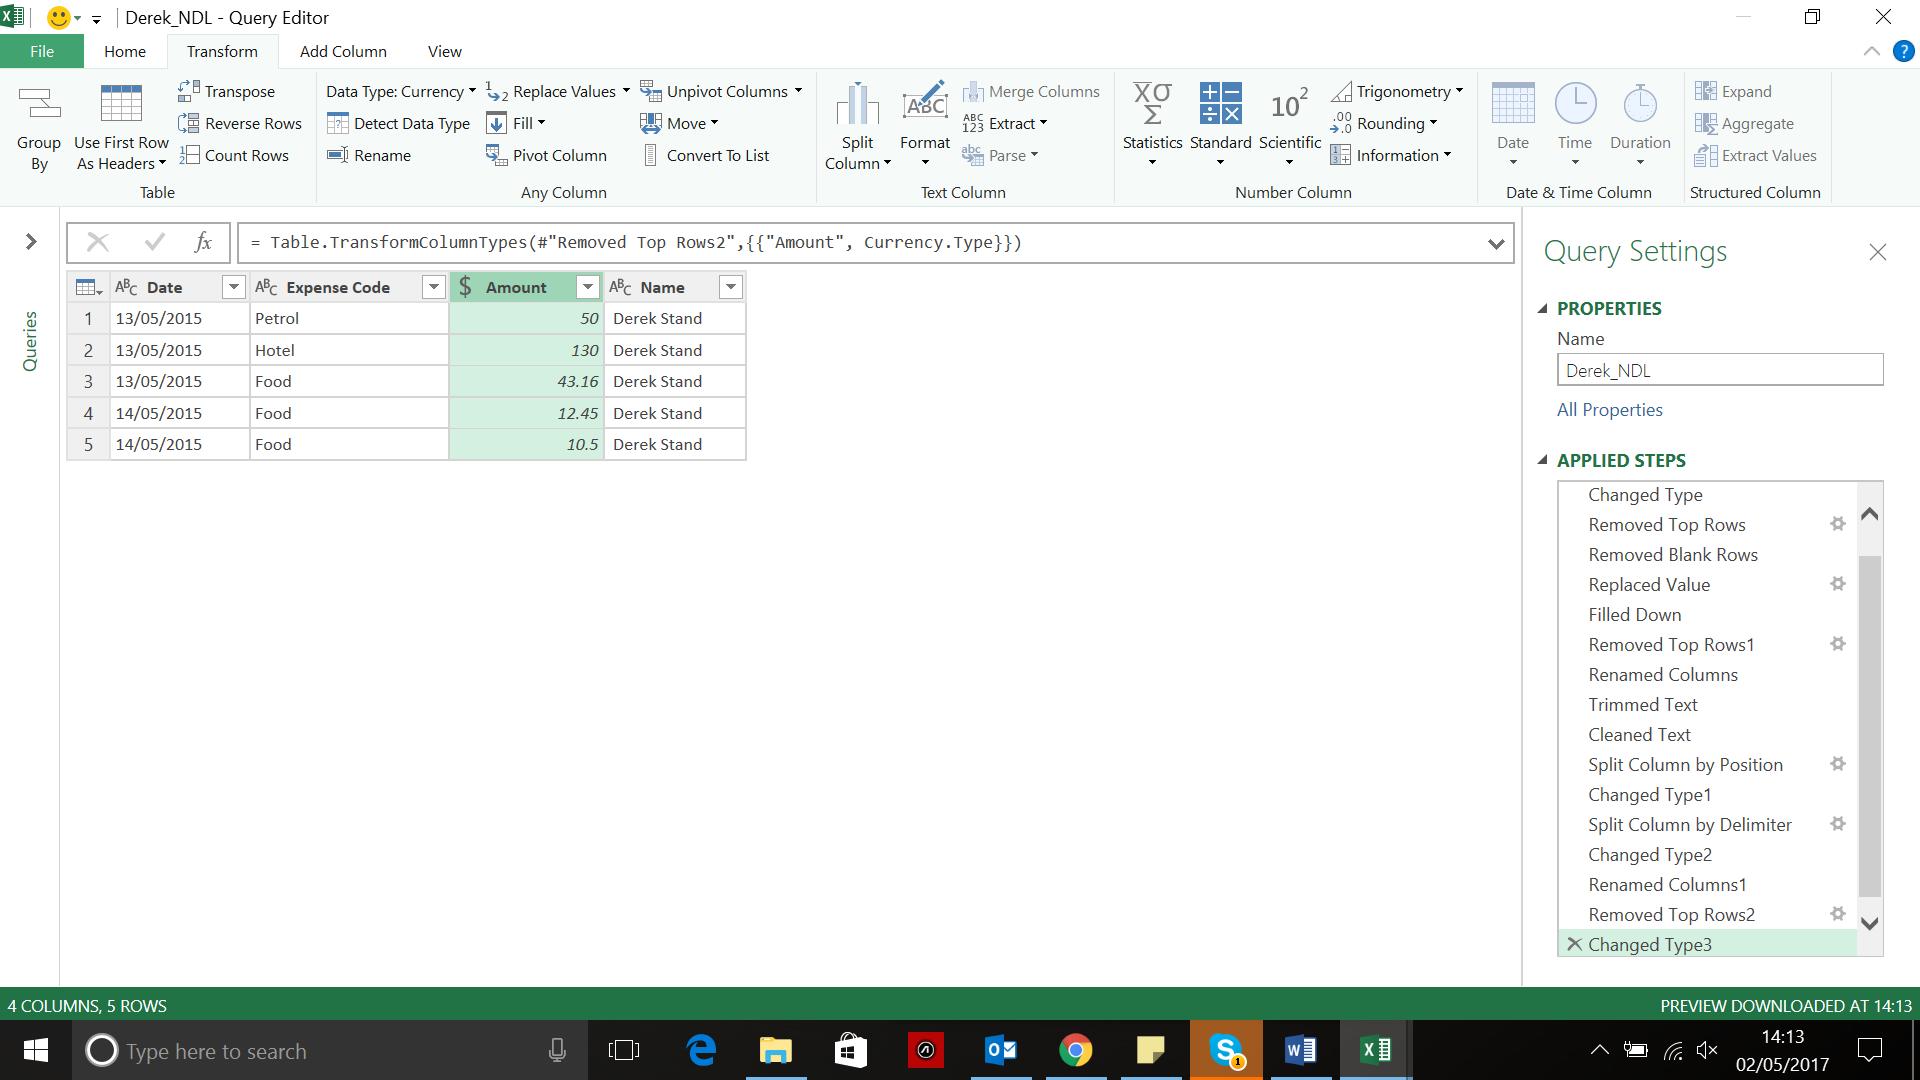
The data looks ready to load. This query can be applied to another delimited expenses text file that comes through in a similar format, and the steps can be adjusted as required.
Want to read more about Power Query? A complete list of all our Power Query blogs can be found here. Come back next time for more ways to use Power Query!

