Power Query: See it, Save it, Sort it - Part 4
8 June 2022
Welcome to our Power Query blog. This week, I reorganise the data from my appended queries.
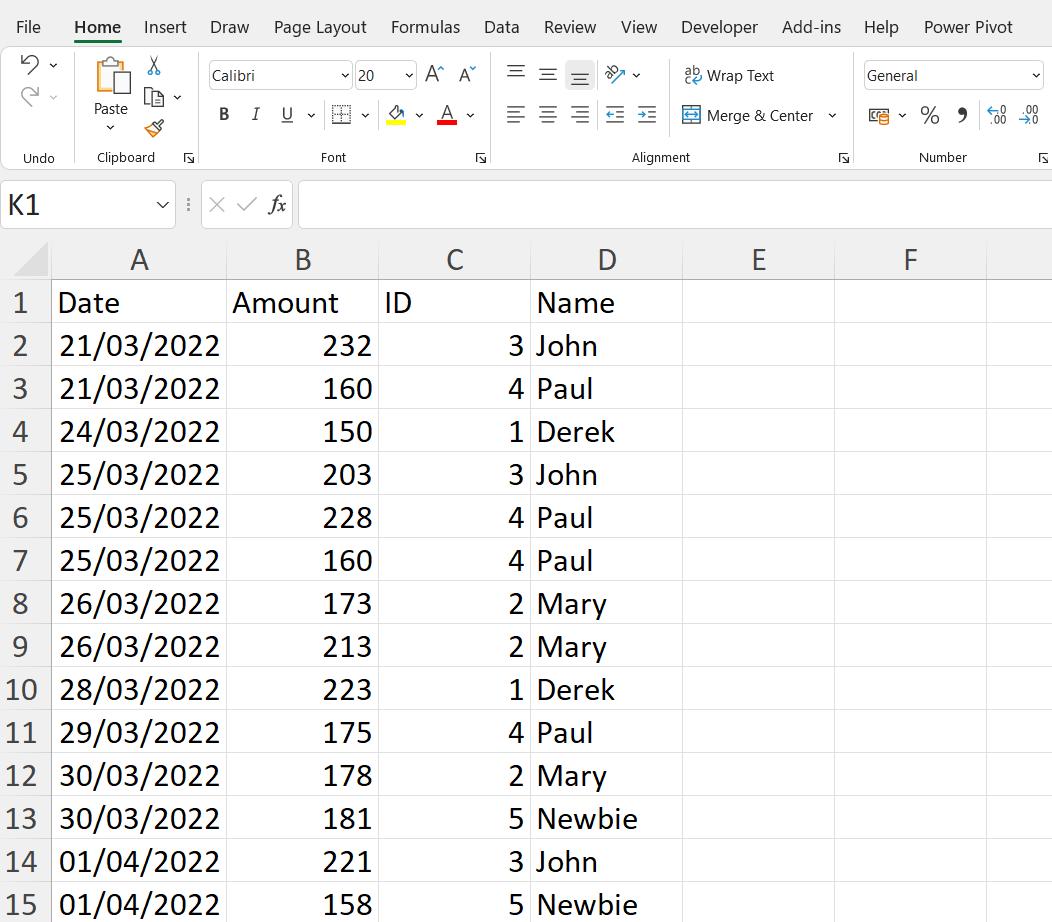
In Power Query: See it, Save it, Sort it – Part 1, I started with some data for my imaginary salespeople:

and extracted it into Power Query, in order to perform some transformations.

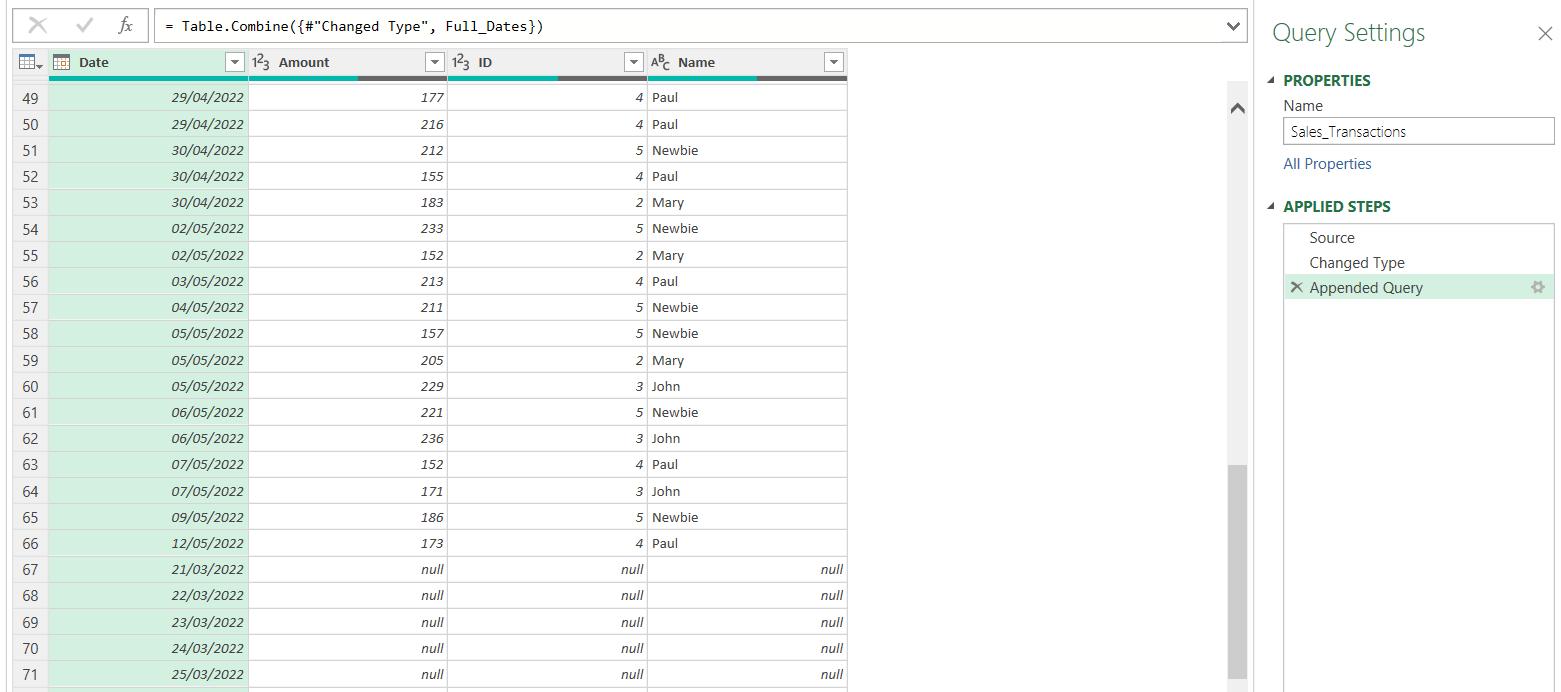
Last week, I appended Full_Dates to Sales_Transactions to give me a row for every consecutive date in Sales_Transactions:

This time, I will organise the data in Sales_Transactions. Currently, the appended Full_Dates rows are under the original Sales_Transactions data:

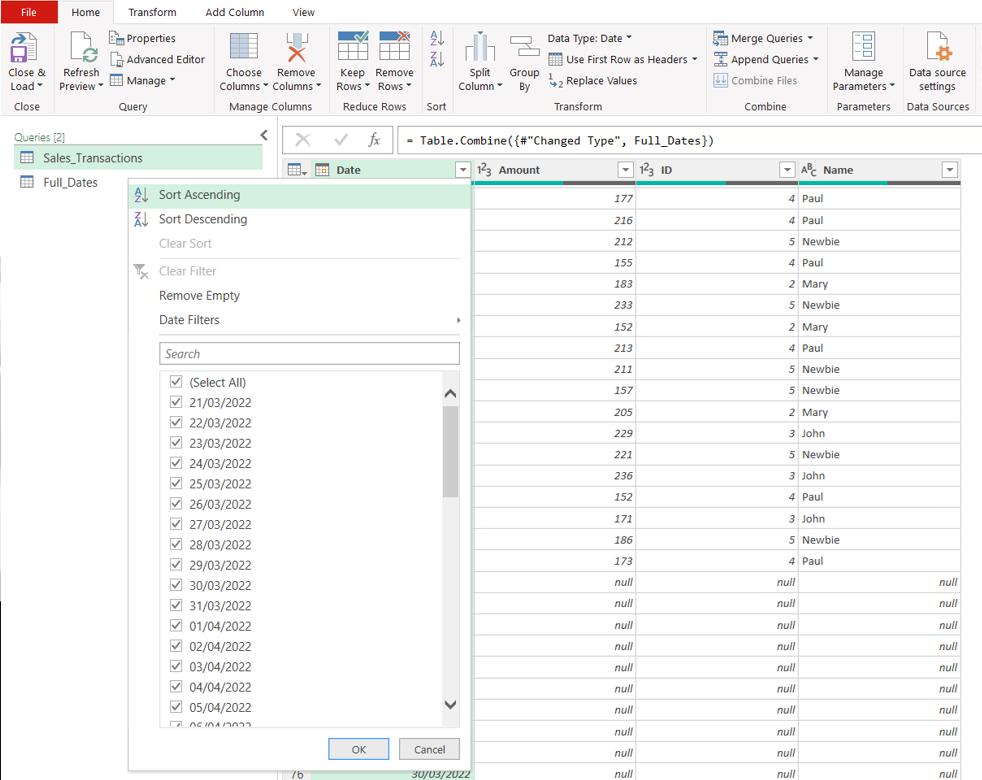
I start by sorting by Date. I can do this using the arrow dropdown on the right of the Date heading.

I choose to ‘Sort Ascending’:

The Full_Dates query had no Amount, ID or Name columns, so these have been left as null values. I only need these rows if there are no transactions from the original data on that date, so now I need a way of removing the extra null lines.
There are several ways I can achieve this, and the first is by using a merge. I can check the data against the original Sales_Transactions data.
I start by generating the M code I will need. On the Home tab, I choose ‘Merge Queries’ from the Merge Queries’ dropdown:

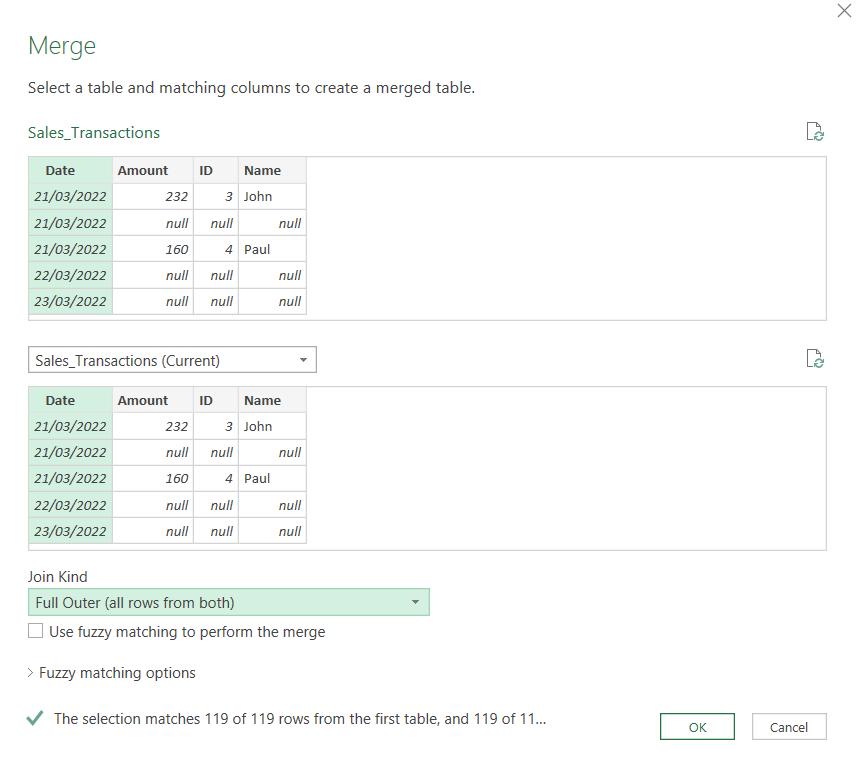
In the dialog, I choose to merge the table with itself on Date, and choose a ‘Full Outer’ join:

This gives me a column of tables.

I continue by using the expand icon next to the heading on the Sorted Rows column:

I have only selected Date, and I have chosen not to ‘Use original column name as prefix’, therefore my new column will be called Date.1:

Next time, I will show how I am going to use this to filter my data.
Come back next time for more ways to use Power Query!

